Chef John's Rocky Road
Rate this recipeBe the first to rate
 By AprilPublished
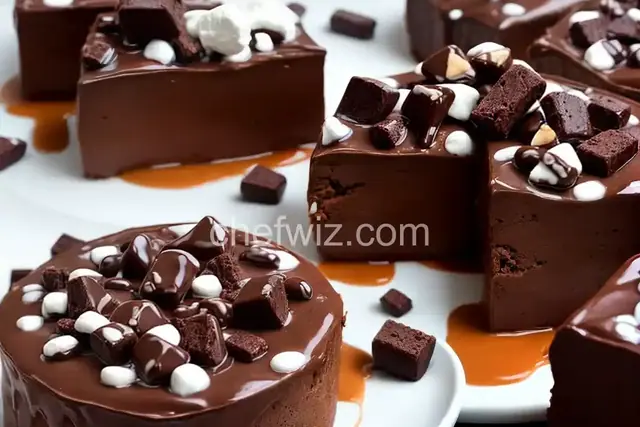
 Who can resist the delightful combination of chocolate, marshmallows, and crunchy nuts?
 By AprilPublished
 Who can resist the delightful combination of chocolate, marshmallows, and crunchy nuts?
In a heat-safe bowl, combine dark chocolate chips, butter, and maple syrup.
Place the bowl over a saucepan filled with about 1 inch of hot water on the lowest heat setting.
Allow the mixture to melt without stirring.
While the mixture is melting, line an 8x8-inch baking pan with plastic wrap.
Slowly stir the melted chocolate mixture together with a spatula until it becomes shiny and smooth.
Remove the bowl from heat and mix in marshmallows and almonds until they are well combined.
Quickly transfer the mixture into the prepared baking pan, making sure to distribute it evenly without smoothing or pressing down the top.
Let the mixture cool to room temperature for approximately 30 minutes.
Wrap the pan with plastic wrap and refrigerate until the mixture is well chilled and firm, which usually takes about 2 hours.
Once chilled, sift cocoa over the top of the mixture.
Cut the mixture into 16 squares.
Optionally, you can use corn syrup instead of maple syrup.
You can also use any kind of mini marshmallows and nuts of your preference, such as peanuts, walnuts, or cashews. Additionally, you can add dried fruit or other ingredients, ensuring that you maintain the same proportions between the chocolate and the additional chunks.
Who can resist the delightful combination of chocolate, marshmallows, and crunchy nuts? Chef John's Rocky Road is a classic treat that satisfies your sweet tooth and leaves you wanting more. In this article, we will delve into the history of Rocky Road, explore the secrets behind Chef John's recipe, and answer some frequently asked questions about this delicious dessert.
Rocky Road is believed to have originated in the United States during the Great Depression. It was created as a way to make use of ingredients that were readily available and affordable. The combination of chocolate, marshmallows, and nuts was not only delicious but also provided a satisfying texture. The name "Rocky Road" is said to have been inspired by the rough and bumpy texture of the dessert, resembling the difficult times people were facing during that era.
Chef John's Rocky Road recipe takes this classic treat to a whole new level. With his unique twist, he adds a touch of gourmet flavor that elevates the dessert to a whole new level. By carefully selecting high-quality chocolate, using fluffy and fresh marshmallows, and adding a variety of nuts for extra crunch, Chef John creates a Rocky Road experience that is truly unforgettable.
One of the secrets to Chef John's Rocky Road is his attention to detail. He believes that every ingredient plays a crucial role in the overall taste and texture of the dessert. From the rich and creamy chocolate to the perfectly toasted nuts, each component is carefully selected and prepared to ensure a harmonious blend of flavors.
Chef John's Rocky Road is a delightful treat that brings together the perfect combination of chocolate, marshmallows, and nuts. With his secret recipe and attention to detail, he creates a dessert that is truly irresistible. Whether you enjoy it on your own or share it with friends and family, Chef John's Rocky Road will surely leave you wanting more.
Yes, you can experiment with different types of chocolate to add your own personal touch to Chef John's Rocky Road. Dark chocolate, milk chocolate, or even white chocolate can be used. Just make sure to use high-quality chocolate for the best results.
Absolutely! Chef John's recipe is a great base, but feel free to get creative and add your favorite ingredients. You can add dried fruits like cherries or raisins for a burst of sweetness, or even sprinkle some sea salt on top to enhance the flavor.
Yes, if you have allergies or simply prefer a nut-free version, you can omit the nuts from the recipe. The chocolate and marshmallows will still create a delicious treat.
If stored properly in an airtight container, Chef John's Rocky Road can stay fresh for up to two weeks. However, it's unlikely it will last that long once you taste its irresistible flavors!
Yes, Rocky Road can be frozen for up to three months. Just make sure to wrap it tightly in plastic wrap or place it in an airtight container before freezing.
Yes, you can certainly use homemade marshmallows in Chef John's Rocky Road. The homemade marshmallows will add a unique texture and flavor to the dessert.
Yes, you can use mini marshmallows if you prefer. They will melt more quickly and distribute evenly throughout the Rocky Road.
Yes, you can get creative with the toppings. Sprinkling some crushed graham crackers, shredded coconut, or even drizzling caramel sauce over the top can take Chef John's Rocky Road to a whole new level of deliciousness.
AprilCook, recipe developer and the heart of Chefwiz. More about April