Checkerboard Cake
Rate this recipeBe the first to rate
 By AprilPublished
 Have you ever seen a cake that looks like a beautiful checkerboard?
 By AprilPublished
 Have you ever seen a cake that looks like a beautiful checkerboard?
Preheat the oven to 350 degrees F (175 degrees C) with racks in the middle and lower third positions.
In the bowl of a stand mixer, combine devil's food cake mix, 1 cup milk, 1/3 cup melted butter, 3 large eggs, and 1 teaspoon vanilla extract. Beat at low speed for 1 minute until combined, then increase speed to medium and beat for 2 minutes.
Spoon the batter evenly into 2 (9-inch) round nonstick cake pans greased with baking spray.
Repeat the same process with the white cake mix, but use 3 egg whites instead of 3 large eggs.
Bake the cakes in the preheated oven for 20 to 25 minutes, or until a wooden pick inserted in the middle comes out clean. Rotate the cake pans halfway through baking time.
Remove the pans from the oven and let them cool on a wire rack for 10 minutes. Then, remove the cakes from the pans and let them cool completely on wire racks for about 1 hour.
Trim the top of the cakes if necessary to make them level.
In a stand mixer, beat softened butter at medium speed until creamy for 1 to 2 minutes. Add softened cream cheese and mix for 1 minute until combined, scraping down the sides of the bowl as needed.
In a large bowl, whisk together powdered sugar and cocoa. Grad
Have you ever seen a cake that looks like a beautiful checkerboard? One that is not only delicious but also visually stunning? Well, you're in for a treat! In this article, we will explore the art of creating a checkerboard cake that will leave your guests in awe. So, let's dive right in!
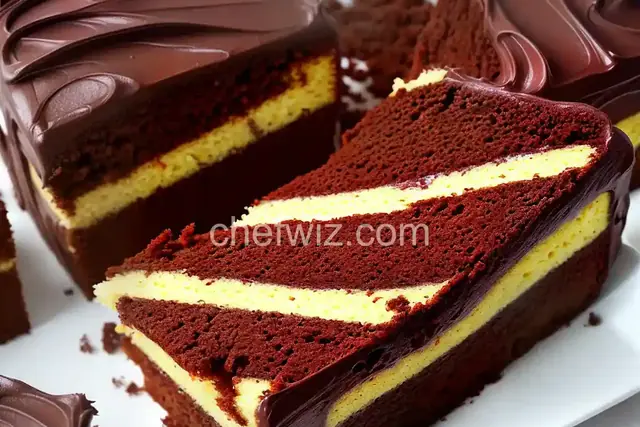
Imagine a cake that resembles a checkered pattern, just like a chessboard or a game of checkers. Each slice reveals alternating layers of different colored cake, creating a captivating visual effect. It's like a work of art that you can eat!
So, how do you achieve this mesmerizing checkerboard effect? It's all about the magic of cake assembly! You start by baking two or more cakes of different colors and flavors. Then, using a special cake ring or a set of cake pans, you cut out concentric circles from each cake. These circles are then carefully placed inside one another, alternating the colors, to form the striking checkerboard pattern.
When it comes to selecting the colors for your checkerboard cake, the sky's the limit! You can go for classic combinations like chocolate and vanilla, or get creative with vibrant hues like blueberry and lemon. The choice is yours, and the possibilities are endless!
The beauty of a checkerboard cake goes beyond its appearance. Each slice offers a delightful explosion of flavors. You can pair complementary flavors like strawberry and banana, or create a surprising contrast with flavors like orange and mint. It's like having a taste adventure with every bite!
When you bring a checkerboard cake to the table, you can be sure that jaws will drop and eyes will widen in amazement. It's a cake that demands attention and invites admiration. Whether it's a birthday party, a special celebration, or just a regular day that needs a touch of magic, a checkerboard cake will always steal the show.
The checkerboard cake is not just a dessert; it's a masterpiece that combines flavors, colors, and artistic flair. It's a cake that brings joy and wonder to every occasion. So, why settle for a regular cake when you can have a checkerboard cake that will dazzle and impress? Get ready to create your own edible work of art!
Yes, you can use any cake recipe that you love. Just make sure to divide the batter into different bowls and add food coloring or flavorings to create the desired colors and flavors.
While there are specific cake rings and pans available for creating a checkerboard effect, you can also achieve the same result by using regular cake pans and a knife to cut out the circles.
To keep the cake layers securely in place, you can use a thin layer of frosting or ganache between each layer. This will act as an adhesive and prevent any shifting or sliding.
Yes, you can freeze a checkerboard cake. Just make sure to wrap it tightly in plastic wrap or place it in an airtight container before freezing. Thaw it in the refrigerator before serving.
Absolutely! There are numerous gluten-free and vegan cake recipes available that can be used to create a delicious checkerboard cake. Just make sure to follow the specific dietary requirements and substitute ingredients accordingly.
The time required to make a checkerboard cake depends on various factors, including the recipe, the number of cake layers, and your baking skills. On average, it can take around 2 to 3 hours from start to finish.
Absolutely! Once you have assembled and frosted your checkerboard cake, you can let your creativity run wild with decorations. Use colorful sprinkles, edible flowers, or even personalized cake toppers to make it even more special.
Yes, you can adapt the checkerboard technique to cupcakes as well. Simply divide the cupcake batter into different bowls, color and flavor them as desired, and carefully layer them in cupcake liners to achieve the checkerboard effect.
AprilCook, recipe developer and the heart of Chefwiz. More about April