Pumpkin-Shaped Dinner Rolls
Rate this recipeBe the first to rate
 By AprilPublished
 As the leaves start to change color and a crispness fills the air, it's time to embrace the beauty of autumn.
 By AprilPublished
 As the leaves start to change color and a crispness fills the air, it's time to embrace the beauty of autumn.
In a bowl, combine warm milk, yeast, honey, and butter; stir.
Add salt and most of the flour to the mixture, leaving some for dusting. Stir with a wooden spoon until a sticky dough forms.
Dust a work surface with the remaining flour. Knead the dough until it becomes smooth, elastic, and no longer sticky, adding more flour if necessary.
Shape the dough into a ball that springs back lightly when pressed and transfer it to a lightly greased bowl.
Cover the bowl with greased foil and let the dough rise in a warm place until it doubles in size, approximately 1 1/2 hours.
Cut kitchen string into 4 dozen strands measuring 8 to 10 inches each. Toss the strings in a bowl with oil to coat and set aside.
Press down the risen dough on a work surface, reserving 3 to 4 tablespoons for forming stems. Cut the remaining dough in half and then into 6 wedges each.
Roll each dough wedge into a round ball by cupping your hand over the dough and gently pressing and rolling in a circular motion for 10 to 15 seconds. Cover and let the dough balls rest for 15 minutes.
Preheat the oven to 375 degrees F (190 degrees C) and line 2 baking sheets with silicone liners.
Place 4 pieces of string on the work surface
As the leaves start to change color and a crispness fills the air, it's time to embrace the beauty of autumn. And what better way to celebrate this season than with pumpkin-shaped dinner rolls? These delightful creations not only add a touch of whimsy to your table, but they also bring a warm and comforting aroma to your home. Let's dive into the world of pumpkin-shaped dinner rolls and discover why they are a must-have for your fall gatherings.
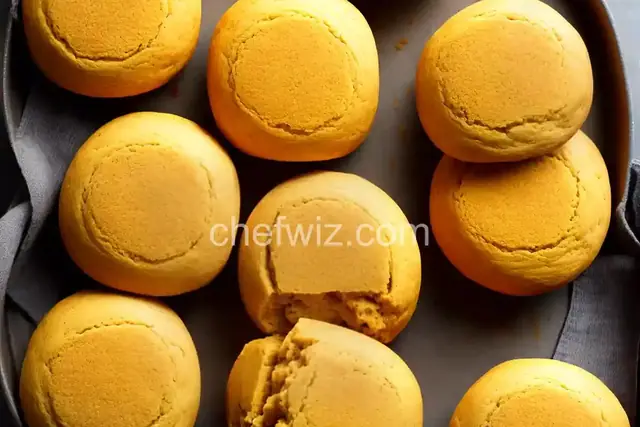
Imagine a platter filled with golden, fluffy rolls that resemble mini pumpkins. Their round shape and deep orange color instantly evoke the spirit of Halloween and Thanksgiving. These delectable treats are not just a feast for the eyes; they also bring a burst of flavor to your taste buds. With a light and airy texture, these rolls are the perfect accompaniment to a hearty soup or a Thanksgiving turkey.
Creating your own pumpkin-shaped dinner rolls may seem like a daunting task, but fear not! With a bit of patience and some basic baking skills, you can bring these adorable creations to life. Start by preparing a soft and slightly sweet dough, reminiscent of traditional dinner rolls. Shape the dough into small balls and use a knife to create the signature pumpkin ridges. Finally, add a small piece of dough on top to resemble the pumpkin stem. As the rolls bake, they will transform into charming pumpkin shapes that will delight your family and guests.
When it comes to hosting a memorable gathering, presentation is key. Pumpkin-shaped dinner rolls not only taste delicious, but they also add a festive touch to your table. Imagine the delight on your guests' faces as they spot these adorable rolls, perfectly complementing your fall-themed decorations. These rolls are sure to spark conversations and leave a lasting impression on everyone who gathers around your table.
Baking pumpkin-shaped dinner rolls is not just about the end result; it's about the process itself. Involving your family in the kitchen can create beautiful memories and strengthen your bond. From shaping the dough into balls to giving each roll its unique pumpkin ridges, every step is an opportunity for laughter and connection. So gather your loved ones and embark on a baking adventure that will leave you with not only delicious rolls but also cherished moments.
Pumpkin-shaped dinner rolls are more than just a culinary delight; they are a symbol of the season. With their whimsical appearance and delicious taste, these rolls add a touch of magic to any fall gathering. So why not gather your loved ones, embrace the spirit of autumn, and create your own pumpkin-shaped dinner rolls? The joy and warmth they bring will be worth every moment spent in the kitchen.
While traditional dinner roll dough works best, you can experiment with different types of dough to add your own twist to these festive rolls. Just make sure the dough is soft and pliable enough to shape into balls and create the pumpkin ridges.
While they require some basic baking skills, pumpkin-shaped dinner rolls are not overly complicated. With a bit of practice and following the recipe instructions carefully, you'll be able to master the art of creating these adorable rolls.
Yes, you can! Prepare the dough, shape it into pumpkin rolls, and place them on a baking sheet. Cover tightly with plastic wrap and refrigerate overnight. In the morning, let the rolls come to room temperature and rise before baking. This way, you can enjoy freshly baked pumpkin-shaped dinner rolls without the stress of last-minute preparations.
Absolutely! After baking, allow the rolls to cool completely. Place them in an airtight container or freezer bag and freeze for up to one month. When ready to serve, let the rolls thaw at room temperature, and if desired, warm them up in the oven for a few minutes.
While pumpkin-shaped dinner rolls are delicious on their own, you can enhance their flavor by adding spices like cinnamon, nutmeg, or cloves to the dough. You can also experiment with different fillings, such as cheese or herbs, to create unique variations.
Yes, you can adjust the size of the rolls to your preference. Keep in mind that larger rolls may require a longer baking time, so be sure to adjust accordingly.
Yes, you can add a few drops of orange food coloring to the dough to enhance the pumpkin-like appearance of the rolls. However, keep in mind that the color will deepen slightly as the rolls bake, so a lighter shade of orange is recommended.
Absolutely! Pumpkin-shaped dinner rolls are versatile and can be served with both sweet and savory dishes. They pair well with soups, stews, roasted meats, and even as a side to a Thanksgiving feast.
AprilCook, recipe developer and the heart of Chefwiz. More about April