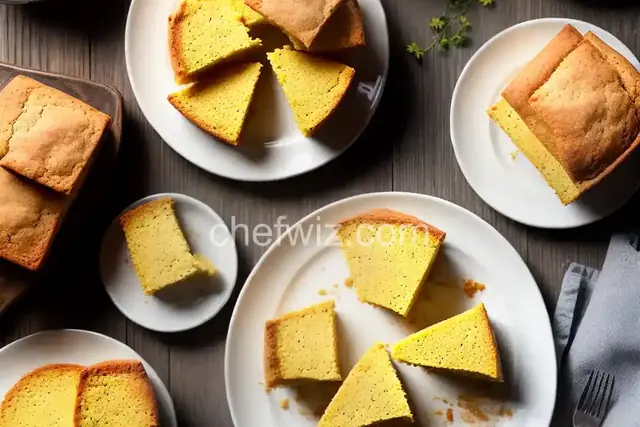
Fluffy Gluten Free Cornbread
Rate this recipeBe the first to rate
 By AprilPublished
 Are you tired of dense and dry gluten-free cornbread? Do you miss that light and fluffy texture that regular cornbread offers?
 By AprilPublished
 Are you tired of dense and dry gluten-free cornbread? Do you miss that light and fluffy texture that regular cornbread offers?
Preheat the oven to 400 degrees F (200 degrees C).
Grease a 9x9 inch baking pan.
In a bowl, whisk together the eggs, water, and vegetable oil until well combined.
In a separate large bowl, stir together the cornmeal, millet flour, rice flour, sugar, baking powder, and salt.
Make a well in the center of the dry ingredients.
Pour the liquid mixture into the well of the dry ingredients.
Stir the batter just until combined.
Pour the batter into the prepared baking pan.
Bake in the preheated oven for about 20 minutes, or until the top is golden and springs back lightly when pressed.
Are you tired of dense and dry gluten-free cornbread? Do you miss that light and fluffy texture that regular cornbread offers? Well, look no further! In this article, we will explore the secrets to making the perfect fluffy gluten-free cornbread that will leave you craving for more.
Gluten is the protein responsible for the elasticity and structure in traditional cornbread. When you remove gluten, it can be challenging to achieve the same texture and moistness. However, fear not, as we have some tricks up our sleeves to conquer this challenge and create a gluten-free cornbread that will surpass your expectations.
One of the key elements in making fluffy gluten-free cornbread is choosing the right flour. Instead of using regular all-purpose flour, opt for a combination of gluten-free flours like almond flour, corn flour, and tapioca flour. These flours bring their unique qualities to the table and help create a lighter and more tender cornbread.
Buttermilk is a secret weapon when it comes to adding moisture and tenderness to any baked goods, including cornbread. Its acidic nature reacts with the leavening agents, resulting in a fluffy texture. Swap regular milk with buttermilk in your gluten-free cornbread recipe, and you'll be amazed at the difference it makes.
Now that you know the basics, let's dive into some additional tips and tricks to ensure your gluten-free cornbread turns out perfectly every time:
Overmixing the batter can lead to a dense and tough cornbread. Mix the ingredients until just combined for the best results.
Preheating the pan before pouring the batter helps create a crispy crust on the bottom of the cornbread while keeping the inside moist and tender.
A touch of sweetness can enhance the flavor of the cornbread. Consider adding a tablespoon of honey or maple syrup to the batter.
Allow the batter to rest for a few minutes before baking. This allows the flours to hydrate and results in a lighter texture.
Add some excitement to your cornbread by incorporating mix-ins like jalapenos, cheese, or diced onions. Get creative and make it your own!
With the right combination of alternative flours, the magic of buttermilk, and a few tips and tricks, you can achieve a fluffy and delicious gluten-free cornbread. Don't let dietary restrictions hold you back from enjoying this classic comfort food. So, grab your apron and get ready to bake up a batch of fluffy gluten-free cornbread that will leave everyone asking for seconds!
A1: Absolutely! If you have a gluten-free flour blend on hand, you can substitute it for the combination of flours mentioned. Just make sure the blend contains flours suitable for baking.
A2: Of course! You can use dairy-free alternatives like almond milk or coconut milk in place of buttermilk. Additionally, you can replace butter with a dairy-free spread or coconut oil.
A3: To store leftover cornbread, wrap it tightly in plastic wrap or place it in an airtight container. It can be kept at room temperature for a day or two or refrigerated for up to a week.
A4: Yes, you can freeze gluten-free cornbread. Wrap individual slices or the whole loaf tightly in plastic wrap and place it in a freezer-safe bag or container. It can be stored in the freezer for up to three months.
A5: Absolutely! Feel free to experiment with various add-ins like cooked bacon, diced bell peppers, or corn kernels to add extra flavor and texture to your cornbread.
A6: Yes, you can! Simply pour the batter into a greased mini muffin tin and bake for a shorter time, around 12-15 minutes, or until a toothpick inserted comes out clean.
A7: The cornbread is done when the top is golden brown and a toothpick inserted into the center comes out clean. It should feel firm to the touch.
A8: Yes, you can prepare the batter in advance and refrigerate it for up to 24 hours before baking. This allows the flavors to develop and makes for a more flavorful cornbread.
AprilCook, recipe developer and the heart of Chefwiz. More about April