How to Cut Shallots
Cutting shallots is a simple yet crucial skill for enhancing the flavor of your dishes. Follow this step-by-step guide to learn how to cut shallots like a master chef.
How to Cut Shallots – Key Takeaways:
- Trim the top of the shallot, leaving the root intact.
- Make a vertical score down the shallot and peel away the skin.
- For slicing, lay the peeled shallot on a flat side and cut crosswise into rings.
- For dicing, cut the peeled bulbs in half lengthwise and make lengthwise and crosswise cuts.
- Mince shallots by finely chopping with a back-and-forth rocking motion using a chef’s knife.
- To cut shallots into strips, remove the root end and make vertical slices.
- Keep the root intact to prevent the layers from slipping while cutting.
- Use goggles or contact lenses to prevent tears while cutting shallots.
- Select shallots with a uniform color, firm texture, and dry skin.
- Store leftover cut shallots tightly wrapped or in an airtight container in the refrigerator.
Cutting shallots into various shapes and sizes allows for creative culinary presentations. Additionally, shallots offer nutritional benefits, including folate, potassium, and iron. So, improve your cooking skills and elevate your dishes by mastering the art of cutting shallots!
Understanding Shallots: Selection and Storage Tips
Before diving into the cutting techniques, it’s essential to know how to select and store the right shallots for your culinary creations. When picking shallots, look for those with a uniform light copper-purple color and smooth, firm, and dry skin. Avoid shallots with deep cuts, discolorations, or soft spots.
To maintain the freshness and flavor of shallots, proper storage is key. Store shallots in a cool, dry, and well-ventilated place, away from direct sunlight. You can also store them in a mesh bag or an open container to allow air circulation, which helps prevent moisture buildup and sprouting. Additionally, do not store shallots near foods with strong odors, as they can easily absorb those flavors.
When it comes to storing leftover cut shallots, ensure they are tightly wrapped or kept in an airtight container in the refrigerator. This will help preserve their freshness and prevent them from absorbing any odors from other foods in the fridge. Remember to use them within a few days to enjoy their optimal flavor and texture.

| Selection Tips | Storage Tips | Leftover Cut Shallots |
|---|---|---|
|
|
|
By following these selection and storage tips, you can ensure that your shallots are fresh, flavorful, and ready to elevate your culinary creations with their distinctive taste.
Choosing Shallots: Quality Indicators
When browsing for shallots, keep an eye out for specific characteristics that signify their quality and freshness. These indicators include:
- Uniform color shallots: Look for shallots with a consistent light copper-purple color. Avoid shallots with uneven coloring, as it may indicate ripeness variations.
- Firm shallots: Gently squeeze the shallots to ensure they feel firm and solid. Avoid shallots that feel soft or mushy, as they may be past their prime.
- Dry skin shallots: Check that the outer skin of the shallots is dry and papery. Avoid shallots with moist or moldy skin, as it can be a sign of spoilage.
- Avoid damaged shallots: Inspect the shallots for any cuts, bruises, or blemishes. Damaged shallots are more likely to spoil quickly and can affect the overall quality of your dish.
Table: Common Quality Indicators for Shallots
| Quality Indicator | Description |
|---|---|
| Uniform color shallots | Consistent light copper-purple color |
| Firm shallots | Solid and resistant to gentle pressure |
| Dry skin shallots | Papery and free from moisture or mold |
| Avoid damaged shallots | No cuts, bruises, or blemishes |
“Choosing shallots with uniform color, firmness, dry skin, and no damages ensures that you get the best quality and flavor in your dishes.”
By paying attention to these quality indicators when selecting shallots, you can ensure that you bring home the best shallots for your recipes. Whether you’re using shallots as a substitute for onions or want to add a depth of flavor to your dishes, quality shallots make all the difference.

In addition to their culinary advantages, shallots also offer several nutritional benefits. They are a good source of folate, potassium, and iron, making them a healthy addition to your meals.
With this understanding of quality indicators and nutritional benefits, you can confidently select and incorporate shallots into your cooking, enhancing the taste and nutritional value of your favorite dishes.
The Process of Cutting Shallots
Before you can start cutting shallots into various shapes and sizes, you need to master the initial steps of the preparation process. To begin, gather your shallots and a sharp knife. Start by trimming off the top of the shallot while leaving the root intact. This will help stabilize the shallot and prevent the layers from slipping while you cut.
Next, make a vertical score down the shallot from top to bottom, just deep enough to penetrate the outer layers. Then, gently peel away the papery skin to reveal the beautiful layers of the shallot.
Now that your shallot is peeled, it’s time to break it into separate pieces. Simply hold the shallot bulb in one hand and use your other hand to gently snap it apart at the natural indentations. This will give you individual shallot bulbs that can be further cut into the desired shape or size.

- Trim off the top of the shallot while leaving the root intact.
- Make a vertical score down the shallot and peel away the papery skin.
- Break the shallot bulb into separate pieces.
Table: Common Shallot Cutting Techniques
| Technique | Description |
|---|---|
| Slicing | Lay the peeled shallot on a flat side and slice it crosswise into rings of desired thickness. |
| Dicing | Cut the peeled bulbs in half lengthwise, make lengthwise cuts up to the root end (without cutting through), make a parallel cut, rotate the shallot, and cut crosswise up to the root end. |
| Mincing | Repeat the dicing process with thinner lengthwise and crosswise slices, and finely mince using a back-and-forth rocking motion with a chef’s knife. |
| Julienne | Remove the root end, cut in half lengthwise, and make vertical slices to create delicate shallot julienne. |
Remember, when working with shallots, it’s important to keep the root end intact to prevent the layers from slipping. Use an appropriate knife, such as a chef’s knife or paring knife, and make sure it is sharp for clean and precise cuts. If you want to prevent tears while cutting shallots, you can try wearing goggles or contact lenses, which can provide some protection from the sulfur compounds that can irritate the eyes.
Now that you have mastered the initial steps of cutting shallots, you are ready to explore the various cutting techniques and create delicious dishes that highlight the unique flavors of this versatile ingredient.
Shallot Slicing: Rings of Flavor
Slicing shallots into rings is a popular method that adds both flavor and visual appeal to your dishes. Whether you’re making a salad, a stir-fry, or a garnish, the thin rings of shallots provide a delightful crunch and a mild onion-like taste. Here’s how you can achieve perfectly sliced shallot rings:
- Start by trimming off the top of the shallot while leaving the root intact. This will help hold the layers together and make it easier to slice.
- Peel away the papery skin by making a vertical score down the shallot. Be sure to remove any loose or damaged layers.
- Lay the peeled shallot on a flat side to provide stability. Hold the shallot firmly and slice it crosswise into rings of your desired thickness. You can make them thin for a delicate texture or slightly thicker for a more substantial bite.
- Repeat the process with the remaining shallots, adjusting the thickness as desired.
Now that you have your beautifully sliced shallot rings, you can use them in various ways. They can be enjoyed raw in salads or used as a topping for sandwiches and burgers. Alternatively, you can sauté them in oil or butter until they become caramelized and golden, adding a sweet and savory flavor to your dishes.
Slicing shallots into rings is just one of the many cutting techniques you can master with shallots. By exploring different methods, you can create a range of textures and flavors to elevate your culinary creations.

Shallot rings add a delicious crunch and mild onion-like taste to salads, stir-fries, and garnishes. Perfectly sliced, they make your dishes visually appealing and irresistible.”
So, the next time you’re preparing a meal, consider incorporating sliced shallots for an extra touch of flavor and texture. They are versatile, easy to work with, and can take your culinary creations to the next level.
Remember, practice makes perfect. With a little bit of patience and skill, you’ll soon be slicing shallots with confidence and creating dishes that impress both your taste buds and your guests.
Shallot Dicing: Perfectly Portioned
Dicing shallots is a versatile cutting technique that allows you to achieve perfectly portioned pieces, enhancing both the taste and aesthetics of your dishes. Whether you’re adding a subtle crunch to a salad or sautéing them for a savory stir-fry, finely diced shallots can elevate your culinary creations to new heights.
To begin the dicing process, start by trimming off the top of the shallot while leaving the root intact. This will help anchor the layers together and prevent them from slipping. Make a vertical score down the shallot and gently peel away the papery skin. With the shallot peeled, break the bulb into separate pieces.

Now that you have individual shallot bulbs, it’s time to dice them into uniform pieces. For a medium-sized dice, cut the peeled bulbs in half lengthwise, making sure to leave the root end intact. Then, make lengthwise cuts up to the root end, but not all the way through. Next, make a parallel cut, rotate the shallot, and cut crosswise up to the root end. The result will be perfectly portioned shallot cubes ready to bring a burst of flavor to your favorite dishes.
Shallot Mincing: Intensify the Flavor
Mincing shallots creates a concentrated burst of flavor, imparting a delightful aroma and taste to your culinary creations. Finely mincing shallots allows their distinct essence to infuse into your dishes, enhancing the overall taste profile.
To begin the process of mincing shallots, start by peeling and separating the bulbs, following the steps outlined in the previous section. Once the shallots are prepared, it’s time to finely mince them using a back-and-forth rocking motion with a sharp chef’s knife. This technique achieves a consistent and uniform texture, resulting in evenly distributed flavor throughout your dish.
Position the shallots on your cutting board and place the tip of the knife on the cutting surface. Apply gentle pressure as you rock the knife blade back and forth across the shallots, moving it in a rhythmic motion. Take care to keep your fingers curled under to prevent any accidents and ensure your safety.
Continue mincing until the shallots reach the desired fineness, whether you prefer a coarse or a fine texture. Remember, the smaller the pieces, the more intense the flavor will be. Once minced, the shallots are ready to be incorporated into your favorite recipes, such as dressings, sauces, stir-fries, or as a garnish to add an extra layer of aromatic complexity.

Now that you’ve mastered the art of mincing shallots, you can elevate your culinary endeavors by unlocking the full potential of these flavorful bulbs. Experiment with different dishes and recipes, and enjoy the enhanced taste and aroma that minced shallots bring to your cooking.
Shallot Julienne: Delicate Strips of Flavor
Julienne-cut shallots offer a delicate and beautiful presentation, while infusing your recipes with a subtle burst of flavor. This cutting technique involves slicing shallots into thin strips, creating elegant shapes that enhance both the visual appeal and taste of your dishes. Whether you’re looking to elevate a salad, garnish a soup, or add texture to a stir-fry, shallot julienne is a versatile and impressive addition to your culinary repertoire.
To achieve the perfect julienne, start by removing the root end of the shallot and cutting it in half lengthwise. With the flat sides facing down, make vertical slices, keeping the width of the strips consistent. The result is thin, uniform pieces that add a delicate crunch and flavor to your creations.

Tip: To make the cutting process easier, it’s essential to use a sharp chef’s knife or paring knife. The sharp blade will ensure clean cuts and prevent the shallot from bruising or tearing. Remember to keep the root end intact while cutting to maintain stability and prevent the layers from slipping.
Incorporating shallot julienne into your recipes not only enhances the overall presentation but also adds complexity and depth of flavor. The subtle sweetness and gentle spice of shallots create a harmonious balance with other ingredients, making each bite a delightful experience. Whether you’re a seasoned chef or a home cook looking to impress, mastering the art of shallot julienne will level up your culinary skills and bring your dishes to new heights.
| Benefits of Shallots | Nutrients |
|---|---|
| Shallots are a nutritious addition to your meals. | • Rich in folate, which supports cell function and growth |
| • High in potassium, an essential mineral for heart health and muscle function | |
| • Contains iron, crucial for oxygen transportation in the body |
Shallot Cutting Techniques: Tips and Tricks
Mastering the art of cutting shallots requires more than just technique – it also involves understanding essential tips and tricks to enhance your knife skills. Whether you’re a novice cook or an experienced chef, these insights will help you achieve precise and efficient results when working with shallots.
When it comes to shallot cutting, it’s important to keep the root end intact. This prevents the layers from slipping, ensuring a more stable cutting surface. Additionally, using a sharp and appropriate knife is crucial. A chef’s knife or paring knife works well for most shallot cutting techniques, allowing you to achieve clean and accurate cuts.
To prevent tears while cutting shallots, you can try wearing goggles or contact lenses. These act as a barrier between your eyes and the onion-like compounds released when cutting shallots. This simple trick can make the process more comfortable and enjoyable.

When selecting shallots, look for those with a uniform light copper-purple color. They should have smooth, firm, and dry skin. Avoid shallots with deep cuts, discolorations, or soft spots. These visual cues indicate the quality of the shallots and ensure that you’re working with fresh and flavorful ingredients.
To store leftover cut shallots, tightly wrap them or place them in an airtight container in the refrigerator. This helps to maintain their freshness and prevent them from drying out. Shallots can be a versatile substitute for onions in various recipes, offering a unique flavor profile.
Remember, mastering shallot cutting skills is not only about technique; it’s also about implementing these tips and tricks to elevate your knife skills. By following these guidelines, you’ll be well-equipped to handle shallots with confidence and precision.
Preventing Tears: Crying-Free Shallot Cutting
Cutting shallots doesn’t have to be a teary ordeal – follow these tips to keep your eyes dry and focused on the art of shallot cutting.
1. Use goggles or contact lenses: Protect your eyes from the tear-inducing compounds found in shallots by wearing goggles or contact lenses. The lenses act as a barrier, preventing the compounds from reaching your eyes and causing irritation.
2. Chill the shallots: Prior to cutting, place the shallots in the refrigerator for about 15 minutes. The cold temperature helps to reduce the release of the tear-inducing compounds, minimizing the risk of tearing up while cutting.
3. Sharp knives: Use a sharp knife when cutting shallots. A dull knife causes more damage to the cells, releasing more of the tear-inducing compounds. A sharp knife allows for cleaner cuts, minimizing the release of these compounds.
| Tips and Tricks |
|---|
| Tip #1: To minimize the spread of tear-inducing compounds, cut shallots close to a running faucet or under a gentle stream of water. The water helps to wash away the compounds, reducing their concentration in the air. |
| Tip #2: Try using a fan to blow the tear-inducing compounds away from your face while cutting shallots. The air movement can help reduce the concentration of compounds in your immediate vicinity. |
| Tip #3: If you don’t have goggles or contact lenses, try cutting shallots near an open flame. The heat from the flame can help neutralize the tear-inducing compounds, reducing their potency. |

By following these tips, you can enjoy the process of cutting shallots without the annoyance of watery eyes. Now, you can focus on the art of shallot cutting and create delicious dishes with ease.
Shallot Cutting vs. Onion Cutting
While shallots and onions share similarities, understanding their differences in cutting techniques can help you utilize shallots as a delicious alternative in your cooking. Shallots, with their mild and sweet flavor, can add a unique depth to your dishes, and knowing how to properly cut them can enhance their taste and presentation.
When it comes to size, shallots are smaller than onions, making them easier to handle and cut. Their small size allows for finer and more precise cuts, ideal for recipes that require a delicate touch. Unlike onions, shallots have a more delicate flavor profile, making them perfect for dishes that require a subtle onion taste without overpowering other ingredients.
When cutting shallots, it’s important to keep the root intact. This helps prevent the layers from slipping and allows for better control during cutting. Additionally, using an appropriate knife, such as a chef’s knife or paring knife, is essential for clean and precise cuts. Keeping the knife sharp ensures smooth cutting and reduces the risk of injury.

One of the key differences between cutting shallots and cutting onions is the level of pungency. Shallots have a milder taste and release fewer irritants that cause tears. However, if you’re particularly sensitive to these irritants, wearing goggles or contact lenses can help prevent tears while cutting shallots.
By understanding these differences in cutting techniques, you can confidently incorporate shallots into your recipes, knowing that they can bring a unique flavor and texture to your dishes. So, the next time you’re looking to add a touch of sweetness and depth to your cooking, consider using shallots as an alternative to onions.
Shallot Cutting: Safety and Precautions
Safety should always be a priority when working in the kitchen – here are some essential precautions to follow while handling sharp knives and shallots. To prevent accidents, make sure to maintain a stable cutting surface and secure the shallots with a non-slip cutting board or a damp cloth. This will help prevent injuries and ensure precision while cutting.
When handling sharp knives, always hold them with a firm grip and position your fingers away from the blade. Maintain a consistent cutting motion and avoid applying excessive force, as this can increase the risk of accidents. Additionally, remember to keep your knives sharp – a dull knife requires more pressure and effort, making it more likely to slip and cause injuries.
Shallots have layers that can shift during cutting, increasing the risk of accidents. To prevent this, ensure that you keep the root end intact as it acts as a stabilizer. By doing so, you provide a stable base for cutting, allowing for more control and reducing the chances of injury.
Finally, if you find yourself tearing up while cutting shallots, consider using goggles or wearing contact lenses. These can help protect your eyes from the sulfur compounds released during the cutting process, minimizing irritation and discomfort.

Shallot Cutting: Cleanup and Storage
After the cutting is done, it’s essential to clean up and store your cut shallots to maintain their quality for future use. Proper storage ensures that the shallots retain their freshness and flavor, allowing you to incorporate them into your culinary creations whenever needed.
To begin with, gather all the cut shallots and place them in a bowl or airtight container. You can separate different cuts, such as slices, dice, or minced shallots, into individual containers or compartments within the same container. This helps in organizing and differentiating the shallots for easy access.
Once the shallots are stored, cover the container with a tight lid or wrap it tightly with plastic wrap. This prevents air exposure, which can cause the shallots to become dry and lose their flavor. Place the container in the refrigerator, preferably in the vegetable or crisper drawer, where the temperature is cool and consistent.
Remember to label the container with the date of storage to keep track of freshness. Properly stored cut shallots can typically last for up to five days in the refrigerator. However, it’s always best to use them as soon as possible to enjoy their optimal flavor and quality.

Now that your cut shallots are safely stored, you can confidently incorporate them into your favorite recipes without any waste. Whether you’re adding them to stir-fries, dressings, or sauces, cut shallots offer a unique and flavorful twist to your dishes. Remember to handle them with care and enjoy the exceptional taste they bring to your culinary creations!
How to Cut Shallots – Conclusion
Cutting shallots may seem like a small step, but it holds the power to transform your dishes into culinary works of art. By mastering the techniques of slicing, dicing, mincing, and julienning shallots, you can elevate the flavor, texture, and presentation of your recipes.
When working with shallots, it’s important to keep the root intact to prevent the layers from slipping. Choose an appropriate knife, such as a chef’s knife or paring knife, and make sure it is sharp for precise cuts. To prevent tears while cutting shallots, consider wearing goggles or contact lenses.
When selecting shallots, look for those with a uniform light copper-purple color and smooth, firm, and dry skin. Avoid shallots with deep cuts, discolorations, or soft spots. Properly storing leftover cut shallots in the refrigerator will help maintain their freshness and flavor.
Not only do shallots add a delicious depth of flavor to your dishes, but they also offer nutritional benefits. They are a good source of folate, potassium, and iron. So, the next time you reach for an onion in your recipe, consider using shallots instead for an added touch of sophistication.
In conclusion, this comprehensive guide has provided you with the knowledge and skills to confidently cut shallots in various ways. From selecting high-quality shallots to mastering the different cutting techniques, you are now equipped to enhance your culinary creations and impress your family and friends with your culinary prowess.
How to Cut Shallots – FAQ
Q: How do I cut shallots?
A: To cut shallots, start by trimming off the top of the shallot while leaving the root intact. Then, make a vertical score down the shallot and peel away the papery skin. Break the bulb into separate pieces. For slicing, lay the peeled shallot on a flat side and slice it crosswise into rings of desired thickness. For dicing, cut the peeled bulbs in half lengthwise and make lengthwise cuts up to the root end, but not all the way through. Make a parallel cut, rotate the shallot, and cut crosswise up to the root end. To mince shallots, repeat the dicing process with thinner lengthwise and crosswise slices, and finely mince using a back-and-forth rocking motion with a chef’s knife. To cut shallots into strips, remove the root end, cut in half lengthwise, and make vertical slices.
Q: How do I select and store shallots?
A: When picking shallots, look for those with a uniform light copper-purple color and smooth, firm, and dry skin. Avoid shallots with deep cuts, discolorations, or soft spots. Store leftover cut shallots tightly wrapped or in an airtight container in the refrigerator.
Q: Can shallots be used as a substitute for onions?
A: Yes, shallots can be used as a substitute for onions in various recipes.
Q: What are the nutritional benefits of shallots?
A: Shallots offer nutritional benefits such as folate, potassium, and iron.
Our Friends:
- https://itsavegworldafterall.com/how-to-cut-shallots/
- https://feelgoodfoodie.net/recipe/how-to-cut-shallots/
Related Recipes:
 How to Cut a Tomato? (Perfect Step-By-Step Guide)
 How to Cut Green Onions? (Step-By-Step Guide)
 How to Chop an Onion? (Perfect Step-By-Step Guide)
 How to Cut Dragon Fruit? (Perfect Step-By-Step Guide)
 How to Cut Mushrooms? (Perfect Step-By-Step Guide)
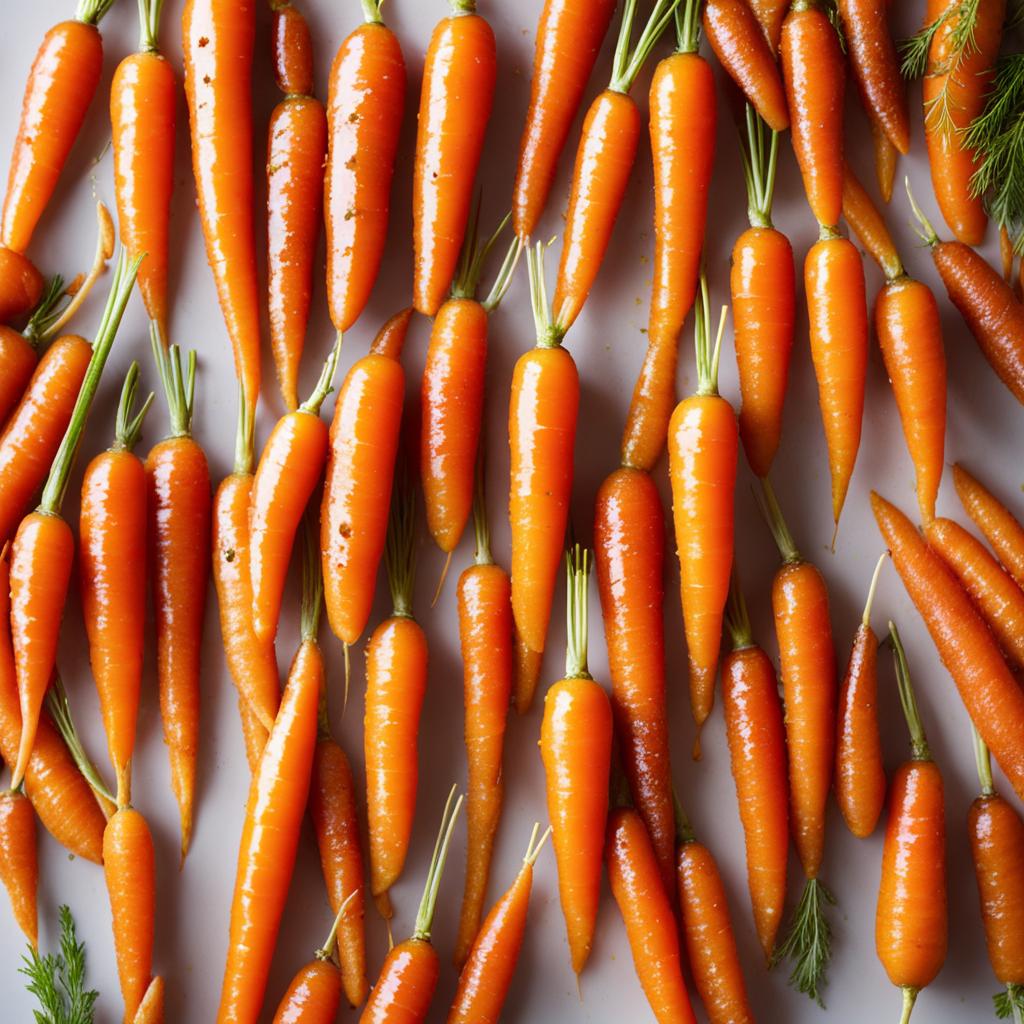
 How to Cut Carrots? (Perfect Step-By-Step Guide)
 How to Cut a Watermelon? (Perfect Step-By-Step Guide)
 How to Cut Beets? (Perfect Step-By-Step Guide)


