Make ahead freezer meals are a lifesaver for busy families. They save time and money in the kitchen while still allowing you to enjoy delicious and convenient meals. In this article, I will share 10+ of the best make ahead freezer meals that can be prepared in just 30 minutes. These recipes and ideas will help you plan and prepare meals in advance, making weeknight dinners a breeze.
Key Takeaways:
- Make ahead freezer meals are a time-saving solution for busy families.
- These meals can be prepared in just 30 minutes.
- By planning and preparing meals in advance, weeknight dinners become easier.
- Save money by avoiding takeout and utilizing ingredients already in your kitchen.
- Enjoy delicious and convenient meals without the stress of cooking every night.
Expert Tips for Prepping and Transporting Freezer Meals
When it comes to meal prep and batch cooking for make ahead freezer meals, there are a few expert tips that can make the process easier and more efficient. As someone who loves to prepare freezer-friendly recipes, I’ve learned a few tricks along the way that I’m excited to share with you.
Choose Meals that Require Minimal Work
One of the key strategies for successful meal prep is to choose recipes that require minimal work on the back end. Look for recipes that can be easily assembled and frozen without the need for additional cooking steps later on.
For example, you can prepare marinades or sauces in advance and freeze them separately. Then, when you’re ready to use them, simply thaw and pour over your protein or veggies for a quick and delicious meal.
Package and Freeze in Airtight Containers or Freezer Bags
Proper packaging is essential when it comes to storing make ahead freezer meals. To prevent freezer burn and maintain the quality of your meals, be sure to use airtight containers or freezer bags.
Airtight containers are great for soups, stews, and casseroles, while freezer bags are ideal for individual portions and easy stacking. Make sure to label your containers or bags with the name and date of each meal for easy identification.
Transport Your Frozen Meals Safely
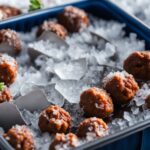
If you plan to travel with your freezer meals, it’s important to transport them safely to keep them cold and maintain their quality. A cooler with ice is your best friend in this situation.
Pack your frozen meals in the cooler, surrounding them with ice packs or bags of ice to keep them at a safe temperature. This will help ensure that your meals stay frozen, especially if you have a long journey ahead.
Remember, safety is key when it comes to transporting frozen food, so take the necessary precautions to keep your meals fresh and delicious.
Tip: To save space in your cooler, you can stack your freezer meals on top of each other, separating them with a layer of ice packs or a towel to provide insulation and maintain a consistent temperature. This way, you can pack more meals without sacrificing space or compromising on food safety.
Incorporate these expert tips into your meal prep routine, and you’ll be well-equipped to prepare and transport delicious make ahead freezer meals. Not only will this save you time in the kitchen, but it will also ensure that you have convenient and nourishing meals ready to enjoy whenever you need them.
Now that we’ve covered the expert tips for prepping and transporting freezer meals, let’s move on to exploring different meal storage options in the next section.
Comparison of Meal Prep Containers and Freezer Bags
| Storage Option | Benefits | Considerations |
|---|---|---|
| Airtight Containers |
|
|
| Freezer Bags |
|
|
Meal Storage Options for Freezer Meals
Proper storage is key when it comes to preserving the quality and flavor of make ahead freezer meals. There are several options available for storing your delicious creations, depending on your preferences and the type of meal you’re freezing.
Rigid Freezer Containers
If you prefer a sturdy and reusable option, freezer containers with lids are a great choice. These containers provide excellent protection against freezer burn and are perfect for meals that need to retain their shape, like casseroles and individual portions.
| Pros | Cons |
|---|---|
| Reusable | Take up more space in the freezer |
| Durable | May require more careful stacking and organization |
| Protect against freezer burn | Can be more expensive than other options |
Gallon-sized Freezer Bags
For a more economical and space-saving option, gallon-sized freezer bags are a popular choice. These bags can be stacked neatly in the freezer, making them ideal for meals that can be laid flat, such as soups, sauces, or individually wrapped items.
| Pros | Cons |
|---|---|
| Space-efficient | Less durable than freezer containers |
| Cost-effective | Not suitable for meals with delicate textures |
| Easier to organize and stack | May have a risk of leaking if not properly sealed |
Wide-mouth Mason Jars
For soups, sauces, and other liquids, wide-mouth mason jars are an excellent choice. These jars are convenient and provide an airtight seal that helps preserve the freshness of your meals. They are also great for portion control and easy reheating.
| Pros | Cons |
|---|---|
| Airtight seal | May take up more space in the freezer |
| Easy to reheat | May be more fragile and prone to breaking |
| Portion control | Not suitable for meals with large solid pieces |
Remember, regardless of the storage option you choose, it’s crucial to minimize air exposure by removing as much air as possible from the containers or freezer bags before sealing. This helps prevent freezer burn and keeps your make ahead freezer meals in optimal condition.
With these various storage options, you can now confidently plan and prepare your make ahead freezer meals, knowing that they will stay fresh and delicious until you’re ready to enjoy them.
Proper Thawing Methods for Freezer Meals
Thawing freezer meals safely is crucial to maintain the quality and safety of the food. Let me share with you some safe thawing methods to ensure your meals are ready to enjoy.
Thawing in the Refrigerator
The best and most recommended method for thawing freezer meals is to transfer them from the freezer to the refrigerator and allow them to thaw slowly. This method ensures a consistent and controlled thawing process, minimizing the risk of bacterial growth and maintaining the texture and taste of the food.
Simply place the frozen meal in a container or on a plate to catch any potential drips, and then let it sit in the refrigerator for 24-48 hours. It’s important to note that larger meals may require more time to fully thaw. Plan ahead and allow ample time for thawing to avoid any last-minute stress.
Cold Water Thawing
If you’re short on time and need to thaw your freezer meal quickly, the cold water thawing method is a safe and effective option. It’s important to note that this method should only be used when you intend to cook the meal immediately after thawing.
First, ensure that the meal is tightly sealed in a leak-proof bag. Then, submerge the bag in a large bowl or sink filled with cold water. Change the water every 30 minutes to maintain a safe temperature. The cold water helps speed up the thawing process while preventing the food from entering the temperature danger zone.
Microwave Thawing
While using the microwave is a quick and convenient option for thawing freezer meals, it’s important to exercise caution. Microwaving can cause uneven thawing and potentially affect the texture and moisture of the food, especially for dishes with delicate components.
If you choose to use the microwave, follow these tips:
- Ensure the meal is microwave-safe and in a microwave-safe container.
- Use the defrost or low power setting to thaw the meal slowly.
- Rotate or stir the food periodically to encourage even thawing.
- After thawing in the microwave, cook the meal immediately to eliminate any potential bacterial growth.
Remember, it’s important to use safe thawing methods to prevent foodborne illnesses and maintain the quality of your freezer meals. Whether you choose to thaw in the refrigerator, use the cold water method, or opt for the microwave, always prioritize food safety and enjoy your thawed meals with peace of mind.
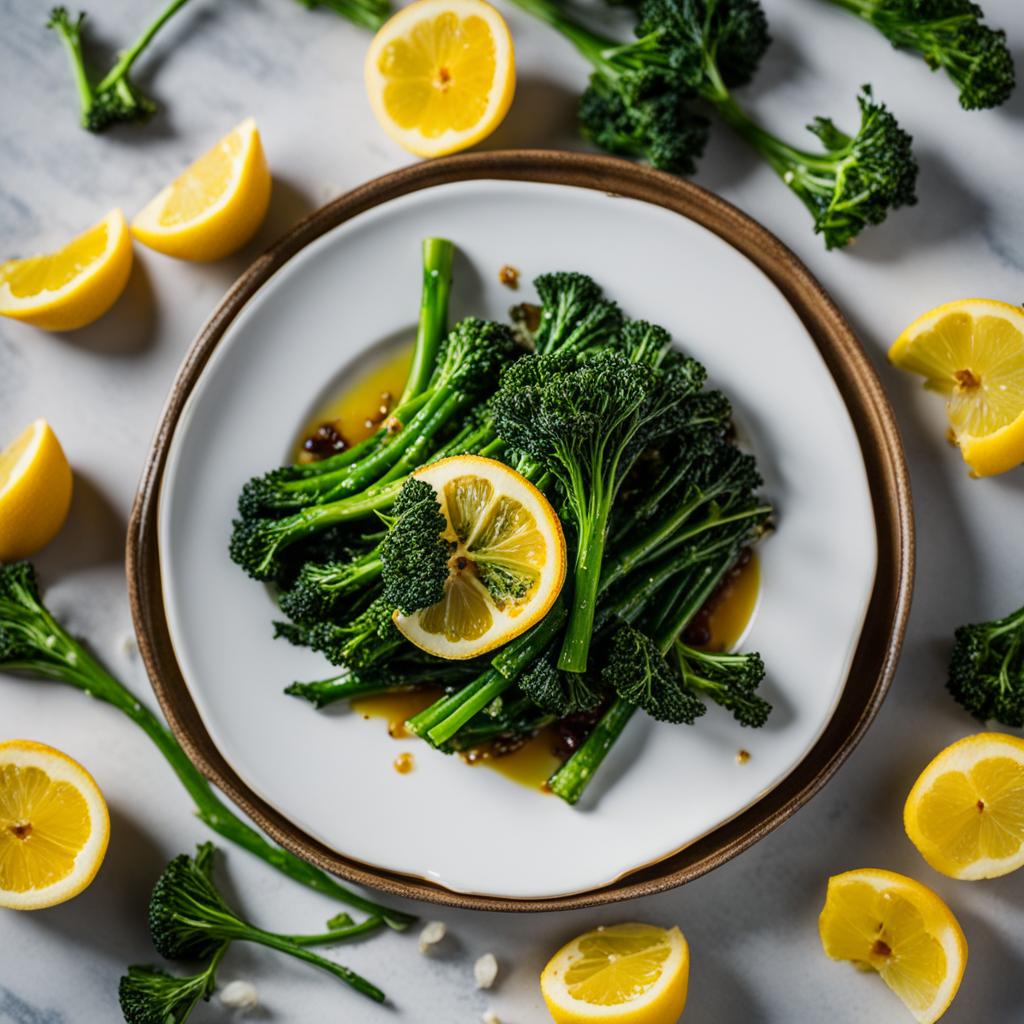
Simple Sides to Serve with Freezer Meals
When serving make ahead freezer meals, it’s best to keep the side dishes simple and convenient. These easy side dish ideas will complement your freezer meals well and require minimal preparation.
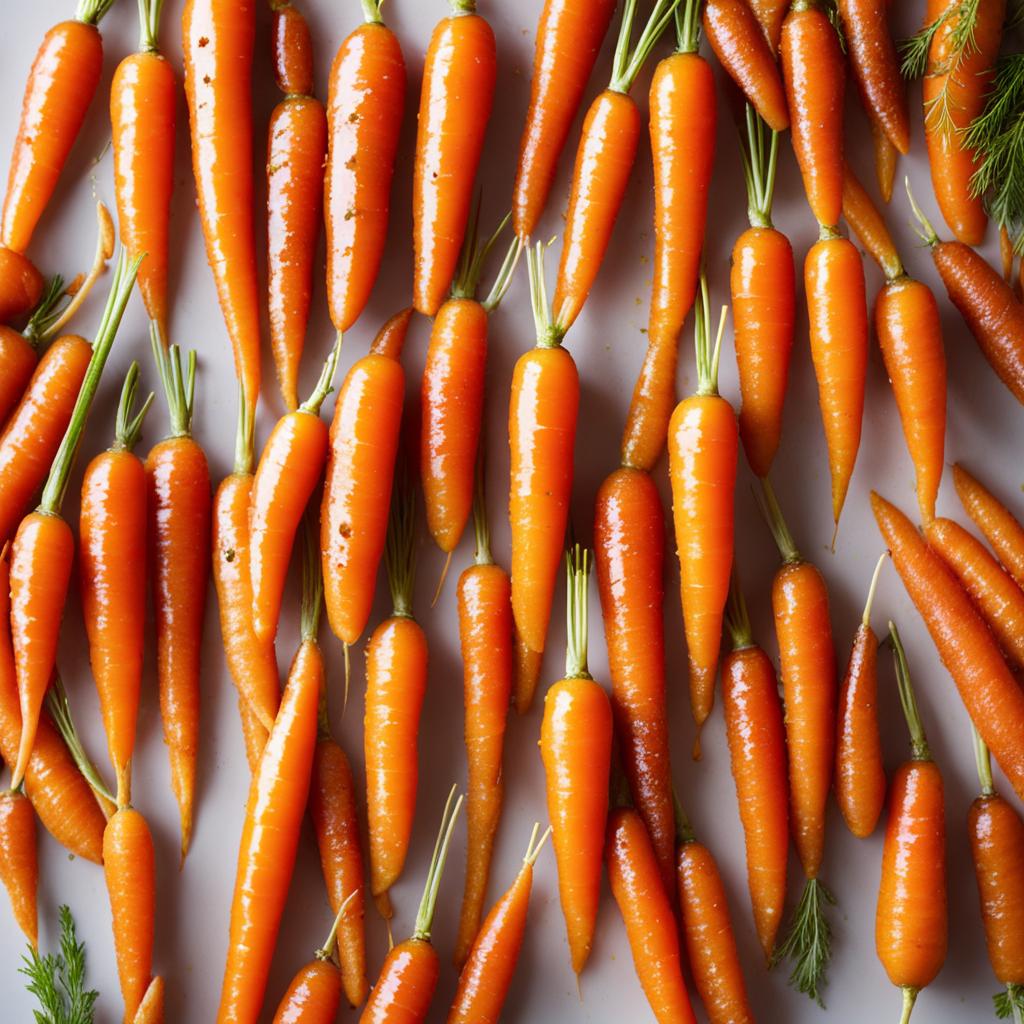
1. Baby Carrots and Veggie Sticks with Dip
Keep things fresh and colorful with a platter of baby carrots and a variety of veggie sticks such as celery, bell peppers, and cucumber. Pair them with a delicious dip like hummus or ranch dressing for added flavor.
2. Store-Bought Guacamole and Salsa with Tortilla Chips
For a quick and tasty side, grab a container of store-bought guacamole and salsa from your local grocery store. Serve them with a bowl of crispy tortilla chips for a satisfying crunch.
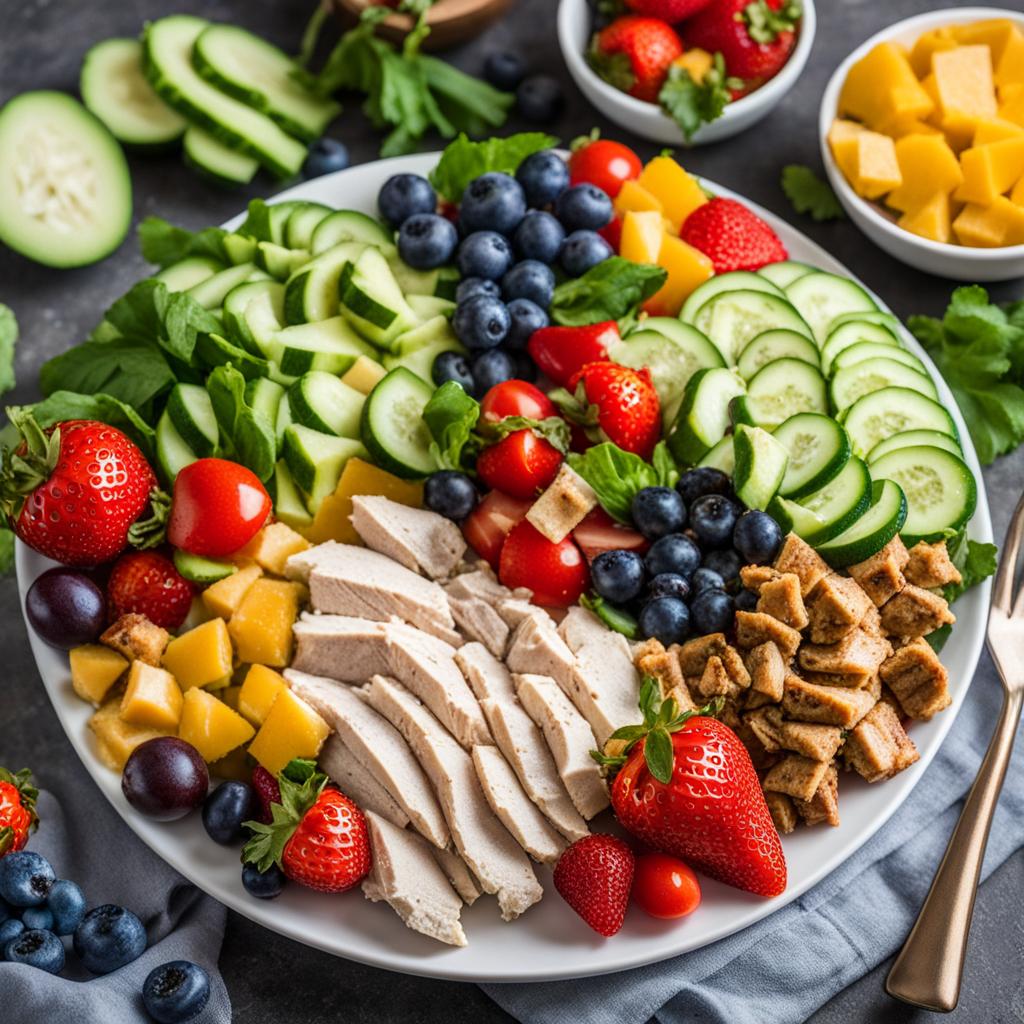
3. Fresh Fruits
Add a refreshing touch to your meal with a selection of fresh fruits. Choose seasonal favorites like sliced watermelon, berries, or citrus fruits for a burst of natural sweetness.
4. Pre-Packaged Salads
If you’re looking for a hassle-free side, opt for pre-packaged salads. These ready-to-eat salads are available in various flavors and combinations, ranging from garden salads to Caesar salads.
5. Baked Beans
Complete your meal with a classic side of baked beans. You can make your own from scratch or choose a canned option for convenience. The rich and smoky flavors of baked beans pair well with a variety of freezer meals.
| Side Dish | Description |
|---|---|
| Baby Carrots and Veggie Sticks with Dip | Fresh and crunchy baby carrots and assorted veggie sticks served with a flavorful dip like hummus or ranch dressing. |
| Store-Bought Guacamole and Salsa with Tortilla Chips | Ready-made guacamole and salsa paired with crispy tortilla chips for a delicious snacking experience. |
| Fresh Fruits | A variety of seasonal fruits such as watermelon, berries, or citrus fruits that add a refreshing touch to your meal. |
| Pre-Packaged Salads | Convenient and ready-to-eat salads in various flavors and combinations, perfect for a quick and healthy side dish. |
| Baked Beans | A classic side dish of hearty and flavorful baked beans, ideal for pairing with a variety of freezer meals. |
These simple and tasty sides will enhance your make ahead freezer meals, providing a well-rounded and satisfying dining experience. Enjoy the convenience of easy preparation and the delicious flavors they bring to the table.
Make-Ahead Meatball Subs
Looking for a tasty and convenient make-ahead freezer meal? These meatball subs are the perfect option. With a few simple steps of baking, cooling, and freezing meatballs in marinara sauce, you can have a delicious meal ready to go whenever you need it.
When you’re ready to enjoy your meatball subs, simply thaw the frozen meatballs and warm them up. Serve them on your favorite sub rolls, topped with melted cheese and additional marinara sauce. The result? A mouthwatering sandwich that’s sure to satisfy your cravings.
Want to switch things up with different flavors? Try making gluten-free meatballs or Asian-style turkey meatballs. You can experiment with various seasonings and ingredients to create unique combinations that suit your taste preferences.
These freezer-friendly meatballs are a versatile staple that can be used in other dishes too. If you’re in the mood for spaghetti, just heat up the meatballs and toss them with cooked pasta and more marinara sauce. Add some grated Parmesan cheese and fresh herbs for a finishing touch.
Make-ahead meatball subs are not only a delicious weeknight dinner option but also a great choice for parties and gatherings. Prepare a batch in advance and impress your guests with a crowd-pleasing meal that requires minimal effort.
I love having a stock of freezer-friendly meatballs ready to go. They make meal planning so much easier, especially on busy days. Whether I’m making subs, spaghetti, or even meatball sliders, these make-ahead meatballs never disappoint. – Emily Smith, Busy Mom and Food Enthusiast
Freezer-Friendly Beef Taquitos
When it comes to convenient freezer meals, these freezer-friendly beef taquitos are a crowd favorite. Whether you have a busy week ahead or unexpected guests, these taquitos can be easily prepared in advance and stored in the freezer for a quick and delicious meal option. With their crispy exterior and flavorful filling, they are sure to satisfy both kids and adults.
Making these taquitos freezer-friendly is incredibly simple. Once you’ve prepared and assembled the taquitos, you can go straight from the freezer to the oven, saving you time and effort. No need to thaw or defrost!

Now, let’s talk about toppings. What makes these taquitos even more irresistible is the addition of Mexican toppings. The combination of flavors and textures takes these taquitos to a whole new level.
Some popular Mexican toppings to consider include:
- Guacamole: Creamy and flavorful, guacamole adds a delicious richness to each bite.
- Sour cream: Cool and tangy, sour cream provides a refreshing contrast to the savory taquitos.
- Salsa: Spicy or mild, salsa adds a burst of fresh flavors that complements the beef filling perfectly.
Feel free to get creative and experiment with other toppings like diced tomatoes, shredded cheese, chopped cilantro, or sliced jalapenos to customize your taquitos to your taste.
Next time you’re in need of a quick and satisfying meal, reach for these freezer-friendly beef taquitos. With their crispy texture, flavorful filling, and tasty Mexican toppings, they’re bound to become a family favorite.
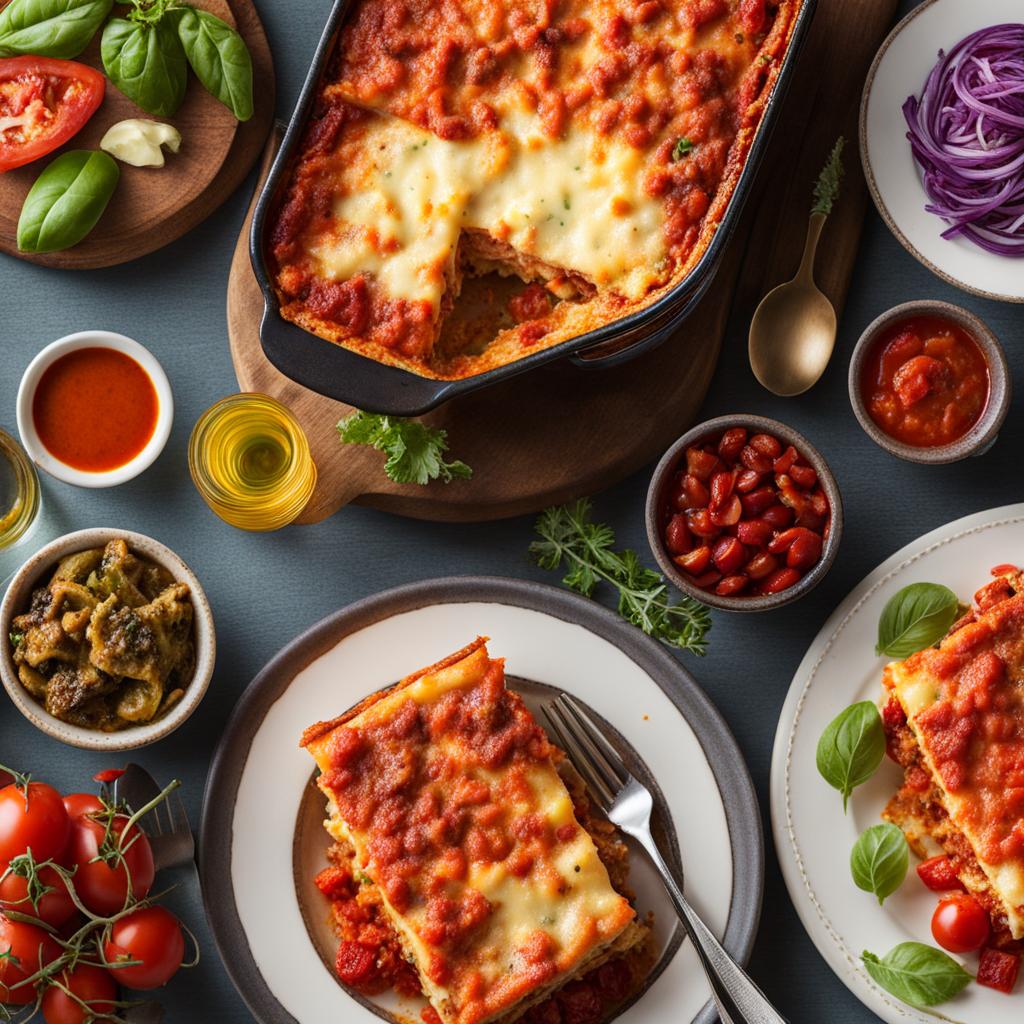
Make-Ahead Chicken Alfredo Casserole
One of my favorite make-ahead freezer meals is the Chicken Alfredo Casserole. It’s a delicious and crowd-pleasing dish that can be prepared in advance, making it perfect for busy weeknights or entertaining guests. Here’s how to make this flavorful and easy casserole.
Ingredients:
- 4 cups cooked chicken, shredded
- 1 pound penne pasta
- 2 cups Alfredo sauce
- 1 cup shredded mozzarella cheese
- 1/2 cup grated Parmesan cheese
- 2 cloves garlic, minced
- 1 teaspoon dried Italian seasoning
- Salt and pepper to taste
Instructions:
- Cook the penne pasta according to the package instructions. Drain and set aside.
- In a large bowl, combine the shredded chicken, Alfredo sauce, minced garlic, dried Italian seasoning, salt, and pepper. Stir until well combined.
- Add the cooked pasta to the chicken mixture and toss until the pasta is evenly coated.
- Transfer the mixture to a 9×13-inch baking dish.
- Sprinkle the shredded mozzarella and grated Parmesan cheese over the top.
- Cover the dish with foil and freeze for up to 3 months.
- When ready to serve, thaw the casserole overnight in the refrigerator.
- Preheat the oven to 375°F (190°C).
- Bake the casserole, covered with foil, for 25 minutes.
- Remove the foil and bake for an additional 10-15 minutes, or until the cheese is bubbly and golden.
- Let the casserole rest for a few minutes before serving.
This Chicken Alfredo Casserole is incredibly versatile. You can enjoy it as is or serve it over pasta with a side salad and bread for a complete and easy dinner. The creamy Alfredo sauce, tender chicken, and gooey cheese make this casserole a family favorite.
So next time you’re looking for a delicious make-ahead casserole, give this Chicken Alfredo Casserole a try. Your taste buds will thank you!
| Prep Time | Cook Time | Total Time | Serves |
|---|---|---|---|
| 15 minutes | 40 minutes | 55 minutes | 8 servings |
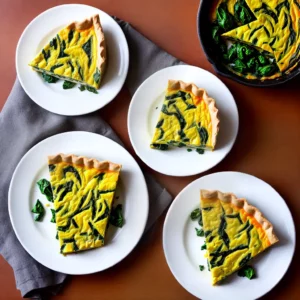
Make-Ahead Breakfast Burritos
Looking for a quick and easy breakfast option? These make-ahead breakfast burritos are the perfect solution. Whether you’re rushing out the door in the morning or need a grab-and-go breakfast for busy weekdays, these burritos have got you covered.

Preparing these burritos in advance allows you to enjoy a delicious and convenient breakfast without the hassle of cooking in the morning. You can customize the fillings to cater to your taste preferences, whether you prefer classic combinations like bacon and eggs or want to try something different like vegetarian or vegan options.
To make these make-ahead breakfast burritos, start by preparing the filling. Sautee your choice of ingredients, such as scrambled eggs, diced vegetables, cooked bacon or sausage, and cheese. Once the filling is ready, it’s time to build the burritos. Place a scoop of filling on a tortilla, fold in the sides, and roll it up tightly. Repeat the process with the remaining tortillas and filling.
Now comes the make-ahead part. Wrap each burrito individually in foil or parchment paper, making sure they are well-sealed. Label them with the date and filling to make them easier to identify later. Then, place the wrapped burritos in a freezer-safe bag or container and freeze them.
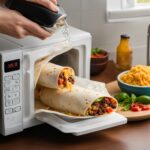
When you’re ready to enjoy a delicious breakfast, simply take a burrito out of the freezer, unwrap it, and thaw it in the refrigerator overnight. In the morning, all you have to do is bake the burrito in the oven until heated through and golden brown. Alternatively, you can microwave the burrito for a quick on-the-go option.
Not only are these make-ahead breakfast burritos convenient, but they are also a great way to reduce food waste. You can use up leftover ingredients from previous meals or even make a big batch of filling specifically for breakfast burritos. Plus, they are much healthier than store-bought frozen breakfast options, as you can control the ingredients and avoid additives or preservatives.
Here’s a simple recipe for make-ahead breakfast burritos:
| Ingredients | Instructions |
|---|---|
|
|
With these make-ahead breakfast burritos, you’ll never have to skip breakfast or rely on unhealthy options again. They are tasty, convenient, and can be easily customized to suit your preferences. Prepare a batch over the weekend, stock them in your freezer, and enjoy a hearty breakfast that will keep you fueled throughout the morning.
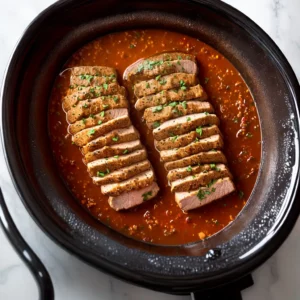
Make-Ahead Pulled Pork
Make-ahead pulled pork is a versatile freezer meal that will add a burst of flavor to your dinner table. Whether you’re planning a backyard barbecue or a cozy family dinner, this recipe is a crowd-pleaser.
Preparing and cooking pulled pork can be time-consuming, but with make-ahead pulled pork, you can do all the work in advance and have a delicious meal ready in no time. Here’s how:
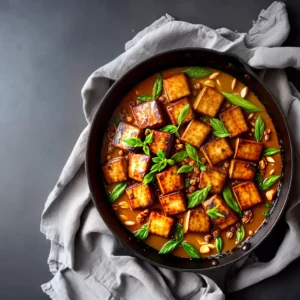
- Cook and Shred: Start by slow-cooking a pork shoulder or butt until it’s tender and juicy. The low and slow cooking method allows the flavors to develop and the meat to become incredibly tender. Once it’s done, shred the pork using two forks or meat claws.
- Sauce it Up: Toss the shredded pork in your favorite BBQ sauce. Whether you prefer a tangy vinegar-based sauce or a sweet and smoky sauce, make sure the meat is well coated. This step enhances the taste and ensures that every bite is packed with flavor.
- Freeze for Later: Place the sauced pulled pork in an airtight container or freezer bag. Label it with the date and store it in the freezer. The sauce will help keep the meat moist and tender during the freezing process, and it will be ready to be reheated whenever you need it.
When it’s time to enjoy your make-ahead pulled pork, simply follow these steps:
- Thaw: Remove the container or bag from the freezer and thaw the pulled pork in the refrigerator overnight. This slow thawing process helps preserve the texture and flavor of the meat.
- Rewarm: Heat the pulled pork in a saucepan over low heat or in the microwave until it’s heated through. Stir occasionally to ensure even heating.
- Serve and Enjoy: Once the pulled pork is hot, it’s ready to be served. Pile it high on soft burger buns or rolls and serve with your favorite BBQ sides. Classic options include corn on the cob, watermelon slices, baked beans, or an easy coleslaw. Let your taste buds guide you!
With make-ahead pulled pork, you can satisfy your BBQ cravings any day of the week. It’s a time-saving solution that doesn’t compromise on flavor. Whether you’re feeding a crowd or simply want to enjoy a tasty meal with your family, make-ahead pulled pork is a delicious choice.
So don’t wait! Prepare a batch of make-ahead pulled pork today, freeze it, and enjoy the convenience and mouthwatering flavors whenever you desire.
| Ingredients | Instructions |
|---|---|
| 1 pork shoulder or butt |
|
Make-Ahead Grilled Pork Tenderloin
Grilled pork tenderloin is a delicious and flavorful option for a make-ahead freezer meal. Here’s how you can prepare it:
- Season the pork tenderloin with your favorite rub or marinade. This will enhance the taste and ensure a juicy and tender result.
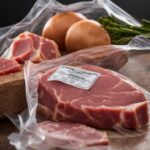
- Place the seasoned tenderloin in a freezer bag, squeezing out any excess air before sealing it tightly. Label the bag with the date and contents.
- Freeze the pork tenderloin for up to three months. The flavors will marinate and develop during this time, resulting in a more flavorful dish.
- When you’re ready to enjoy the grilled pork tenderloin, thaw it overnight in the refrigerator.
- Preheat your grill to medium-high heat.
- Grill the pork tenderloin for about 15-20 minutes, turning occasionally, until the internal temperature reaches 145°F (63°C).
- Remove the grilled pork tenderloin from the grill and let it rest for a few minutes before slicing.
- Serve the juicy and smoky grilled pork tenderloin with your favorite sides and enjoy!
Note: Leftover grilled pork tenderloin can also be used to create delicious sandwiches. Just add some BBQ sauce, pickles, and fresh lettuce for a mouthwatering meal.

Make-Ahead Italian Meatball Sliders
Looking for a quick and satisfying meal? These make-ahead Italian meatball sliders are the perfect solution. With just a few simple steps, you can have a delicious lunch or dinner ready to go.
To start, bake your meatballs to perfection. Use your favorite Italian meatball recipe or try this classic one:
| Ingredients | Instructions |
|---|---|
|
|
Once the meatballs are baked and cooled, it’s time to prepare them for freezing. Place the meatballs in an airtight container or freezer bag. Label them with the date and contents for easy identification later on.
When you’re ready to enjoy your Italian meatball sliders, simply thaw the meatballs in the refrigerator overnight. Then, rewarm them in the oven or on the stovetop.
Now it’s time to assemble your sliders. Start by slicing mini buns in half. Place a meatball on each bottom half of the buns. Top with grated Parmesan cheese and Provolone slices.
Feel free to get creative with your toppings! Add some marinara sauce, caramelized onions, or even a sprinkle of crushed red pepper for a little heat.
Place the top half of the buns on the sliders and secure them with toothpicks if needed. Serve your make-ahead Italian meatball sliders to your hungry guests or pack them up for a delicious on-the-go meal.
These sliders are perfect for parties, game nights, or even a simple weeknight dinner. They’re packed with flavor and are sure to be a hit with everyone.
So why wait? Start prepping your make-ahead Italian meatball sliders today and enjoy a hassle-free meal later on!
Vegetarian Black Bean Burritos
Looking for a healthy and convenient meal option? These freezer-friendly vegetarian black bean burritos are the answer! Packed with protein and flavor, these burritos are a delicious choice for lunch or dinner. With just a few simple steps, you can prepare a batch of these freezer-friendly burritos that can be enjoyed whenever you’re craving a quick and satisfying meal.
To make these delicious burritos, start by mashing black beans in a bowl until they reach a smooth consistency. Then, mix in diced tomatoes, shredded cheese, and a sprinkle of diced jalapenos for a touch of heat. Fill your tortillas with this flavorful bean mixture, roll them up tightly, and place them in a freezer-safe container or bag. Pop them in the freezer, and they’re ready to go whenever hunger strikes!
When you’re ready to enjoy your vegetarian burritos, simply heat them in the microwave or oven until they are hot and the cheese is melted. Serve them with your favorite toppings like salsa, sour cream, or guacamole for a burst of freshness. These freezer-friendly burritos are perfect for meal prepping or when you need a quick and satisfying meal on busy days.

So why not add these vegetarian black bean burritos to your meal rotation? They’re a tasty and convenient option that you can make ahead and freeze for later. With their delicious flavors and simple preparation, these freezer-friendly burritos are sure to become a go-to meal in your household.
Conclusion
Make-ahead freezer meals are a game-changer for busy families. With proper meal prep and storage, you can enjoy delicious and convenient meals without spending hours in the kitchen. These freezer-friendly recipes provide a solution for hectic weeknights or vacations, ensuring that you always have a tasty meal on hand.
Whether you’re in the mood for make-ahead breakfast burritos, mouthwatering meatball subs, or flavorful grilled pork tenderloin, freezer meals offer a stress-free solution to your dinner dilemmas. By planning and prepping your meals in advance, you can minimize time spent in the kitchen and maximize time spent with your loved ones.
So why not start filling your freezer with these freezer-friendly recipes? With a little bit of organization and some creative meal planning, you can enjoy the convenience of make-ahead freezer meals and make dinnertime a breeze. Say goodbye to the hassle of last-minute meal preparations and say hello to stress-free and enjoyable dinners!
FAQ
What are make ahead freezer meals?
Make ahead freezer meals are meals that you can prepare in advance and store in the freezer for later use. These meals are a convenient and time-saving solution for busy families.
Why should I make ahead freezer meals?
Make ahead freezer meals save time and money in the kitchen. By preparing meals in advance, you can easily have delicious and convenient dinners ready to enjoy, even on the busiest of days.
How do I prepare and store make ahead freezer meals?
Choose meals that require minimal work on the back end, package them in airtight containers or freezer bags, and freeze them. It’s important to minimize air exposure to prevent freezer burn and maintain the quality of the meals.
What are the best options for storing make ahead freezer meals?
You can use rigid freezer containers with lids, gallon-sized freezer bags, or wide-mouth mason jars for soups and sauces. The key is to minimize air exposure to prevent freezer burn.
How do I safely thaw freezer meals?
Thaw freezer meals in the refrigerator for 24-48 hours. Alternatively, use the cold water thawing method by placing the sealed meal in a bag and submerging it in cold water, changing the water every 30 minutes. The microwave can also be used, but be cautious as it may affect the texture and moisture of the food.
What are some easy side dishes to serve with freezer meals?
Some easy side dish ideas include baby carrots and veggie sticks with dip, store-bought guacamole and salsa with tortilla chips, fresh fruits, pre-packaged salads, and baked beans.
How do I make make-ahead meatball subs?
Bake the meatballs, freeze them, and then thaw and rewarm when ready to eat. Serve them on mini buns with grated Parmesan and Provolone slices for a tasty and satisfying meal.
How do I make freezer-friendly beef taquitos?
Prepare the taquitos, freeze them, and then bake them straight from the freezer. Serve them with your favorite Mexican toppings such as guacamole, sour cream, and salsa.
How do I make make-ahead chicken Alfredo casserole?
Assemble the casserole without baking and freeze it. When ready to serve, thaw and bake as directed. You can enjoy it as is or serve it over pasta with a side salad and bread for a complete and easy dinner.
How do I make make-ahead breakfast burritos?
Prepare the filling, build the burritos, and freeze them before baking. Thaw and bake when ready to eat, and you’ll have a delicious and convenient breakfast option. Customize the fillings to cater to your taste preferences.
How do I make make-ahead pulled pork?
Cook and shred the meat ahead of time, then freeze it in the sauce. Thaw and rewarm the meat as needed for a quick and satisfying dinner. Serve it with corn on the cob, watermelon, baked beans, or easy coleslaw for a complete meal.
How do I make make-ahead grilled pork tenderloin?
Season the pork tenderloin and freeze it in a freezer bag. Thaw and grill at your destination for a delicious and easy dinner. Leftover grilled pork can also be used in sandwiches with some BBQ sauce.
How do I make make-ahead Italian meatball sliders?
Bake the meatballs, freeze them, and then thaw and rewarm when ready to eat. Serve them on mini buns with grated Parmesan and Provolone slices for a tasty and satisfying meal.
How do I make freezer-friendly vegetarian black bean burritos?
Mash the beans, mix them with tomatoes, cheese, and jalapenos, and fill the burritos. Freeze them and heat them as needed for a quick and delicious lunch or dinner.
Why should I make make-ahead freezer meals?
Make-ahead freezer meals are a game-changer for busy families. With proper prepping and storage, you can enjoy delicious and convenient meals without spending hours in the kitchen.
Source Links
- https://thrivinghomeblog.com/20-freezer-meals-to-take-on-vacation/
- https://www.eatingwell.com/gallery/8008871/make-ahead-freezer-meals/
- https://thrivinghomeblog.com/70-healthy-freezer-meals/
Related Recipes:
 How to Freeze Meatballs for Easy Meals
 Perfect Pairings: What Goes Well with Meatballs
 How to Defrost Ground Beef Quickly
 How to Reheat a Burrito: Keep It Delicious and Moist
 10+ Best Breakfast Recipes And Ideas (30-Minute Meals)
 How to Freeze Pork: Tips for Maintaining Flavor
 How to Tell if Pork is Bad: Identifying Spoiled Meat
 How to Tell if Pork Chops Have Gone Bad


