Single-Malt Single-Hop IPA: A Beginner's Guide to Homebrewing
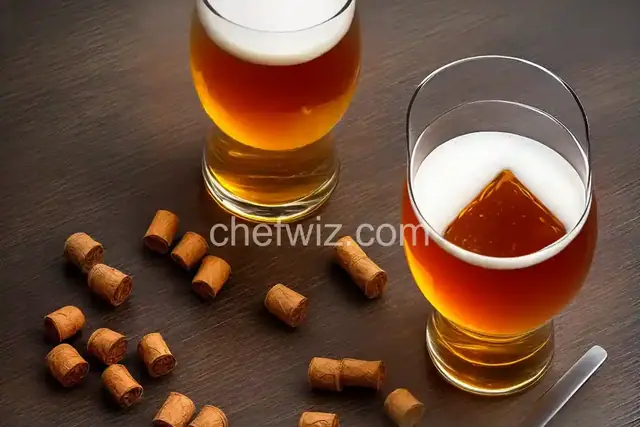
Have you ever wondered what it takes to brew your own beer? The craft beer revolution has inspired many to try their hand at homebrewing, and one popular style for beginners is the Single-Malt Single-Hop IPA. This style allows you to focus on mastering the basics while still creating a delicious and hop-forward beer.
What is a Single-Malt Single-Hop IPA?
A Single-Malt Single-Hop (SMaSH) IPA is a beer that is brewed using only one type of malt and one type of hop. By simplifying the recipe, homebrewers can better understand the impact that each ingredient has on the final product. This style is perfect for beginners who are just starting their homebrewing journey.
Choosing the Right Malt
The malt you choose will have a significant impact on the flavor and color of your beer. For a Single-Malt Single-Hop IPA, it's important to choose a malt that will provide a solid base for the hops to shine. Popular choices include pale malt, pilsner malt, or even Maris Otter for a more complex flavor profile.
Selecting the Perfect Hop
The hop you choose will be the star of your Single-Malt Single-Hop IPA. This is where you can get creative and experiment with different flavors and aromas. Popular hops for IPAs include Cascade, Centennial, and Citra. These hops will give your beer a nice citrusy and floral aroma, with a balanced bitterness.
Mastering the Brewing Process
Now that you've selected your malt and hop, it's time to dive into the brewing process. Brewing beer is a combination of science and art, and it's important to pay attention to every step to ensure a successful brew.
Mashing and Steeping
The first step in the brewing process is mashing and steeping your malt. This involves mixing the malt with hot water to extract the sugars and flavors. The temperature and time at which you mash will affect the body and sweetness of your beer.
Boiling and Hop Addition
After mashing, it's time to bring your wort to a boil. During this process, you'll add your hops at different intervals to achieve the desired bitterness and aroma. For a Single-Malt Single-Hop IPA, you'll want to add the majority of your hops during the last 15 minutes of the boil.
Fermentation and Carbonation
Once your wort has cooled, it's time to transfer it to a fermentation vessel and add your yeast. The yeast will convert the sugars in the wort into alcohol and carbon dioxide. After a week or two of fermentation, your beer will be ready to be carbonated and enjoyed.
In Conclusion
Brewing a Single-Malt Single-Hop IPA is a great way for beginners to dip their toes into the world of homebrewing. By focusing on a single malt and hop, you can better understand the flavors and characteristics they bring to the beer. So, why not give it a try? Brew up a batch of your very own Single-Malt Single-Hop IPA and impress your friends with your brewing skills!
Frequently asked questions
- . Can I use different malts and hops in a Single-Malt Single-Hop IPA?
No, the whole point of a Single-Malt Single-Hop IPA is to focus on the flavors and characteristics of a single malt and hop. Using different malts and hops would defeat the purpose.
- . How long does it take to brew a Single-Malt Single-Hop IPA?
The brewing process for a Single-Malt Single-Hop IPA typically takes around 4-6 weeks. This includes fermentation, carbonation, and conditioning.
- . Can I make adjustments to the recipe?
Absolutely! Brewing is all about experimentation. Feel free to adjust the hop additions, fermentation temperature, or even try different yeast strains to customize the recipe to your liking.
- . Can I dry hop a Single-Malt Single-Hop IPA?
While traditionally a Single-Malt Single-Hop IPA does not involve dry hopping, there's no reason why you can't experiment with it. Dry hopping can enhance the aroma and flavor of your beer.
- . Can I brew a Single-Malt Single-Hop IPA without a homebrew kit?
Yes, you can brew a Single-Malt Single-Hop IPA without a homebrew kit. However, a homebrew kit can make the process easier for beginners by providing all the necessary equipment and ingredients in one package.
- . How do I know if my beer is infected?
If your beer has a sour or off-flavor, strange odors, or excessive carbonation, it may be infected. It's best to consult a homebrewing resource or experienced brewer to confirm.
- . How long should I let my Single-Malt Single-Hop IPA condition before drinking?
It's recommended to let your Single-Malt Single-Hop IPA condition for at least 2-3 weeks before drinking. This will allow the flavors to mellow and the carbonation to fully develop.
- . Can I bottle my Single-Malt Single-Hop IPA instead of kegging?
Absolutely! Bottling is a common method of packaging homebrewed beer. Just make sure to properly sanitize your bottles and use the correct amount of priming sugar for carbonation.
 By AprilPublished