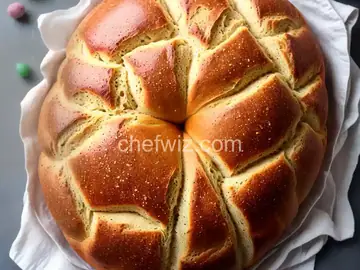
Better No-Knead Bread Recipe
Rate this recipeBe the first to rate
 By AprilPublished
 Are you tired of spending hours kneading bread dough, only to end up with mediocre results?
 By AprilPublished
 Are you tired of spending hours kneading bread dough, only to end up with mediocre results?
In a large bowl, combine flour, salt, and yeast. Whisk together until well combined.
Add water to the mixture and stir using a wooden spoon until there are no dry flour particles left.
Cover the bowl tightly with plastic wrap and let it sit at room temperature for a minimum of 12 hours and a maximum of 24 hours.
Transfer the bowl to the refrigerator and let it sit for at least 3 days and up to 5 days.
Remove the dough from the refrigerator and place it on a floured surface.
Turn the dough once or twice and shape it into a loaf.
Cover the loaf with a floured kitchen towel and let it rise at room temperature for at least 2 hours, and up to 4 hours.
Adjust the oven rack to the lower-middle position and preheat the oven to 450°F (230°C). Place a heavy cast-iron or stainless steel Dutch oven inside the oven.
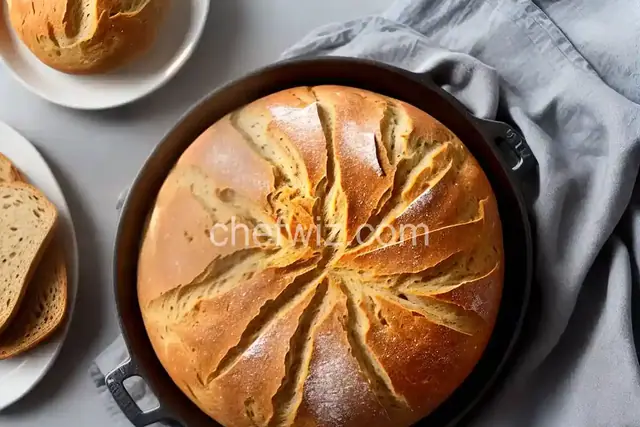
When the dough has risen, use a floured knife to make 2 or 3 slashes, about 1/2 inch deep, on the top of the loaf.
Remove the Dutch oven from the oven and quickly place the dough inside.
Put the lid back on the Dutch oven and return it to the oven.
Bake for 15 minutes, then remove the lid and continue baking until the center of the bread reaches a temperature of 209
Are you tired of spending hours kneading bread dough, only to end up with mediocre results? Look no further! In this article, we'll share with you a better no-knead bread recipe that will give you delicious, bakery-quality bread with minimal effort. Say goodbye to sore arms and hello to fluffy, crusty homemade bread.
Imagine a bread recipe that requires no kneading. It may sound too good to be true, but it's not! The secret lies in the long fermentation process that allows the gluten to develop naturally. This method, popularized by the famous baker Jim Lahey, produces a bread with a chewy interior and a crispy crust that will rival any artisan loaf.
Many people believe that kneading is essential for developing gluten, but the truth is, time can do the job just as well. By allowing the dough to ferment slowly, the gluten strands have ample time to form and create the desired texture. Plus, the hands-off approach means less time and effort on your part.
Now that you understand the magic behind no-knead bread, it's time to get baking. Here's a simple recipe to get you started:
Before you begin, make sure you have the following ingredients:
In a large bowl, combine the flour, water, yeast, and salt. Give it a good stir until all the ingredients are well incorporated. The dough will be sticky, but don't worry, that's normal. Cover the bowl with plastic wrap and let it sit at room temperature for at least 12 hours or overnight.
Preheat your oven to 450째F (230째C) and place a Dutch oven or a similar oven-safe pot with a lid into the oven while it preheats. Once the oven is hot, carefully remove the pot and place the dough into it. Cover the pot with the lid and return it to the oven. Bake for 30 minutes with the lid on, then remove the lid and bake for an additional 15-20 minutes until the bread is golden brown.
With this better no-knead bread recipe, you can enjoy freshly baked bread without the hassle of kneading. The long fermentation process creates a flavorful and textured loaf that will impress your family and friends. So, why wait? Grab your ingredients and get ready to bake your way to bread heaven!
Absolutely! Whole wheat flour adds a nutty flavor and nutritional benefits to your bread. Just keep in mind that whole wheat flour absorbs more liquid, so you may need to adjust the water accordingly.
Of course! Feel free to experiment with different flavors and add-ins. Fresh herbs, grated cheese, or even dried fruits and nuts can take your bread to the next level.
Yes, you can substitute instant yeast for active dry yeast. However, keep in mind that the rising times may differ, so it's always best to follow the recipe instructions provided.
The best way to determine if your bread is fully baked is to check its internal temperature. It should register around 190째F (88째C) on an instant-read thermometer. Additionally, the bread should have a golden brown crust and sound hollow when tapped on the bottom.
Absolutely! If you want to make a larger batch, simply double the ingredients. Just make sure you have a big enough pot to accommodate the increased dough volume.
Yes, you can freeze the dough after the initial fermentation. Simply shape the dough into a ball, wrap it tightly in plastic wrap, and place it in a freezer bag. When you're ready to bake, thaw the dough in the refrigerator overnight, then proceed with the recipe as usual.
While a bread machine can be convenient for kneading dough, it's not necessary for this no-knead recipe. Mixing the dough by hand is quick and easy, and it allows you to have more control over the process.
Freshly baked bread is best enjoyed within the first few days. To keep it fresh for longer, store it in a paper bag or a bread box at room temperature. Avoid storing it in the refrigerator, as it can cause the bread to dry out.
AprilCook, recipe developer and the heart of Chefwiz. More about April