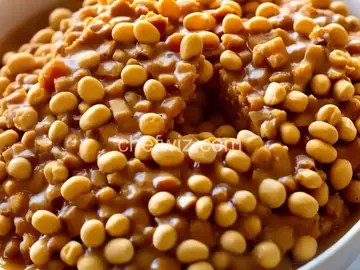
Salted Nut Roll Squares
Rate this recipeBe the first to rate
 By AprilPublished
 Are you a fan of sweet and salty treats? If so, you're in for a treat with these delicious Salted Nut Roll Squares.
 By AprilPublished
 Are you a fan of sweet and salty treats? If so, you're in for a treat with these delicious Salted Nut Roll Squares.
Start by pouring half of the peanuts into the bottom of a 9x13-inch baking dish.
In a microwave-safe glass or ceramic bowl, melt the peanut butter chips and butter. Do this by microwaving them in 30-second intervals, stirring after each interval. Continue this process until the chips and butter are melted, which should take around 1 to 3 minutes.
Once melted, add the sweetened condensed milk to the bowl and stir until well combined. Microwave the mixture for an additional 30 seconds to heat it through.
Next, stir the marshmallows into the butter mixture until they are completely melted and incorporated.
Pour the marshmallow mixture over the peanuts in the baking dish.
Sprinkle the remaining peanuts over the top of the marshmallow mixture.
Cover the peanuts with a sheet of waxed paper and press down firmly to create an even layer in the pan.
Remove the wax paper and allow the mixture to cool completely.
Once cooled, cut the mixture into squares and serve.
Are you a fan of sweet and salty treats? If so, you're in for a treat with these delicious Salted Nut Roll Squares. Imagine a chewy and gooey base, topped with a layer of creamy caramel and crunchy salted nuts. It's a winning combination that will leave your taste buds dancing with delight.
1. Sweet and Salty: The combination of sweet caramel and salted nuts creates a perfect balance of flavors that will satisfy your cravings.
2. Easy to Make: These squares are simple to prepare, making them a great option for a quick and delicious homemade treat.
3. Crowd Pleaser: Whether you're serving them at a party or sharing with friends and family, these squares are sure to be a hit with everyone.
Creating these delectable Salted Nut Roll Squares is a breeze. Start by preparing the chewy base, which provides the perfect foundation for the caramel and nutty topping. Once the base is baked to perfection, it's time to spread a layer of creamy caramel and sprinkle it generously with salted nuts. Pop it back in the oven to let everything meld together, and voila - you have a batch of irresistible Salted Nut Roll Squares ready to be devoured.
A: Absolutely! Feel free to experiment with different types of nuts to find your favorite combination.
A: Yes, you can make a batch of Salted Nut Roll Squares ahead of time and store them in an airtight container for up to a week.
A: While store-bought caramel can be used, homemade caramel adds a special touch to these squares. It's worth the extra effort.
A: Yes, you can freeze Salted Nut Roll Squares for up to three months. Just make sure to thaw them before serving.
A: These squares typically take around 25-30 minutes to bake, but it may vary depending on your oven.
A: Absolutely! Adding a layer of melted chocolate on top of the caramel and nuts can take these squares to the next level of deliciousness.
A: Yes, you can use a gluten-free flour substitute to make these squares suitable for those with gluten sensitivities.
A: While the recipe calls for sugar, you can experiment with alternative sweeteners like honey or maple syrup for a different flavor profile.
In conclusion, Salted Nut Roll Squares are a delightful combination of sweet and salty flavors that will leave you craving more. These easy-to-make treats are perfect for any occasion and are sure to be a hit with everyone who tries them. So why not whip up a batch today and treat yourself to a little slice of heaven?
AprilCook, recipe developer and the heart of Chefwiz. More about April