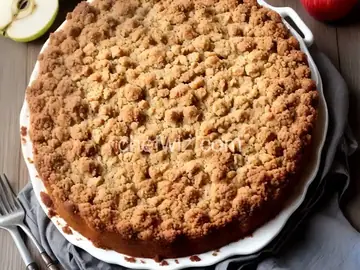
Prebaked Pie Shell
Rate this recipeBe the first to rate
 By AprilPublished
 Are you tired of soggy pie crusts that ruin your otherwise delicious desserts?
 By AprilPublished
 Are you tired of soggy pie crusts that ruin your otherwise delicious desserts?
In a large bowl, combine the flour, lard, butter, and salt. Use your fingertips to mix the ingredients lightly until the dough forms grape-sized pieces. It is important to still have visible chunks of fat.
Stir in the iced water. Gently knead the dough, handling it as little as possible, until it forms a ball. If needed, add a little more iced water.
Transfer the dough to a plastic bag and shape it into a log. Cut the log into 2 pieces and place each piece in an airtight bag. Seal the bags, removing any air, and refrigerate for 1 hour or up to 3 days. The pie dough can also be frozen for up to a week.
Roll out half of the dough to a 12-inch round, approximately 1/8 inch thick. Use the rolled dough to line a buttered and floured 10-inch pie pan, pressing it well into the bottom and sides without stretching.
Chill the lined pie pan for 30 minutes.
Preheat the oven to 350 degrees.
Cut out a circle of aluminum foil or parchment paper and place it inside the chilled pie shell. Fill the shell with rice, beans, or ceramic pie weights.
Bake the pie shell for about 15 minutes, or until the edges are lightly golden and starting to separate from the sides of the pan.
Are you tired of soggy pie crusts that ruin your otherwise delicious desserts? Look no further than the prebaked pie shell! This simple yet essential technique can make all the difference in achieving a perfectly crisp and golden crust that holds up to any filling. In this article, we'll explore the magic of prebaking and how it can elevate your pie game to new heights.
Imagine building a house without a solid foundation. The same goes for pies. By prebaking the crust, you create a sturdy base that prevents the filling from seeping into the pastry and turning it into a mushy mess. It's like putting on a raincoat before heading out into a storm – you're protected from the elements, and your pie crust is shielded from the moisture in the filling.
Prebaking a pie shell is a simple process that requires just a few extra steps. Start by rolling out your pastry dough and transferring it to a pie dish. Next, prick the bottom of the crust with a fork to prevent it from puffing up during baking. Line the crust with parchment paper or aluminum foil and fill it with pie weights or dried beans. This will help the crust maintain its shape and prevent it from shrinking.
Here are some expert tips to ensure your prebaked pie shell turns out perfectly every time:
Prebaking a pie shell is a game-changer when it comes to achieving a perfectly crisp and flaky crust. By taking the extra step of prebaking, you ensure that your pie holds up well, even with moist fillings. So the next time you're planning to bake a pie, don't forget to prebake the shell for a truly outstanding dessert experience.
Absolutely! Just make sure to thaw the frozen pie shell before prebaking it.
Yes, you can reuse pie weights as long as they are clean and free from any debris.
Yes, you can use dried beans or rice as a substitute for pie weights.
You can store a prebaked pie shell at room temperature for up to 2 days, or in the refrigerator for up to 5 days.
Yes, you can freeze a prebaked pie shell for up to 3 months. Just make sure to wrap it tightly in plastic wrap or aluminum foil.
Absolutely! Prebaking the pie shell ensures that it holds up well when filled with a no-bake filling.
It is recommended to prebake the pie shell for fruit pies that have a very moist filling to prevent the crust from becoming soggy.
Leftover prebaked pie shells can be used to make mini pies, tartlets, or even savory quiches.
AprilCook, recipe developer and the heart of Chefwiz. More about April