Pita Bread
Rate this recipeBe the first to rate
 By AprilPublished
 When it comes to culinary delights, few dishes can match the versatility and deliciousness of pita bread.
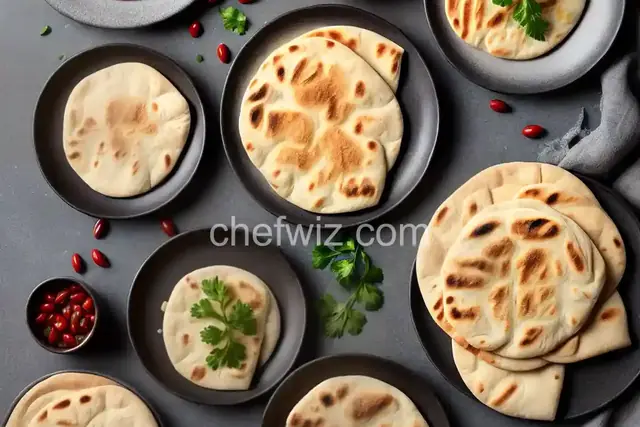 By AprilPublished
 When it comes to culinary delights, few dishes can match the versatility and deliciousness of pita bread.
In the mixing bowl of a heavy-duty electric mixer, attach the dough hook and combine the yeast, sugar, and warm water. Stir the mixture until well blended and let the yeast sit until it becomes foamy, which usually takes around 5 to 10 minutes.
Add the salt to the mixture and gradually incorporate the flour into the bowl. Mix at the lowest speed until all the flour is fully combined and the dough forms a ball. This process should take approximately 4 minutes.
Transfer the dough to a lightly floured surface and knead it until it becomes smooth and elastic.
Place the dough in a lightly oiled bowl, ensuring all sides are coated, and cover it with plastic wrap. Allow the dough to rise until it doubles in size, which typically takes around 1 1/2 hours.
Position a large pizza stone on the lower rack of the oven and preheat both the oven and the stone to 500 degrees F.
Once the dough has risen, punch it down and divide it into 8 equal pieces. Shape each piece into a ball, ensuring they are lightly floured and covered while you work. Allow the dough balls to rest, covered, for 15 minutes to make rolling them out easier.
Using a rolling pin, flatten each dough ball into a smooth, circular shape that is approximately 8 inches in diameter and 1/4 inch thick. Make sure there are no creases or
When it comes to culinary delights, few dishes can match the versatility and deliciousness of pita bread. Whether you're a fan of Mediterranean cuisine or simply looking for a tasty alternative to traditional bread, pita bread has you covered. In this article, we will explore the many uses and benefits of pita bread, as well as answer some common questions about this beloved food.
Unlike your typical loaf of bread, pita bread is unique in its ability to be transformed into a pocket. This makes it perfect for stuffing with a variety of ingredients, from falafel and hummus to fresh vegetables and grilled meats. The pocket-like structure of pita bread allows you to create your own flavor combinations, making it a customizable and versatile option for any meal.
Not only is pita bread great for stuffing, but it also serves as an excellent vessel for dipping. The soft and chewy texture of pita bread makes it the perfect companion for creamy dips like tzatziki or baba ganoush. Its sturdy nature ensures that it won't break or crumble when dipped, providing a satisfying experience with every bite.
If you're looking to make healthier choices in your diet, pita bread is a fantastic option. Compared to traditional sliced bread, pita bread is lower in calories and carbohydrates. It also contains more fiber, which helps promote digestion and keeps you feeling full for longer. Additionally, pita bread is a good source of protein, making it a great choice for those following a vegetarian or vegan diet.
Another benefit of pita bread is its lower sodium content compared to some other bread options. This makes it a suitable choice for individuals who need to monitor their sodium intake due to health concerns. With pita bread, you can enjoy the taste and texture of bread without compromising your dietary goals.
Pita bread's versatility extends beyond just being a pocket. It can be used in a variety of creative ways to elevate your meals. For example, you can cut pita bread into wedges, toast them, and use them as a crunchy topping for salads or soups. You can also grill or bake pita bread to create crispy chips that pair well with salsa or guacamole.
Looking to satisfy your sweet tooth? Pita bread can even be transformed into a delicious dessert. Simply brush it with melted butter, sprinkle it with cinnamon and sugar, and bake until crispy. The result is a sweet and crispy treat that is sure to satisfy your cravings.
Pita bread is a culinary delight that offers endless possibilities. Its versatility, health benefits, and ability to transform into a pocket make it a beloved choice for many food enthusiasts. From savory dishes to sweet indulgences, pita bread has something to offer everyone. So next time you're looking to add a delicious twist to your meal, reach for the humble but mighty pita bread.
Yes, pita bread can be easily frozen. Just make sure to wrap it tightly in plastic wrap or place it in a freezer bag to prevent freezer burn. When you're ready to use it, simply thaw it at room temperature or in a toaster oven.
No, traditional pita bread is made with wheat flour and is not gluten-free. However, there are gluten-free alternatives available, such as pita bread made from alternative flours like chickpea or rice flour.
Absolutely! Making your own pita bread can be a fun and rewarding experience. There are many recipes available online that guide you through the process, allowing you to enjoy the taste of freshly baked pita bread in the comfort of your own home.
Pita bread typically stays fresh for 2-3 days when stored in a cool, dry place. To extend its shelf life, you can store it in the refrigerator or freezer.
Absolutely! Pita bread makes an excellent alternative to traditional sandwich bread. The pocket-like structure allows you to stuff it with your favorite sandwich fillings, creating a portable and delicious meal.
Pita bread has its roots in the Middle East and Mediterranean regions, where it has been a staple for centuries. It is believed to have originated in ancient Mesopotamia, and its popularity has spread worldwide over the years.
Yes, there are many vegan-friendly options available when it comes to pita bread. Traditional pita bread is typically vegan, as it is made from simple ingredients like flour, water, yeast, and salt. However, it's always a good idea to check the ingredient list to ensure there are no animal-derived additives.
Absolutely! Pita bread can be a surprising and delicious addition to your dessert repertoire. From sweet fillings like Nutella and bananas to fruity combinations like berries and cream, the possibilities are endless when it comes to incorporating pita bread into your sweet treats.
AprilCook, recipe developer and the heart of Chefwiz. More about April