Ombre Wave Shark Cake
Rate this recipeBe the first to rate
 By AprilPublished
 Are you ready to dive into the world of baking? Imagine creating a stunning masterpiece that not only tastes amazing but also looks like a work of art.
 By AprilPublished
 Are you ready to dive into the world of baking? Imagine creating a stunning masterpiece that not only tastes amazing but also looks like a work of art.
Preheat the oven to 350 degrees F.
Coat five 6-inch round cake pans with flour-based baking spray.
In the bowl of an electric mixer fitted with the whisk attachment, combine the flour, granulated sugar, cake mixes, and salt. Whisk on low speed until combined.
Add the sour cream, eggs, and 2 cups of water. Mix on medium speed until just combined.
Stop the mixer and scrape down the sides of the bowl. Add the vanilla extract. Mix again until no streaks of the dry ingredients remain.
Divide 1 cup of batter between two small bowls (1/2 cup in each).
Tint one bowl of batter with blue food color and tint the other with teal food color. Stir to combine.
Divide the remaining white cake batter among the prepared pans.
Spoon a little blue and teal batter into each pan and swirl the colors together with a skewer or butter knife.
Bake the cakes until they are lightly browned and a toothpick tester inserted near the center comes out clean, about 30 minutes.
Let the cakes cool completely.
Level each cake layer using a serrated knife or a wire cake leveler.
Swiss meringue buttercream:
Set a saucepan filled one-third full of water over medium-high heat and bring to a simmer.
Whisk together the egg whites,
Are you ready to dive into the world of baking? Imagine creating a stunning masterpiece that not only tastes amazing but also looks like a work of art. If you're a fan of the ocean and all its wonders, then the Ombre Wave Shark Cake is the perfect creation for you. In this article, we will explore the process of making this visually stunning cake that will leave your taste buds and your guests in awe.
Before you embark on your baking journey, it's essential to make a plan. Just like a captain navigating the high seas, you need to know what lies ahead. First, gather all the necessary ingredients and tools. From flour to baking powder, butter to sugar, and of course, the food coloring to achieve that beautiful ombre effect. It's like putting together your very own treasure map.
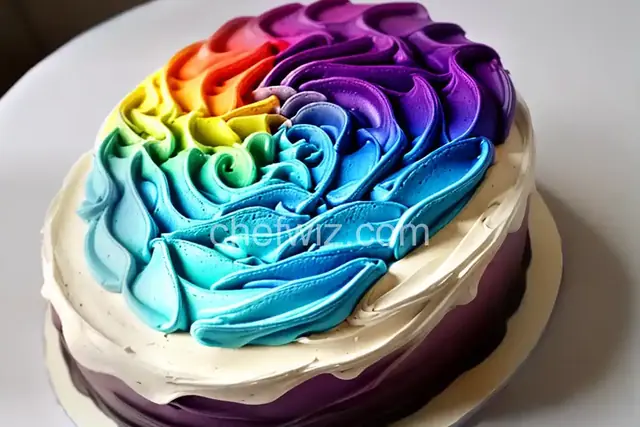
Now that you have everything you need, it's time to start creating the waves. Just like the waves crashing against the shore, you'll be layering different shades of blue to create a mesmerizing ombre effect. Think of it as blending different hues of the ocean to bring your cake to life.
As the waves come to life, it's time to introduce the star of the show - the shark. Picture yourself sculpting a shark out of fondant, molding its sharp teeth and fierce eyes. This is where your artistic skills will shine. You'll be amazed at how a simple piece of sugar can transform into a lifelike creature.
Now that all the elements are ready, it's time to bring them together and assemble your oceanic masterpiece. Layer by layer, you'll see the waves forming and the shark coming to life. It's like building a sandcastle on the beach, but instead of sand, you're using layers of delicious cake and frosting. The anticipation builds as you add each layer, creating a sense of excitement and wonder.
Once your cake is assembled, it's time to add those finishing touches that will truly make it stand out. Just like a real shark gliding through the water, you'll use piping bags filled with frosting to create intricate details. From the shark's gills to the foam on the waves, these details will bring your creation to a whole new level.
As you take in the final result, you'll be amazed at how a simple cake can transport you to the depths of the ocean. The ombre waves crashing against the shore, the fierce shark gliding through the water - it's a feast for the senses. Not only will your taste buds be delighted by the flavors, but your eyes will also be captivated by the visual spectacle.
The Ombre Wave Shark Cake is not just a dessert; it's an experience. From the planning stages to the final assembly, every step is an adventure in itself. So why not embark on this baking journey and create a masterpiece that will leave a lasting impression on all who see it? Let your creativity flow, and dive into the world of the Ombre Wave Shark Cake - a delicious treat for ocean lovers.
Yes, you can experiment with different colors to suit your preferences. Feel free to create an ombre effect using shades of purple, green, or any other color that appeals to you.
While it may seem daunting at first, with practice and patience, you'll be able to create a lifelike shark. Start with simple shapes and gradually work your way up to more intricate details.
Absolutely! You can use any type of cake that you enjoy. Whether it's a classic vanilla or a rich chocolate, the choice is yours.
The time required to make this cake will depend on your baking skills and experience. On average, it can take anywhere from a few hours to half a day.
Definitely! The Ombre Wave Shark Cake is perfect for birthdays, beach-themed parties, or any special occasion that calls for a unique and visually stunning dessert.
Yes, you can bake the cake layers ahead of time and store them in the freezer. When you're ready to assemble the cake, simply thaw the layers and proceed with the assembly process.
The possibilities are endless! You can try your hand at creating other sea creatures like dolphins, turtles, or even a school of fish. Let your imagination run wild!
Absolutely! You can add seashells, edible pearls, or even a sprinkle of edible glitter to enhance the oceanic theme. Get creative and make it your own.
AprilCook, recipe developer and the heart of Chefwiz. More about April