Homemade Granola Bars
Rate this recipeBe the first to rate
 By AprilPublished
 Are you tired of buying expensive and unhealthy snacks from the store?
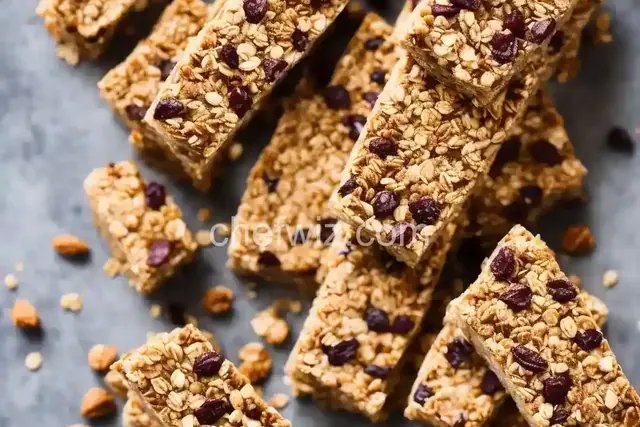 By AprilPublished
 Are you tired of buying expensive and unhealthy snacks from the store?
Prepare an 8x8 baking pan by lining it with parchment paper.
In a large bowl, combine the peanut butter, honey, vanilla, and salt. Stir until the mixture is smooth.
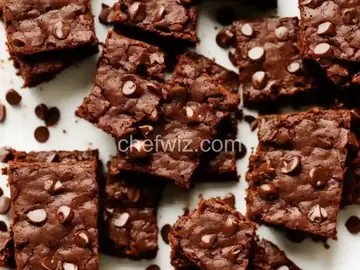
Add the oats, chocolate chips, and pepitas (or nuts) to the bowl. Keep stirring until everything is well combined. The mixture may initially appear dry, but continue stirring and it will come together.
Transfer the mixture to the prepared baking pan. Use the back of a measuring cup, along with a second piece of parchment paper, to press the mixture firmly into the pan, ensuring it is evenly spread.
Place the pan in the refrigerator and let it chill for at least 1 hour.
Once chilled, remove the pan from the refrigerator and slice the mixture into bars.
Store the bars in the refrigerator until ready to serve.
Are you tired of buying expensive and unhealthy snacks from the store? Look no further than homemade granola bars! These delightful treats are not only delicious but also packed with nutrients, making them the perfect snack for any time of the day. In this article, we will explore the benefits of making your own granola bars and provide you with some easy and customizable recipes to try. So, let's dive in!
Have you ever wondered what goes into those store-bought granola bars? Often, they are loaded with artificial flavors, preservatives, and excess sugar that can be harmful to your health. By making your own granola bars, you have full control over the ingredients. You can choose wholesome and nutritious options such as oats, nuts, seeds, dried fruits, and even dark chocolate. Plus, they are super easy to make!
One of the greatest advantages of making your own granola bars is the ability to customize them according to your taste preferences and dietary needs. Do you love a certain type of nut or seed? Add it in! Want to reduce the sugar content? Replace it with natural sweeteners like honey or maple syrup. The possibilities are endless, and you can experiment with different flavors and combinations until you find your perfect granola bar recipe.
Life can get hectic, and having a convenient snack on hand is a game-changer. Homemade granola bars are the ideal on-the-go snack, whether you're heading to work, going for a hike, or simply need a little pick-me-up during the day. They are portable, easily stored, and provide a quick boost of energy. Plus, they are much healthier than reaching for a bag of chips or a candy bar.
Now that we've convinced you to give homemade granola bars a try, let's dive into the process. Making granola bars is a simple and fun activity that you can involve your whole family in. You'll only need a few basic ingredients and some creativity to get started. Here's a general outline of the process:
The beauty of granola bars is that you can mix and match ingredients to suit your taste. Start with a base of oats and add in your choice of nuts, seeds, dried fruits, and any other extras you desire. This is also the time to decide if you want to add some sweetness with honey, maple syrup, or another natural sweetener.
In a large bowl, combine all your dry ingredients and give them a good mix. In a separate small saucepan, heat your sweetener of choice until it becomes runny and easy to pour. Pour the sweetener over the dry ingredients and mix until everything is well coated.
Transfer the mixture to a lined baking dish and press it down firmly to create an even layer. This will ensure that your granola bars hold together nicely. Bake the mixture in the oven at a moderate temperature until it becomes golden brown and fragrant.
Once your granola bars are baked to perfection, remove them from the oven and let them cool completely. This step is crucial, as it allows the bars to set and become firm. Once cooled, carefully cut them into your desired shape and size. Store them in an airtight container for maximum freshness.
A1: Absolutely! By making your own granola bars, you have control over the ingredients and can avoid adding unhealthy additives and excessive sugar.
A2: Of course! Nuts are a popular addition to granola bars, but you can easily omit them or replace them with seeds or dried fruits for added texture and flavor.
A3: When stored in an airtight container, homemade granola bars can last up to two weeks. However, they are so delicious that they rarely last that long!
A4: Yes, you can! There are many no-bake granola bar recipes available that use ingredients like nut butter and dates to hold the bars together.
A5: Absolutely! Freezing granola bars is a great way to extend their shelf life. Just make sure to wrap them individually to prevent them from sticking together.
A6: Yes, they are! Granola bars contain a good balance of carbohydrates, healthy fats, and protein, making them an excellent source of sustained energy.
A7: Definitely! If you have a gluten intolerance or allergy, opt for certified gluten-free oats to ensure your granola bars are safe to consume.
A8: Of course! Dark chocolate chips or chunks can be a wonderful addition to your granola bars, adding a touch of sweetness and decadence.
In conclusion, homemade granola bars are a fantastic alternative to store-bought snacks. Not only are they healthier, but they also allow you to get creative in the kitchen and customize them to your heart's content. Whether you prefer a chewy or crunchy texture, a sweet or savory flavor, there's a granola bar recipe out there for you. So, why not give it a try and whip up a batch of these delicious and nutritious treats today?
AprilCook, recipe developer and the heart of Chefwiz. More about April