Home Made Top Tarts!
Rate this recipeBe the first to rate
 By AprilPublished
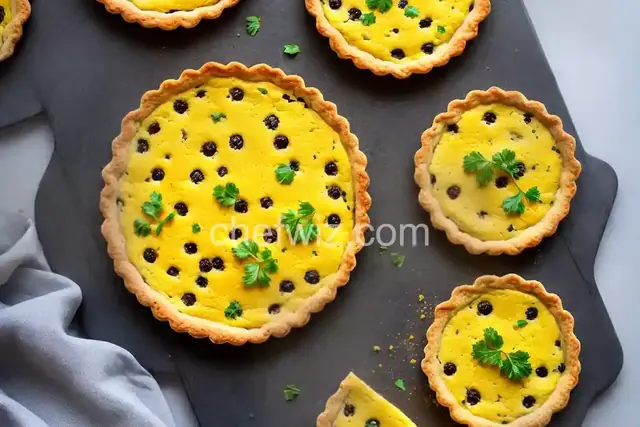
 Who doesn't love a delicious tart? Whether it's a fruity delight or a rich and creamy treat, tarts have a way of satisfying our cravings in the most delightful way.
 By AprilPublished
 Who doesn't love a delicious tart? Whether it's a fruity delight or a rich and creamy treat, tarts have a way of satisfying our cravings in the most delightful way.
Preheat the oven to 425 degrees F (220 degrees C).
Prepare 2 baking sheets by lining them with parchment paper.
Place the unrolled pie crusts on a lightly floured surface and slightly roll them with a rolling pin to square the edges.
Cut each crust into 8 equal-sized rectangles.
Take 8 of the squares and place about 2 teaspoons of strawberry jam in the center of each square.
Spread the jam out to within 1/4-inch of the edge.
Take the remaining 8 pastry squares and place them on top of the jam-filled squares.
Use a fork to crimp the edges together, sealing in the jam.
If desired, use a knife to trim any excess pastry.
Transfer the filled pastries to the prepared baking sheets.
Bake in the preheated oven for approximately 7 minutes, or until the edges are lightly golden brown.
Allow the pastries to cool on the baking sheets.
In a bowl, mix together confectioners' sugar, milk, and vanilla extract to create a spreadable frosting.
Spread the cooled pastries with the frosting.
Sprinkle colored sugar over the frosted pastries.
Who doesn't love a delicious tart? Whether it's a fruity delight or a rich and creamy treat, tarts have a way of satisfying our cravings in the most delightful way. But have you ever considered making your own homemade top tarts? Not only is it a fun and rewarding experience, but it also allows you to create customized flavors and experiment with different combinations of ingredients. So let's dive into the wonderful world of homemade top tarts and discover how you can become a tart-making pro!
There's something truly special about creating your own food from scratch. Making your own top tarts allows you to have full control over the ingredients, ensuring that you use only the freshest and highest quality products. You can also customize the flavors to suit your preferences and dietary needs. Plus, the process of making tarts can be a therapeutic and enjoyable experience, allowing you to unleash your creativity in the kitchen.
When it comes to making top tarts, the possibilities are endless. You can experiment with a variety of flavors, from classic combinations like apple and cinnamon to more unique pairings like blueberry and lavender. The tart shell acts as a canvas for your creativity, and you can let your imagination run wild with different fillings and toppings. The joy of flavors is that you can create something truly unique and personalized to your taste.
One of the things that makes top tarts so delightful is the combination of textures. The crisp and buttery tart shell contrasts perfectly with the smooth and creamy filling, creating a symphony of flavors and sensations in every bite. Whether you prefer a velvety custard or a tangy fruit filling, the interplay of textures is what elevates a tart from good to unforgettable.
Now that you're ready to embark on your tart-making journey, here are some tips to ensure your creations turn out perfectly:
The tart shell is the foundation of any great tart. To achieve a crisp and golden crust, make sure to chill the dough before rolling it out. This helps prevent shrinkage during baking. Don't forget to blind bake the shell by pricking it with a fork and lining it with parchment paper and pie weights. This ensures that the shell bakes evenly and maintains its shape. Once the shell is baked and cooled, it's ready to be filled with your delicious concoctions.
When it comes to filling your tart, the options are limitless. From luscious fruit compotes to decadent chocolate ganache, choose flavors that complement each other and create a harmonious balance. Make sure to spread the filling evenly and level it with a spatula for a polished finish. If you're adding any toppings, such as fresh fruits or whipped cream, do so just before serving to maintain their freshness and visual appeal.
Homemade top tarts are a delightful way to indulge your taste buds and impress your loved ones. With a little practice and experimentation, you'll soon become a tart-making pro. So gather your ingredients, unleash your creativity, and enjoy the sweet rewards of your homemade top tarts!
Absolutely! If you're short on time or prefer the convenience, store-bought tart shells are a great option. Just make sure to follow the instructions on the packaging for best results.
Yes, you can freeze your homemade tarts! Once baked and cooled, wrap them tightly in plastic wrap or aluminum foil and place them in an airtight container. They can be stored in the freezer for up to three months. To thaw, simply let them sit at room temperature for a few hours before enjoying.
To prevent a soggy tart shell, make sure to brush the baked shell with a thin layer of melted chocolate or egg white. This creates a barrier between the filling and the shell, keeping it crisp and delicious.
Absolutely! If you prefer to use alternative sweeteners like honey, maple syrup, or agave nectar, go ahead and experiment. Just keep in mind that the consistency and sweetness may vary, so adjust accordingly.
Of course! Mini tarts are a great option for parties or when you want to create individual servings. Simply divide the dough and filling into smaller portions and adjust the baking time accordingly.
Absolutely! There are plenty of gluten-free tart shell recipes available that use alternative flours like almond flour or gluten-free all-purpose flour. Just make sure to follow a trusted recipe for the best results.
To prevent your tart filling from cracking, make sure not to overmix the ingredients. Overmixing can introduce air bubbles, which can cause the filling to crack during baking. Also, avoid overbaking the tart and let it cool gradually to room temperature before refrigerating.
Absolutely! You can get creative with your tart decorations. From lattice patterns to intricate cut-outs, the sky's the limit. Use cookie cutters or a sharp knife to create shapes on the dough or sprinkle some powdered sugar or cocoa powder for a finishing touch.
Homemade tarts are best enjoyed within 2-3 days of baking. Store them in the refrigerator in an airtight container to keep them fresh for as long as possible. Remember to bring them to room temperature before serving for the best flavor and texture.
AprilCook, recipe developer and the heart of Chefwiz. More about April