Amazing Apple Crostata
Rate this recipeBe the first to rate
 By AprilPublished
 Are you a fan of delicious, homemade desserts? Do you love the combination of sweet and tart flavors?
 By AprilPublished
 Are you a fan of delicious, homemade desserts? Do you love the combination of sweet and tart flavors?
In a bowl, combine flour, 2 tablespoons of sugar, and salt. Use an electric mixer to mix until well combined.
Add the butter to the mixture and continue mixing until it resembles coarse meal.
Gradually add the ice water, 2 teaspoons at a time, while the mixer is running. Mix until the dough just holds together. Test the dough by pinching a small amount between your fingers. If it is crumbly, add 1 teaspoon of ice water at a time until it holds together.
Wrap the dough in plastic wrap and refrigerate until slightly firm, for about 20 to 30 minutes.
Preheat the oven to 350 degrees F (175 degrees C).
Squeeze half of the lemon over the apple slices to prevent browning.
Place a large piece of parchment paper on a flat work surface. Roll out the dough into a round shape, about 12 to 16 inches in diameter and 1/4 to 1/2-inch thick.
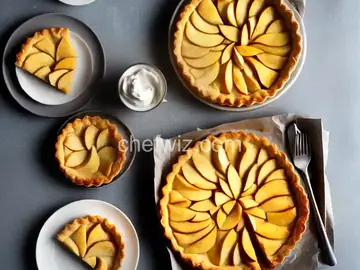
Arrange the apple slices in two layers on the dough, leaving a 1 1/2 to 2-inch border all around. Fold up the border, pleating the edge to fit, and leave most of the apples uncovered.
In a small bowl, combine 1/2 cup of sugar and cinnamon. Sprinkle this mixture over the apples. Squeeze the remaining half of the lemon over the apples and
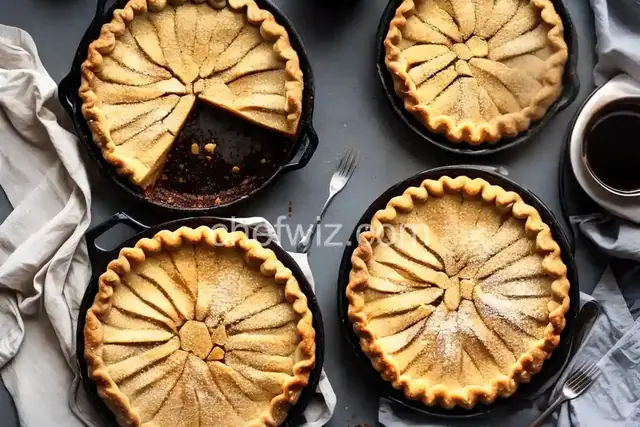
Are you a fan of delicious, homemade desserts? Do you love the combination of sweet and tart flavors? If so, then you're in for a treat with this amazing apple crostata! Picture a warm, flaky crust filled with juicy apples, cinnamon, and a hint of lemon zest. It's the perfect dessert to enjoy on a cozy evening or to impress your guests at a dinner party. So, let's dive in and discover how to create this mouthwatering masterpiece!
Every great crostata starts with a flaky crust that melts in your mouth. It's like a work of art that requires precision and attention to detail. Think of it as a delicate dance between butter, flour, and just the right amount of liquid. The key is to keep the butter cold and work it into the flour until it resembles coarse crumbs. This creates pockets of butter that will steam in the oven and create that sought-after flakiness.
Now that we have our crust ready, it's time to focus on the star of the show – the apple filling! Imagine biting into tender apple slices coated in a heavenly blend of sugar, cinnamon, and a squeeze of lemon juice. It's a burst of flavor that will make your taste buds sing with joy. And the best part? You can customize the filling to your liking. Add a sprinkle of nutmeg for warmth or a handful of raisins for extra sweetness. The possibilities are endless!
Once your crostata is assembled and ready to go, it's time to bake it to perfection. The oven becomes your stage, and you become the conductor of flavors. The heat will work its magic, transforming the raw ingredients into a golden-brown masterpiece. Your kitchen will be filled with the warm aroma of apples and cinnamon, making it impossible to resist taking a peek through the oven door. But remember, patience is key! Let the crostata bake until the crust is beautifully golden and the filling is bubbling with delight.
Creating an amazing apple crostata is a labor of love that rewards both the baker and those lucky enough to taste it. From the flaky crust to the tantalizing filling, each bite is a symphony of flavors that will leave you craving more. So, gather your ingredients, put on your apron, and let your kitchen become the stage for this delectable dessert. Your taste buds will thank you!
Absolutely! While apples are the classic choice, you can experiment with other fruits like pears, peaches, or berries for a unique twist.
Yes, you can prepare the crust ahead of time and refrigerate it until you're ready to assemble the crostata. Just make sure to let it come to room temperature before rolling it out.
Yes, you can freeze the baked crostata for up to three months. Just make sure to wrap it tightly in plastic wrap and aluminum foil to prevent freezer burn.
Absolutely! A scoop of vanilla ice cream or a dollop of whipped cream is the perfect accompaniment to the warm crostata. The contrasting temperatures and textures create a delightful sensory experience.
If you're short on time, store-bought pie crust can be a convenient option. However, keep in mind that making your own crust from scratch will elevate the overall taste and texture of the crostata.
Of course! Chopped walnuts or pecans can add a delightful crunch to the filling. Feel free to get creative and experiment with different nuts and combinations.
While pre-cut apple slices can save time, they may not be as fresh or flavorful as using freshly sliced apples. If possible, it's recommended to slice your own apples for the best results.
Absolutely! Mini crostatas make for a charming individual dessert. Just adjust the baking time accordingly to ensure they are cooked through.
AprilCook, recipe developer and the heart of Chefwiz. More about April