Gluten-Free Red Velvet Cake
Rate this recipeBe the first to rate
 By AprilPublished
 Are you a fan of the classic red velvet cake but follow a gluten-free diet?
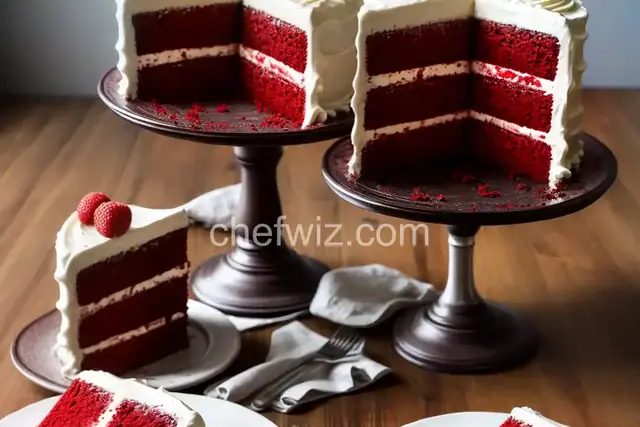 By AprilPublished
 Are you a fan of the classic red velvet cake but follow a gluten-free diet?
Preheat your oven to 300 degrees F (150 degrees C).
Grease and flour a 10-inch springform pan, using gluten-free flour.
In a bowl, combine the gluten-free baking flour, cornstarch, cocoa powder, and baking powder. If the mixture appears clumpy, sift it again.
Place the butter, avocado, applesauce, sugar, vinegar, buttermilk, and vanilla extract in a food processor. Pulse several times and process until well blended.
Mix in the egg yolks and process again. Scrape the mixture into a large bowl.
In a separate mixing bowl, use an electric mixer to beat the egg whites with cream of tartar until stiff peaks form.
Gently fold the egg whites into the avocado mixture, then fold in the flour mixture, taking care to maintain the fluffiness of the batter.
Gently incorporate the red food coloring.
Pour the batter into the prepared springform pan.
Bake in the preheated oven for approximately 1 1/2 hours, or until the center is set and a toothpick inserted into the cake comes out clean.
Allow the cake to cool. As it is gluten-free, it may sink slightly while cooling.
Once cooled, remove the cake from the springform pan before decorating.
Are you a fan of the classic red velvet cake but follow a gluten-free diet? Look no further! In this article, we will guide you through the process of making a delicious and moist gluten-free red velvet cake that will satisfy your sweet tooth. Whether you are gluten intolerant or just looking for a healthier alternative, this recipe is perfect for you.
Creating a gluten-free cake that is moist and fluffy can be a challenge. However, with the right combination of ingredients and techniques, it is absolutely possible. Think of the gluten in traditional cakes as the scaffolding that holds the structure together. In a gluten-free cake, we need to find alternative ways to achieve that moist and fluffy texture.
One key ingredient swap in this recipe is replacing regular flour with a gluten-free flour blend. There are many options available in the market, such as almond flour, rice flour, or a pre-made gluten-free flour mix. These alternatives provide the necessary structure and texture for the cake.
Another important ingredient to include in your gluten-free red velvet cake is xanthan gum. Xanthan gum acts as a binding agent, helping to hold the cake together and prevent it from crumbling. It is a key ingredient in many gluten-free baking recipes and can be found in most grocery stores.
Now that we have covered the basics, let's dive into the step-by-step process of making a gluten-free red velvet cake:
Start by preheating your oven to the recommended temperature. Then, combine the dry ingredients in a bowl and the wet ingredients in another. Gradually mix the wet ingredients into the dry ingredients until well combined. Remember to add the red food coloring for that iconic red velvet look.
Transfer the cake batter into a greased cake pan and smooth the top with a spatula. Place the pan in the preheated oven and bake for the recommended time, or until a toothpick inserted into the center comes out clean. The baking time may vary, so keep an eye on the cake as it bakes.
Once the cake has cooled completely, it's time to frost and decorate it. You can use a classic cream cheese frosting or experiment with other frostings of your choice. Get creative with decorations such as edible flowers, sprinkles, or chocolate shavings to make your gluten-free red velvet cake visually appealing.
Now you know the secrets to making a delicious and moist gluten-free red velvet cake. With the right ingredients and techniques, you can enjoy this classic dessert without worrying about gluten. So go ahead, gather your ingredients, and start baking your own gluten-free masterpiece. Happy baking!
Yes, you can use any gluten-free flour of your choice, such as almond flour, rice flour, or a gluten-free flour blend.
Yes, xanthan gum is essential as it helps bind the ingredients together and prevent the cake from crumbling.
Absolutely! You can use natural food coloring options like beetroot powder or raspberry puree for a vibrant red color.
Yes, you can easily make this cake dairy-free by replacing dairy milk with plant-based milk and using vegan butter or coconut oil in the frosting.
It is recommended to let the cake cool completely before frosting, which usually takes around 1-2 hours.
Yes, you can freeze the cake layers before frosting. Just make sure to wrap them tightly in plastic wrap or foil to prevent freezer burn.
The cake can stay fresh for up to 3-4 days when stored in an airtight container at room temperature.
Definitely! The recipe works well for cupcakes too. Just adjust the baking time accordingly.
AprilCook, recipe developer and the heart of Chefwiz. More about April