Fig Bars II
Rate this recipeBe the first to rate
 By AprilPublished
 Who doesn't love a delicious, sweet treat? Fig bars are a classic choice that can satisfy your cravings and leave you wanting more.
 By AprilPublished
 Who doesn't love a delicious, sweet treat? Fig bars are a classic choice that can satisfy your cravings and leave you wanting more.
Preheat the oven to 325 degrees F (165 degrees C).
Grease and flour a 9x13 inch baking pan.
In a large bowl, beat eggs and sugar until thick and pale.
Sift together the flour, baking powder, salt, cloves, cinnamon, and allspice.
Blend the sifted dry ingredients into the egg mixture along with the vanilla.
Fold in the chopped figs and walnuts.
Pour the batter into the prepared pan and spread it evenly.
Bake for 20 to 25 minutes in the preheated oven, until lightly toasted.
Let the baked mixture cool.
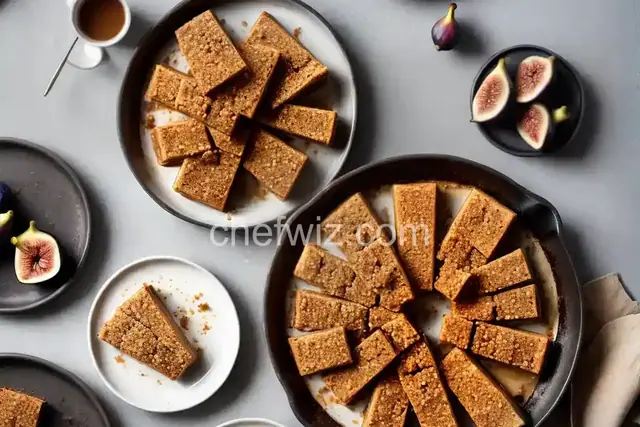
Cut the cooled mixture into squares.
Roll the squares in confectioners' sugar.
Who doesn't love a delicious, sweet treat? Fig bars are a classic choice that can satisfy your cravings and leave you wanting more. In this article, we will explore the world of fig bars and discover some interesting facts and tips to enhance your baking experience. So, let's dive in and uncover the secrets of perfecting your own batch of mouthwatering fig bars!
Fig bars have a unique appeal that sets them apart from other baked goods. The combination of a soft, buttery crust with a sweet and chewy fig filling creates a delightful contrast in every bite. These bars are not only delicious but also versatile. Whether you enjoy them as a snack on the go or as a delectable dessert, fig bars never fail to impress.
The key to a great fig bar lies in its crust. It should be tender yet sturdy enough to hold the luscious fig filling. Achieving the perfect crust requires a delicate balance of ingredients and technique. Just like building a strong foundation for a house, a well-made crust provides the structure for the entire fig bar.
Now, let's talk about the star of the show – the fig filling. Figs, known for their natural sweetness and chewy texture, make an excellent choice for creating a luscious filling. When preparing the fig filling, it's important to strike a balance between the sweetness of the figs and any additional flavors you might want to incorporate. Whether you prefer a hint of cinnamon or a touch of orange zest, the possibilities are endless.
When it comes to baking fig bars, a few tips and tricks can make all the difference. Here are some handy pointers to help you achieve fig bar perfection:
Chilling the dough before rolling it out is crucial for obtaining a flaky and tender crust. It allows the fats in the dough to solidify, resulting in a better texture. So, don't skip this step!
When rolling out the dough, make sure to do it evenly. This ensures that the crust bakes uniformly, preventing any undercooked or overly crispy areas.
Spread the fig filling evenly over the crust to ensure every bite is bursting with flavor. Take your time to distribute it evenly, reaching all the corners and edges.
When cutting your fig bars, a sharp knife is your best friend. It allows for clean, precise cuts without squishing the filling. Remember to wipe the knife clean between each cut for a neater presentation.
Fig bars are a timeless treat that never fails to delight. With the right techniques and a little creativity, you can create your own batch of fig bars that will impress friends and family. Whether you're a seasoned baker or just starting out, these delicious bars are sure to become a favorite. So, roll up your sleeves, gather your ingredients, and let the magic of fig bars unfold in your kitchen!
A1: Absolutely! Dried figs work just as well and provide a more concentrated flavor in the filling.
A2: When stored in an airtight container, fig bars can stay fresh for up to one week.
A3: Yes, you can freeze fig bars for up to three months. Just make sure to wrap them tightly to prevent freezer burn.
A4: Of course! Chopped nuts like walnuts or almonds can add a delightful crunch to the fig filling.
A5: To prevent a soggy crust, make sure to bake the fig bars until the crust is golden brown and the filling is set.
A6: While fig filling is traditional for fig bars, you can experiment with other fruit fillings like raspberry or apricot if you're feeling adventurous.
A7: Absolutely! There are many gluten-free flour alternatives available that can be used to make delicious gluten-free fig bars.
A8: Yes, a simple glaze made with powdered sugar and milk can add a touch of sweetness and make your fig bars even more irresistible.
AprilCook, recipe developer and the heart of Chefwiz. More about April