Easy Gluten-Free Bagels
Rate this recipeBe the first to rate
 By AprilPublished
 Are you tired of missing out on tasty bagels because of a gluten intolerance?
 By AprilPublished
 Are you tired of missing out on tasty bagels because of a gluten intolerance?
Preheat the oven to 400 degrees F (200 degrees C) and prepare a baking sheet by lining it with parchment paper.
In a bowl, combine almond flour, baking powder, and garlic salt.
In a microwave-safe bowl, mix mozzarella cheese and cream cheese. Microwave for 1 minute, then stir. Microwave for another minute, then stir until well combined.
Add the flour mixture and eggs to the melted cheese mixture. Mix quickly until a sticky dough forms.
Knead the dough by hand until it becomes completely uniform, which should take about 2 minutes.
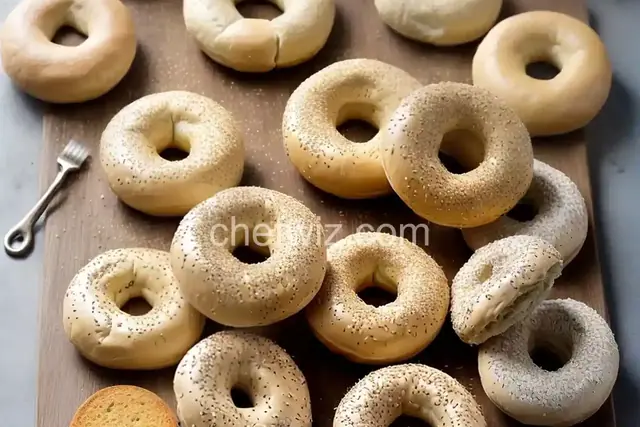
Divide the dough into 6 equal parts. Roll each part into a long log shape and then join the ends together to form a bagel shape. Place the bagels on the prepared baking sheet.
Bake the bagels in the preheated oven for 10 to 14 minutes, or until they turn golden.
If you prefer not to use a microwave, you can melt the cheeses in a double boiler on the stove over low heat. Stir frequently until completely melted.
If the dough becomes hard to mix, too difficult to work with, or still sticky after a couple of minutes, you can reheat it in the microwave for 15 to 20 seconds to soften it. After reheating, wash your hands and knead the dough again. It's important for the dough to be completely uniform, without any separate pieces
Are you tired of missing out on tasty bagels because of a gluten intolerance? Well, fret no more! In this article, we will show you how to make delicious gluten-free bagels that will satisfy your cravings and leave you wanting more.
Gluten is a protein found in wheat, barley, and rye. While it's harmless for most people, those with celiac disease or gluten sensitivity need to avoid it to prevent adverse health effects. Going gluten-free can improve digestion, reduce inflammation, and promote overall well-being.
Bagels are a beloved breakfast staple, but finding a good gluten-free option can be a challenge. Many store-bought gluten-free bagels lack the texture and taste of their wheat counterparts. That's why we're here to help you make your own delicious gluten-free bagels from scratch.
Before we dive into the recipe, let's take a look at the key ingredients you'll need for these amazing gluten-free bagels:
Now that you have all the necessary ingredients, let's dive into the step-by-step process of making these delicious gluten-free bagels:
Now that you have the recipe for easy gluten-free bagels, there's no need to miss out on this delicious breakfast treat. With a few simple ingredients and some basic kitchen skills, you can enjoy bagels that are just as tasty as their gluten-filled counterparts. So, roll up your sleeves, preheat that oven, and get ready to savor the delightful aroma of freshly baked gluten-free bagels!
Yes, you can experiment with different gluten-free flours, but keep in mind that the texture and taste may vary. It's best to use a gluten-free flour blend specifically formulated for bread baking.
Yeast is essential for achieving the traditional bagel texture. However, if you're unable to consume yeast, you can try using a gluten-free sourdough starter or a yeast substitute like baking powder.
These gluten-free bagels are best consumed within a day or two. To extend their freshness, you can store them in an airtight container or freeze them for later use.
Absolutely! You can shape the dough into smaller rounds to create mini bagels. Just adjust the baking time accordingly.
The recipe as written includes eggs, but you can try using egg substitutes like flaxseed meal or applesauce to make them vegan-friendly.
Definitely! You can get creative and add various flavors like cinnamon, garlic, or herbs to the dough to customize your gluten-free bagels.
Yes, you can prepare the dough ahead of time and refrigerate it overnight. This allows the flavors to develop and makes the dough easier to handle.
While it's possible to use a bread machine for kneading the dough, the boiling and baking steps will still need to be done separately. It's simpler to follow the traditional method outlined in this recipe.
AprilCook, recipe developer and the heart of Chefwiz. More about April