DIY Rice Milk Recipe
Rate this recipeBe the first to rate
 By AprilPublished
 Are you looking for a delicious dairy-free alternative to milk?
 By AprilPublished
 Are you looking for a delicious dairy-free alternative to milk?
Toast the rice grains in a dry skillet over medium heat, stirring frequently until they become fragrant and start to change color, for approximately 4 minutes.
Transfer the toasted rice grains to a bowl or jar and add 2 cups of water. Allow them to soak for 10 hours.
After the soaking time is complete, pour the soaked rice and water into a blender.
Add salt, sweetener (if desired), and vanilla (if desired) to the blender.
Blend everything at the highest setting until the rice grains are no longer visible, which should take around 2 minutes.
Use a nut milk bag or a fine strainer to strain the blended mixture into a clean glass storage jar, collecting the rice milk while separating any solids.
Thoroughly chill the rice milk before serving.
Before each use, make sure to shake the jar well to mix the rice milk properly.
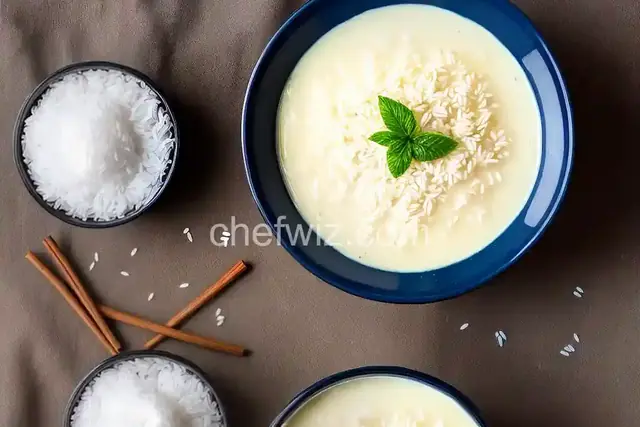
Are you looking for a delicious dairy-free alternative to milk? Look no further than rice milk! Making your own rice milk at home is not only easy but also allows you to control the ingredients and customize the flavor to your liking. In this article, we will guide you through the process of creating your very own homemade rice milk. So, let's dive in!
Rice milk is a fantastic option for those who are lactose intolerant, have dairy allergies, or follow a vegan diet. It serves as an excellent substitute for cow's milk in various recipes, smoothies, cereals, and even coffee. Additionally, rice milk is naturally low in fat, cholesterol, and calories, making it a healthier choice for those watching their weight.
Making rice milk at home requires minimal ingredients and equipment. All you need is rice, water, a blender, and a cheesecloth or nut milk bag. Follow the steps below:
Start by rinsing one cup of rice under cold water to remove any impurities. Then, place the rice in a bowl and cover it with water. Let it soak for at least 4 hours or overnight. Soaking the rice softens it, making it easier to blend.
Drain the soaked rice and transfer it to a blender. Add three cups of water and blend on high speed until you achieve a smooth and creamy consistency. You may need to blend for a few minutes to ensure the rice is fully broken down.
Place a cheesecloth or nut milk bag over a large bowl or pitcher. Pour the blended mixture into the cloth and let the liquid strain through, leaving behind the rice solids. Gently squeeze the cloth to extract as much milk as possible.
If desired, you can enhance the flavor of your rice milk by adding a touch of sweetness, such as vanilla extract or a natural sweetener like agave syrup or maple syrup. You can also experiment with other flavors like cinnamon or cocoa powder to create unique variations.
Pour the strained rice milk into a clean bottle or jar with a tight-fitting lid. It can be stored in the refrigerator for up to five days. Shake well before each use, as the milk may naturally separate. Enjoy your homemade rice milk in your favorite recipes or as a refreshing beverage!
By following these simple steps, you can easily create your own delicious and nutritious rice milk at home. Whether you are lactose intolerant, have dairy allergies, or simply want to explore new alternatives, rice milk is a fantastic option. Give it a try and experience the creamy goodness for yourself!
A1: Yes, rice milk is naturally gluten-free, making it a safe option for individuals with gluten intolerance.
A2: Absolutely! Brown rice can be used to make rice milk, and it adds a slightly nutty flavor to the final product.
A3: Yes, homemade rice milk retains the same nutritional benefits as store-bought versions, as long as you don't strain out the rice solids.
A4: Yes, rice milk can be used as a substitute for cow's milk in most baking recipes. However, it may yield slightly different results due to its thinner consistency.
A5: Most store-bought rice milk is fortified with calcium to match the levels found in cow's milk. If you make your own rice milk, you can also add a calcium supplement to ensure sufficient intake.
A6: Freezing rice milk can alter its texture and cause separation. It is best to consume it fresh or within a few days of preparation.
A7: Absolutely! The leftover rice solids can be used in various recipes like porridge, pancakes, or even added to soups for extra thickness.
A8: Yes, rice milk can be substituted for other plant-based milks like almond milk or soy milk in most recipes. However, keep in mind that the flavor and texture may vary.
AprilCook, recipe developer and the heart of Chefwiz. More about April