DIY Chocolate Shell Coating
Rate this recipeBe the first to rate
 By AprilPublished
 Who doesn't love the satisfying crackle and smoothness of a chocolate shell coating on their favorite desserts?
 By AprilPublished
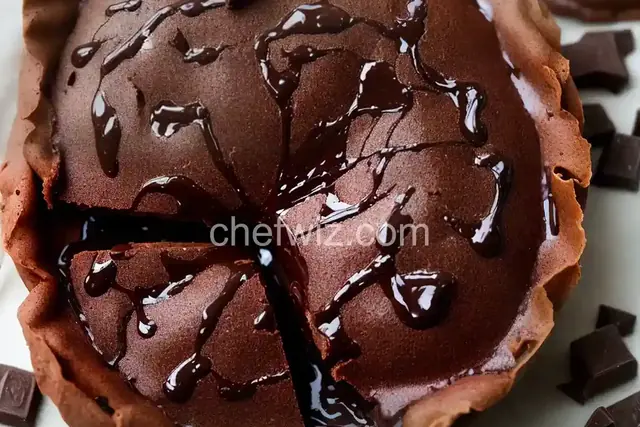
 Who doesn't love the satisfying crackle and smoothness of a chocolate shell coating on their favorite desserts?
In a small saucepan, combine the chocolate, shortening, vanilla, and a pinch of salt.
Place the saucepan over medium-low heat.
Stir the mixture constantly with a rubber spatula until it becomes smooth, which should take about 4 minutes.
Transfer the melted chocolate mixture into a separate small bowl.
To harden, pour the melted chocolate mixture over the ice cream.
Alternatively, you can use the melted chocolate as a coating for snacks such as fruit or pretzels.
Who doesn't love the satisfying crackle and smoothness of a chocolate shell coating on their favorite desserts? Whether it's an ice cream sundae, a piece of fruit, or even a cookie, that thin layer of chocolate adds an extra touch of indulgence to any treat. But did you know that you can easily make your own chocolate shell coating at home? No need to rely on store-bought versions when you can create a customized chocolate experience right in your own kitchen. In this article, we'll guide you through the process of making your own DIY chocolate shell coating, step by step.
When it comes to making a chocolate shell coating, the type of chocolate you use makes all the difference. While you can use any type of chocolate, including milk, dark, or white, it's important to choose a high-quality chocolate that you enjoy. After all, the better the chocolate, the better the end result will be. So go ahead and splurge on that artisanal chocolate bar you've had your eye on!
Now that you have your chocolate of choice, it's time to melt it down. This is where the magic happens! You can melt the chocolate using a double boiler or a microwave. If using a double boiler, place a heatproof bowl over a pot of simmering water, making sure the bottom of the bowl doesn't touch the water. If using a microwave, simply heat the chocolate in short intervals, stirring in between, until it's melted and smooth.
Once your chocolate is melted, it's time to get creative! You can add various flavors and ingredients to customize your chocolate shell coating. From a splash of vanilla extract to a sprinkle of sea salt, the possibilities are endless. You can even experiment with adding crushed cookies, nuts, or dried fruit for an extra crunch or burst of flavor. Let your imagination run wild!
Now comes the fun part: coating your treats with the homemade chocolate shell. Take your favorite dessert, whether it's a scoop of ice cream, a sliced banana, or a cookie, and dip it into the melted chocolate. Make sure to coat it evenly and let any excess chocolate drip off. Place the coated treat onto a parchment-lined baking sheet and let it sit at room temperature for a few minutes until the chocolate hardens.
Once the chocolate shell has hardened, it's time to indulge in your homemade creation. Take a bite and savor the satisfying crackle of the chocolate shell as it gives way to the creamy interior. The beauty of DIY chocolate shell coating is that you can enjoy it as is or get creative with toppings. Drizzle some caramel sauce, sprinkle some crushed nuts, or add a dollop of whipped cream. The choice is yours!
Yes, you can use any type of chocolate, including milk, dark, or white chocolate, based on your preference.
You can melt the chocolate using a double boiler or a microwave. Be sure to stir the chocolate occasionally to prevent it from burning.
Absolutely! You can add various flavors like vanilla extract, peppermint extract, or even coffee powder to customize the taste of your chocolate shell coating.
You can coat a variety of treats such as ice cream, fruits, cookies, or even pretzels with the homemade chocolate shell.
The chocolate shell usually takes a few minutes to harden at room temperature, but you can also place the coated treats in the refrigerator for quicker results.
Yes, you can store any leftover chocolate shell coating in an airtight container at room temperature for future use. Simply reheat and use it again.
No, the DIY chocolate shell coating is best suited for cold or frozen treats. It may not hold up well with hot desserts.
While the chocolate shell coating is traditionally used for individual treats, you can certainly experiment and try it on cupcakes or cakes for a unique twist.
In conclusion, making your own DIY chocolate shell coating is a simple and fun way to elevate your favorite desserts. With just a few ingredients and a little creativity, you can create a personalized chocolate experience right at home. So why not give it a try? Dive into the world of homemade chocolate shells and let your taste buds thank you!
AprilCook, recipe developer and the heart of Chefwiz. More about April