Daan Tat (Hong Kong-Style Egg Tart)
Rate this recipeBe the first to rate
 By AprilPublished
 Have you ever tried a dessert that simply melts in your mouth, leaving a sweet and savory aftertaste that lingers?
 By AprilPublished
 Have you ever tried a dessert that simply melts in your mouth, leaving a sweet and savory aftertaste that lingers?
In the food processor, combine flour and butter until a smooth paste forms and gathers around the blade (about 30 seconds).
Scrape the butter mixture onto a large sheet of plastic wrap and cover it with another sheet of plastic wrap.
Gently press the mixture into a rough 6-inch square and fold the ends of the plastic wrap over the center to form a neat parcel.
Use a bench scraper to square the sides of the parcel and place it in the refrigerator to cool for about 30 minutes.
In a small bowl, whisk water and egg yolk until smooth and combined (about 30 seconds). Set aside.
In the empty bowl of the food processor, pulse flour and salt until combined.
With the processor running, add the egg yolk mixture and process until the dough runs around the blade (about 30 seconds).
Transfer the dough to a lightly floured counter and knead until smooth (about 30 seconds).
Press the dough into a rough 6-inch square and transfer it to a parchment paper-lined baking sheet.
Cover the dough with plastic wrap and freeze until slightly firmed (about 25 minutes).
Remove the butter block and dough from the refrigerator/freezer and let them rest on the counter until they reach a pliable texture (about 10 minutes for the butter block and the chilled dough).
On a floured work surface, roll the dough into
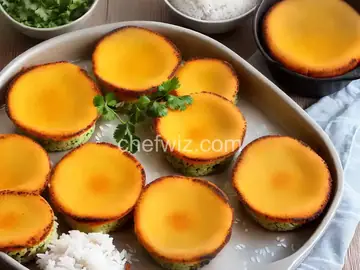
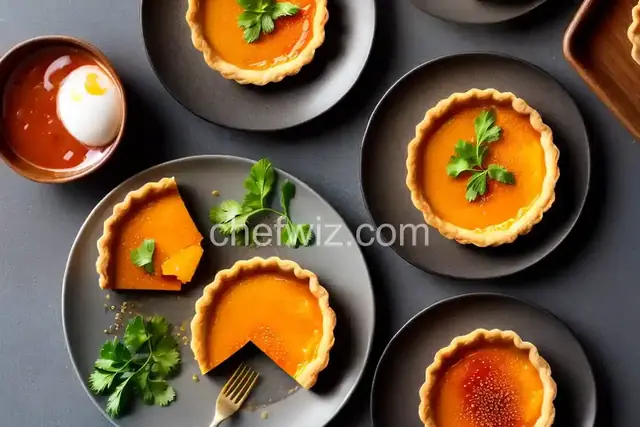
Have you ever tried a dessert that simply melts in your mouth, leaving a sweet and savory aftertaste that lingers? If not, then you must give Daan Tat, also known as Hong Kong-Style Egg Tart, a try. These delicate pastries are a delightful combination of a flaky crust and a creamy egg custard filling. Let's dive into the world of Daan Tat and discover what makes them so unique and irresistible.
Just like the city it hails from, Daan Tat is a fusion of Chinese and Western influences. The recipe for these delectable treats was brought to Hong Kong by Portuguese merchants in the 1940s. Over the years, the locals added their own twist to the recipe, giving birth to the iconic Hong Kong-Style Egg Tart we know and love today.
What sets Daan Tat apart from other egg tarts is the unique balance of flavors. The crust is made with a combination of butter and lard, resulting in a flaky and buttery pastry that adds a delightful crunch to each bite. The filling, on the other hand, is a smooth and creamy custard made with eggs, sugar, milk, and vanilla extract. The contrast between the crispy crust and the silky custard creates a symphony of textures and flavors that will leave you craving for more.
Imagine sinking your teeth into a warm Daan Tat. As your teeth break through the delicate crust, you are greeted with a burst of flavors. The buttery pastry crumbles in your mouth, releasing its rich aroma, while the smooth custard filling envelops your taste buds with its creamy sweetness. The combination is pure bliss, a harmony of textures and flavors that dances on your palate.
Creating the perfect Daan Tat requires skill and patience. The crust must be carefully rolled out and pressed into individual tart molds, ensuring an even thickness and a beautiful golden color when baked. The custard filling, on the other hand, needs to be whisked just enough to ensure a silky smooth texture, without incorporating too much air. The tarts are then baked until the crust turns golden and the custard sets, resulting in a dessert that is visually appealing and full of flavor.
While you can find Daan Tat in bakeries and dim sum restaurants across Hong Kong, there is something special about making them at home. The process of creating these delicate pastries from scratch can be a therapeutic experience. From kneading the dough to carefully pouring the custard filling, every step is an opportunity to connect with the art of baking and create a treat that is truly your own.
Daan Tat, the Hong Kong-Style Egg Tart, is a dessert that brings together the best of both worlds - a fusion of Chinese and Portuguese flavors. With its buttery crust and creamy custard filling, it is a treat that is sure to delight your taste buds. Whether enjoyed at a dim sum restaurant or made from scratch at home, Daan Tat is a pastry that is worth savoring. So, why not indulge in a bite of heaven and experience the magic of Daan Tat for yourself?
A1: While you can use a pre-made pie crust, it may not yield the same flaky and buttery texture as a homemade crust. The crust is an essential part of the Daan Tat experience, so it's worth the effort to make it from scratch.
A2: Yes, you can substitute the lard with butter if you prefer. However, keep in mind that lard adds a unique flavor and texture to the crust, so the result may be slightly different.
A3: Traditional Daan Tat recipes call for evaporated milk, but you can use regular milk if you prefer. Just make sure to adjust the sugar content accordingly, as evaporated milk is slightly sweeter.
A4: Yes, you can freeze Daan Tat. Once baked and cooled, place them in an airtight container and store them in the freezer. When ready to eat, simply thaw them at room temperature or reheat them in the oven for a few minutes.
A5: While the classic Daan Tat is made with a vanilla-flavored custard, you can experiment with other flavors such as matcha, chocolate, or even fruit puree. Just make sure to adjust the recipe accordingly and maintain the balance of flavors.
A6: Daan Tat are best enjoyed on the day they are made, as the crust tends to lose its crispness over time. However, if stored in an airtight container, they can still be enjoyed for up to 2 days.
A7: Yes, you can make mini Daan Tat by using smaller tart molds. The baking time may vary, so keep an eye on them to ensure they are baked to perfection.
A8: While Daan Tat are traditionally enjoyed plain, you can add a touch of elegance by dusting them with powdered sugar or garnishing them with fresh fruit. Get creative and make them your own!
AprilCook, recipe developer and the heart of Chefwiz. More about April