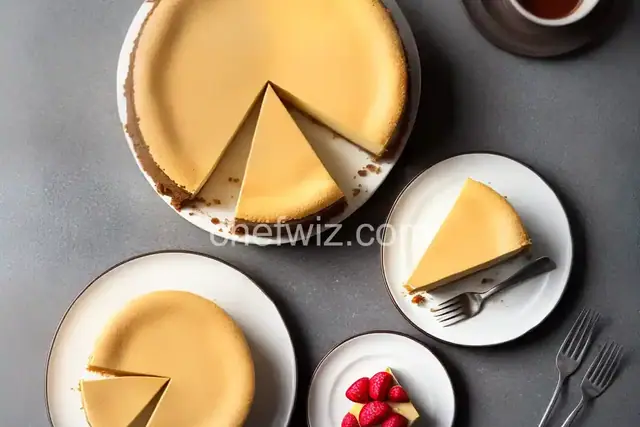
Crack Proof Cheesecake
Rate this recipeBe the first to rate
 By AprilPublished
 Who doesn't love a creamy, indulgent slice of cheesecake? It's a classic dessert that satisfies our sweet tooth and leaves us wanting more.
 By AprilPublished
 Who doesn't love a creamy, indulgent slice of cheesecake? It's a classic dessert that satisfies our sweet tooth and leaves us wanting more.
In a mixing bowl, combine the crust ingredients using a fork until they are evenly moistened.
Lightly coat the bottom and sides of a 9-inch springform pan with non-stick cooking spray.
Press the mixture firmly over the bottom and 1-inch up the sides of the pan using your fingers or the bottom of a glass.
Refrigerate the crust while you prepare the filling.
To prepare the filling:
In a large bowl, beat the cream cheese on low speed for 1 minute until it becomes smooth and free of lumps.
Gradually add the sugar and beat until creamy for 1 to 2 minutes. Remember to scrape down the sides of the bowl and the beaters periodically.
Add the eggs one at a time, beating slowly after each addition until combined.
Stir in the vanilla extract and lemon zest.
Blend in the sour cream. Make sure the batter is well mixed but avoid overbeating, as this can cause the cake to puff and then crack when cooling.
Pour the filling into the crust-lined pan and smooth the top with a spatula.
To create a water bath:
Set the pan on a large piece of aluminum foil and fold up the sides to prevent water from seeping into the seams of the springform pan.
Carefully place the cake pan in a larger roasting pan.
Pour boiling
Who doesn't love a creamy, indulgent slice of cheesecake? It's a classic dessert that satisfies our sweet tooth and leaves us wanting more. But sometimes, despite our best efforts, we end up with a cheesecake that cracks on top, ruining its appearance and texture. So, how can we ensure a crack-proof cheesecake every time? Let's dive into some tips and tricks that will help you achieve a perfectly smooth dessert that will impress your friends and family.
One of the key factors in preventing cracks in your cheesecake is using room temperature ingredients. When the cream cheese, eggs, and sour cream are all at the same temperature, they blend together smoothly, creating a creamy batter that bakes evenly. So, be patient and allow your ingredients to come to room temperature before you start baking.
Another crucial step is to mix the ingredients properly. Overmixing can introduce air into the batter, which can lead to cracks during baking. To avoid this, mix the ingredients on low speed and stop as soon as they are combined. This will result in a dense and velvety texture, without any cracks.
The water bath method is a popular technique used to bake cheesecakes evenly and prevent cracks. By placing your springform pan in a larger pan filled with hot water, the heat is distributed more gently and evenly, reducing the risk of cracks. Wrap the bottom of your springform pan with aluminum foil to prevent any water from seeping in.
Once your cheesecake is done baking, resist the temptation to take it out of the oven immediately. Instead, turn off the oven and let it cool gradually with the door slightly ajar. This slow cooling process helps prevent rapid changes in temperature, which can cause cracks. Only remove the cheesecake from the oven when it is completely cooled.
After your cheesecake has cooled, it's time to chill it in the refrigerator. This step is essential for the cheesecake to set properly and achieve that smooth texture. Allow it to chill for at least 4 hours, but overnight is even better. This will give the flavors time to meld together and ensure a crack-proof and delicious cheesecake.
Now that you have mastered the art of a crack-proof cheesecake, it's time to think about the perfect topping. Whether it's a drizzle of chocolate sauce, a dollop of whipped cream, or a sprinkle of fresh berries, the choice is yours. Get creative and add your personal touch to elevate your cheesecake to the next level.
If you're short on time, you can soften the cream cheese in the microwave at a low power setting. Just make sure to monitor it closely to avoid melting or overheating.
The water bath method is particularly useful for baked cheesecakes. No-bake cheesecakes typically don't require a water bath since they set in the refrigerator.
Cracks can happen for various reasons, such as overbaking, overmixing, or sudden changes in temperature. Assess each step and make adjustments accordingly for your next attempt.
Absolutely! Once your cheesecake is fully chilled and set, you can wrap it tightly in plastic wrap and aluminum foil before placing it in the freezer. Just make sure to thaw it in the refrigerator overnight before serving.
Yes, using a store-bought crust is a convenient option. However, if you want to take your cheesecake to the next level, consider making a homemade crust using graham crackers or your favorite cookies.
Absolutely! Feel free to experiment with flavors like chocolate, fruit purees, or extracts. Just be mindful of the additional moisture these ingredients may introduce and adjust accordingly.
A crack-proof cheesecake can be stored in the refrigerator for up to 5 days. Just make sure to keep it covered to prevent it from absorbing any odors.
Yes, you can! Simply use a muffin tin lined with cupcake liners and adjust the baking time accordingly. Mini crack-proof cheesecakes are perfect for individual servings or parties.
In conclusion, achieving a crack-proof cheesecake is all about patience, proper techniques, and attention to detail. By following these tips and tricks, you'll be able to enjoy a perfectly smooth and delicious cheesecake every time. So, go ahead, put your baking skills to the test, and indulge in the creamy goodness of a crack-proof cheesecake that will leave everyone wanting more.
AprilCook, recipe developer and the heart of Chefwiz. More about April