Classic Crème Brûlée
Rate this recipeBe the first to rate
 By AprilPublished
 Are you a dessert enthusiast? Do you crave the creamy, velvety texture of a well-made crème brûlée?
 By AprilPublished
 Are you a dessert enthusiast? Do you crave the creamy, velvety texture of a well-made crème brûlée?
Place a rack in the middle of the oven and preheat it to 325°F.
In a 2-quart heavy saucepan, pour the cream. If using a vanilla bean, scrape the seeds from it and add them to the cream along with the pod. If using vanilla extract, do not add it yet.
Heat the cream over moderate heat until it becomes hot but not boiling. Remove the saucepan from the heat and discard the vanilla pod.
In a medium bowl, whisk together the yolks, granulated sugar, and salt until they are well combined.
Slowly pour the hot cream into the yolk mixture, whisking constantly until everything is combined.
Pass the custard through a fine-mesh sieve into another bowl and whisk in the vanilla extract if using.
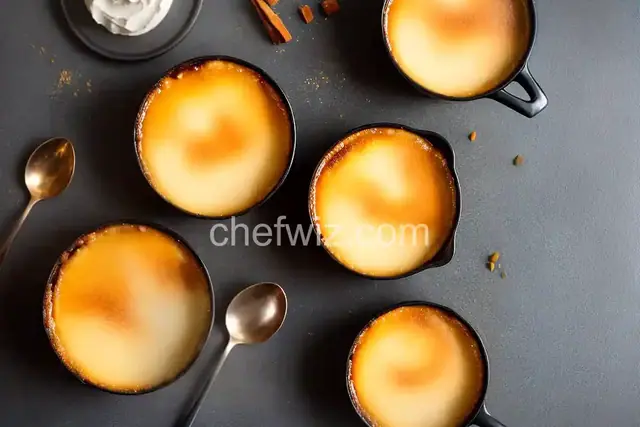
Ladle the custard into ramekins.
Arrange the ramekins in a roasting pan and add enough boiling water to the pan so that it reaches halfway up the sides of the ramekins.
Bake the custards in the oven for 25 to 30 minutes or until they are just set.
Using tongs, transfer the custards to a rack to cool. Once cooled, refrigerate them uncovered for at least 4 hours.
Just before serving, evenly sprinkle turbinado sugar over the custards.
Use a blowtorch to move the flame evenly back and
Are you a dessert enthusiast? Do you crave the creamy, velvety texture of a well-made crème brûlée? Look no further! In this article, we will delve into the world of classic crème brûlée, exploring its rich history, tantalizing flavors, and the secrets behind achieving that perfectly caramelized sugar crust.
Legend has it that crème brûlée was first created in the 17th century by a French chef who was experimenting with new dessert recipes. The name itself translates to "burnt cream," which perfectly describes the dessert's signature caramelized sugar topping. Just like a phoenix rising from the ashes, crème brûlée emerged as a culinary masterpiece.
Crème brûlée is a simple yet elegant dessert that requires only a handful of ingredients. The star of the show is the smooth custard, made from a delicate blend of cream, egg yolks, and a touch of vanilla. This luscious base sets the stage for the caramelization process that creates that satisfying crackle with every spoonful.
Now, let's talk about the pièce de résistance: the caramelized sugar crust. Picture this: a thin layer of sugar, sprinkled on top of the custard, is transformed into a golden, crunchy layer of perfection using a culinary torch. The heat melts the sugar, creating a caramel that hardens into a thin glass-like shell when cooled. It's like a sweet symphony for your taste buds!
Creating the perfect crème brûlée requires a delicate balance of technique and patience. From achieving the right custard consistency to mastering the caramelization process, each step is critical to the dessert's success. But fear not! With a little guidance and practice, you too can become a crème brûlée connoisseur.
Achieving that coveted caramelized crust requires the right equipment. Invest in a culinary torch, which will give you precise control over the caramelization process. Additionally, individual ramekins, shallow ceramic dishes, are perfect for baking and serving this delightful dessert.
Creating the custard is where the magic happens. It's all about achieving the perfect balance of creaminess and sweetness. Gently heating the cream and infusing it with vanilla allows the flavors to meld together, creating a velvety smooth custard. Whisking in the egg yolks adds richness and depth, resulting in a decadent dessert fit for royalty.
Crème brûlée is a dessert that tantalizes the senses and brings joy to those who indulge in its creamy decadence. From its humble beginnings to becoming a timeless classic, this dessert continues to charm dessert lovers worldwide. So why not treat yourself and embark on a culinary adventure by creating your own perfect crème brûlée? With a bit of practice and a dash of creativity, you'll be savoring the sweet rewards in no time!
Absolutely! A kitchen torch is the ideal tool for achieving that beautiful caramelized sugar crust. It provides precise control and evenly distributes heat for a perfect finish.
To prevent curdling, make sure to temper the eggs by gradually adding the hot cream mixture while whisking continuously. This step ensures a smooth and creamy custard.
Absolutely! While vanilla is the classic flavor for crème brûlée, you can experiment with other flavors such as chocolate, coffee, or even citrus zest to add a unique twist to this timeless dessert.
It's best to chill the custard for at least two hours, allowing it to set and develop its flavors. This ensures a firm base that can withstand the caramelization process without becoming too soft.
While a broiler can be used as an alternative, it may not provide the same level of control and precision as a culinary torch. The direct flame from the torch creates a more even caramelization and avoids overheating the custard.
Crème brûlée is best enjoyed fresh. While you can prepare the custard in advance, it's recommended to caramelize the sugar just before serving to ensure the perfect contrast between the velvety custard and the crispy caramelized top.
Absolutely! You can personalize your crème brûlée by adding fresh fruits, such as berries or sliced bananas, or even a dollop of whipped cream. Get creative and make it your own!
Yes, crème brûlée is naturally gluten-free as it does not contain any wheat or flour-based ingredients. It's a delightful dessert option for those with gluten sensitivities or dietary restrictions.
Crème brûlée is traditionally baked in the oven to achieve the perfect custard consistency. While alternative methods exist, such as using a stovetop or a microwave, they may not yield the same results as baking.
AprilCook, recipe developer and the heart of Chefwiz. More about April