Christmas Tree Tarts
Rate this recipeBe the first to rate
 By AprilPublished
 Oh, the joy of the holiday season! The twinkling lights, the cozy fires, and of course, the delicious treats that make our taste buds tingle with delight.
 By AprilPublished
 Oh, the joy of the holiday season! The twinkling lights, the cozy fires, and of course, the delicious treats that make our taste buds tingle with delight.
Preheat the oven to 375 degrees F.
Prepare a baking sheet by lining it with parchment paper.
Place one pie crust on a cutting board and use a 2 1/2-inch round cutter to cut out 8 circles from the crust.
Transfer the circles onto the prepared baking sheet. Discard the remaining dough.
Place the second pie crust on the cutting board and use the same 2 1/2-inch cutter to cut out 8 more circles.
Use a 2-inch round cutter to cut out 8 smaller circles from the larger circles. Set aside the rings.
Use a 1 1/2-inch Christmas tree cutter to cut out 8 small trees from the smaller full circles.
Beat the egg with 1 tablespoon of water.
Brush the edges of the 2 1/2-inch circles with the egg wash.
Place the rings on top of the egg-washed circles.
Spoon 3 cherries into the center of each tart.
Place a small tree on top of each tart, making sure the trunk touches the outer ring.
Brush the pie-crust ring and tree with the egg wash.
Bake the tarts in the preheated oven until golden brown, approximately 15 minutes.
Allow the tarts to cool completely.
Prepare a platter or cake stand by creating a bed of
Oh, the joy of the holiday season! The twinkling lights, the cozy fires, and of course, the delicious treats that make our taste buds tingle with delight. Speaking of delights, have you ever tried Christmas Tree Tarts? These delightful little treats are like a burst of holiday cheer in your mouth. Let's dive into the world of Christmas Tree Tarts and explore what makes them so special.
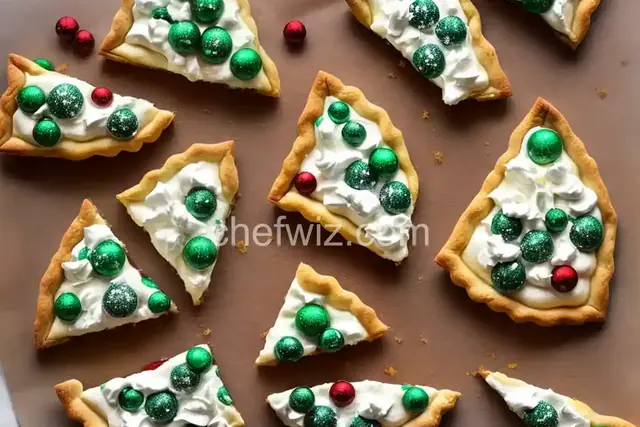
Imagine a flaky, buttery crust holding a sweet and tangy filling, topped with a vibrant green icing that resembles the beautiful foliage of a Christmas tree. These tarts are not only visually appealing but also a delight to taste. The combination of flavors and textures creates a symphony of sensations that will have you coming back for more.
One bite into a Christmas Tree Tart and you'll be transported into a winter wonderland. The crispness of the crust, the creaminess of the filling, and the freshness of the icing all come together to create a truly magical experience. It's like having a miniature Christmas tree in the palm of your hand.
Now that we've piqued your interest, let's talk about how you can create your very own Christmas Tree Tarts. The great thing about these tarts is that they are versatile and can be customized to suit your taste preferences. You can choose from a variety of fillings, such as fruit compote, chocolate ganache, or even a zesty lemon curd.
Start by making your favorite tart crust. Whether you prefer a classic butter crust or a flaky puff pastry, the choice is yours. Roll out the dough and cut it into small triangles, resembling the shape of a Christmas tree. Fill each triangle with your desired filling, leaving a small border around the edges.
Bake the tarts until the crust is golden brown and the filling is set. While the tarts cool, prepare the icing by mixing powdered sugar with a touch of milk and green food coloring. Drizzle the icing over the tarts, creating a zigzag pattern to mimic the branches of a Christmas tree.
The beauty of Christmas Tree Tarts is not just in their taste but also in the joy they bring when shared with loved ones. Imagine gathering around a cozy fireplace, sipping hot cocoa, and enjoying these delectable treats with friends and family. The smiles and laughter that accompany each bite are what make these tarts truly special.
So, why not spread the joy this holiday season? Whip up a batch of Christmas Tree Tarts and share them with those you hold dear. Whether you gift them in a beautifully wrapped box or serve them at your holiday gathering, these tarts are sure to be a hit.
Christmas Tree Tarts are a delightful treat that brings joy to the holiday season. With their flaky crust, delicious fillings, and vibrant green icing, they are sure to be a hit at any gathering. So, why not give them a try this year? Create your own magical Christmas tree in the form of these delectable tarts and share the joy with your loved ones. Happy baking and happy holidays!
Absolutely! Store-bought crust works just fine and saves you time in the kitchen.
Yes, you can make the tarts a day in advance and store them in an airtight container until ready to serve.
Yes, you can freeze the tarts before adding the icing. Simply thaw them and decorate before serving.
Absolutely! Get creative and use different colors to match your holiday theme.
Yes, you can enhance the festive look of your Christmas Tree Tarts by adding edible decorations like sprinkles or small candies.
Of course! Simply adjust the size of the triangles and baking time to create adorable bite-sized tarts.
Yes, you can easily make dairy-free tarts by substituting butter with a dairy-free alternative and using non-dairy milk in the icing.
Absolutely! Get creative and experiment with different fillings like caramel, Nutella, or even a savory cheese filling.
AprilCook, recipe developer and the heart of Chefwiz. More about April