Blooming Onion
Rate this recipeBe the first to rate
 By AprilPublished
 Welcome, food enthusiasts! Are you ready to embark on a flavorful journey that will tingle your taste buds?
 By AprilPublished
 Welcome, food enthusiasts! Are you ready to embark on a flavorful journey that will tingle your taste buds?
In a small bowl, combine mayonnaise, horseradish, ketchup, paprika, salt, black pepper, and cayenne pepper.
Refrigerate the sauce until needed.
To prepare the blooming onion:
In a large bowl, beat milk and egg until well combined.
In a separate bowl, combine flour, salt, cayenne pepper, black pepper, garlic powder, thyme, oregano, and cumin.
Cut 3/4 to 1 inch off the top and bottom of the onion and remove the skin.
Remove the 1-inch diameter core from the middle of the onion.
Using a large, sharp knife, slice down the center of the onion 3/4 of the way down.
Turn the onion 90 degrees and slice again. Repeat this step for each section until you have 16 sections. Be careful not to cut through the bottom of the onion.
Spread the petals of the onion apart.
Dip the onion in the milk and egg mixture, ensuring it is well coated.
Coat the onion with the flour mixture, making sure to cover all the petals.
Separate the petals again and sprinkle flour mixture between them.
Dip the onion back into the milk and egg mixture, followed by the flour mixture once again.
Place the battered onion in the refrigerator for at least
Welcome, food enthusiasts! Are you ready to embark on a flavorful journey that will tingle your taste buds? Look no further than the iconic blooming onion. This mouthwatering appetizer has gained popularity worldwide for its unique presentation and delectable taste. In this article, we will explore the origins, preparation, and tips to make the perfect blooming onion. Let's dive in!
Every great dish has a captivating backstory, and the blooming onion is no exception. Imagine a world where onions reign supreme, each layer representing a burst of flavor waiting to be unleashed. The exact origins of the blooming onion are shrouded in mystery, but it is believed to have originated in the United States in the late 20th century.
Legend has it that a creative chef stumbled upon the idea while experimenting in the kitchen. Inspired by the natural beauty of a blooming flower, the chef meticulously sliced the onion to resemble a delicate blossom. Little did they know that this culinary masterpiece would soon become a sensation.
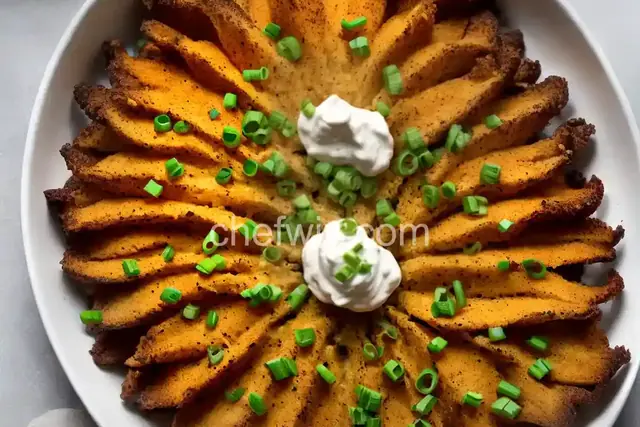
Creating a blooming onion that is both visually stunning and deliciously satisfying requires careful preparation. First, select a large, firm onion and remove the skin. To achieve the signature "blooming" effect, make vertical cuts into the onion, being cautious not to slice all the way through.
Once the cuts are made, it's time to dip the onion in a seasoned batter. The batter acts as a protective cocoon, ensuring the onion remains moist and tender while it cooks. Gently coat the onion with the batter, making sure to reach every nook and cranny.
Now comes the exciting part - frying! Heat a pot of oil to the optimal temperature and carefully lower the battered onion into it. As the onion sizzles and fries, it transforms into a beautiful blooming flower. The golden, crispy exterior complements the soft, caramelized onion layers, creating a harmonious blend of textures and flavors.
Creating a blooming onion masterpiece may require a bit of practice, but fear not! Here are some handy tips and tricks to help you achieve perfection:
Opt for large onions that are firm and have minimal blemishes. This ensures a visually appealing and tasty final result.
Make clean, vertical cuts into the onion, ensuring they are evenly spaced. This will allow the onion to open up beautifully during frying.
Experiment with different seasonings to enhance the flavor of the batter. Add a dash of paprika, garlic powder, or your favorite spices to create a unique taste.
Ensure the oil reaches the ideal temperature before frying. Too low, and your onion may become soggy. Too high, and it may burn before fully cooking.
A blooming onion pairs perfectly with a zesty dip. Try a spicy chipotle sauce, creamy garlic aioli, or a tangy barbecue dip to complement the flavors.
The blooming onion is more than just a culinary creation - it's a work of art. This appetizer delights both the eyes and the palate, making it a favorite at restaurants and gatherings alike. With a little practice and the right techniques, you can recreate this masterpiece in your own kitchen. So, why wait? Get ready to impress your friends and family with a stunning blooming onion that will leave them craving for more!
While any onion can be used, larger onions such as Vidalia or Spanish onions are ideal for creating a visually impressive blooming effect.
Yes, you can! Baking the blooming onion in the oven at a high temperature will yield a similar result with a slightly healthier twist.
To achieve a light and crispy batter, ensure your batter has the right consistency. If it becomes too thick, add a small amount of water or beer to thin it out.
Absolutely! Substitute regular flour with gluten-free flour or a blend of alternative flours to cater to dietary restrictions.
Yes, you can experiment with adding cheese, bacon, or other toppings to enhance the flavor and presentation of your blooming onion.
Fry the blooming onion for approximately 5-7 minutes or until it turns golden brown. Ensure the onion is cooked through by inserting a knife into the center - it should go in easily.
It's best to serve the blooming onion immediately after frying to retain its crispiness. However, you can prepare the onion in advance and store it in the refrigerator until ready to fry.
Yes, blooming onions are vegetarian-friendly as they are made solely from onions and batter. However, ensure the batter does not contain any non-vegetarian ingredients like eggs or animal-based broths.
AprilCook, recipe developer and the heart of Chefwiz. More about April