Better than Salt Dough Holiday Ornament Clay
Rate this recipeBe the first to rate
 By AprilPublished
 Have you ever tried making salt dough ornaments for the holidays?
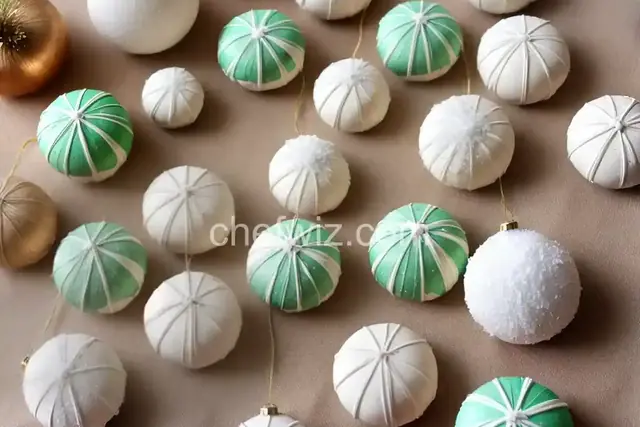 By AprilPublished
 Have you ever tried making salt dough ornaments for the holidays?
In a medium saucepan over medium-low heat, combine baking soda, cornstarch, and water using a rubber spatula or scraper. Stir until well mixed.
Heat the mixture while stirring constantly until it reaches a consistency similar to thin mashed potatoes.
Remove the saucepan from heat and continue stirring until the mixture becomes soft and putty-like.
Transfer the mixture to a medium-sized mixing bowl and cover it directly with plastic wrap. Allow it to cool completely.
Once cooled, place the clay onto a smooth surface and knead it until it becomes smooth. Add more cornstarch if the clay is too sticky or wet.
Preheat the oven to 200�F and line a baking sheet with parchment paper.
Roll out the dough to a thickness of 1/4 inch and use cookie cutters to create desired shapes.
Arrange the pieces on the baking sheet and use a skewer or drinking straw to poke a hole at the top of each piece for hanging purposes.
Bake the clay in the oven until it becomes dry and hardened, which usually takes about 1 hour for a 1/4 inch thickness. Remember to flip the pieces over halfway through baking for even drying.
Allow the baked clay ornaments to cool completely on the baking sheet.
Decorate the ornaments as desired.
Please note that if you want colored ornaments, add the desired amount of food coloring to the water before
Have you ever tried making salt dough ornaments for the holidays? While they can be fun and easy to create, they often lack durability and longevity. But fear not, because I have a solution for you – a better alternative to salt dough that will ensure your holiday ornaments last for years to come! In this article, I will introduce you to a superior clay recipe that is not only easy to make but also more durable than salt dough. So, let's dive in and discover the wonders of this amazing clay!
Salt dough is a popular choice for making holiday ornaments due to its simplicity and affordability. However, it has its fair share of downsides. First and foremost, salt dough is not very durable. It tends to crack and crumble over time, especially if exposed to moisture. This means that your beautifully crafted ornaments may not last beyond a single holiday season.
Furthermore, salt dough is not very forgiving when it comes to mistakes. Once it dries, it's nearly impossible to fix any imperfections or smooth out rough edges. This can be frustrating, especially if you're aiming for a polished and professional-looking ornament.
But fret not, my friends, for I have the perfect solution – a clay recipe that is better than salt dough in every way! This clay is easy to make, requires only a few ingredients, and is more durable than salt dough. It's a win-win situation!
Unlike salt dough, this clay is made with ingredients that provide superior durability. It dries hard and strong, ensuring that your ornaments will withstand the test of time. You won't have to worry about them crumbling or breaking easily.
This clay is also much easier to work with compared to salt dough. It's smooth and pliable, allowing you to create intricate designs and details with ease. Plus, if you make a mistake or want to make adjustments, you can simply add a bit of water to soften the clay and start over. It's like having a second chance at perfection!
Now that you're convinced of the superiority of this clay, let me walk you through the simple steps of making it. You'll be amazed at how easy it is!
The ingredients for this clay are simple and readily available. All you need is flour, salt, water, and a bit of oil. You probably already have these in your pantry!
In a bowl, combine the flour and salt. Mix them together until they are well incorporated. This will ensure that your clay has a uniform texture.
Slowly pour in the water and oil while stirring the mixture. Keep adding water until the dough comes together and forms a ball. The oil will make the clay more pliable and prevent it from drying out too quickly.
Transfer the dough onto a clean surface and knead it for a few minutes. This will help develop its elasticity and ensure that all the ingredients are fully combined. You'll notice that the clay becomes smoother and easier to work with as you knead it.
Now comes the fun part – shaping the clay into beautiful ornaments! Use cookie cutters, molds, or your own creative hands to bring your designs to life. Remember to poke a small hole at the top of each ornament if you plan to hang them.
Once you're satisfied with your creations, place them on a baking sheet and let them air dry. This may take a few days, depending on the thickness of the ornaments. Be patient, my friends, for the end result will be worth it!
In conclusion, if you're looking for a better alternative to salt dough for making holiday ornaments, look no further than this amazing clay recipe. It's easy to make, more durable than salt dough, and allows for greater creativity and flexibility. With this clay, your holiday ornaments will not only bring joy to your home but also stand the test of time. So, go ahead and give it a try – you won't be disappointed!
Absolutely! Once the clay ornaments are completely dry, you can paint them using acrylic paints. Get creative and add your own personal touch to make them even more special.
The drying time will vary depending on the thickness of the ornaments and the humidity level in your area. On average, it takes about 2-3 days for the clay to fully dry. Patience is key!
Yes, you can! Before drying the clay, you can press glitter, beads, or other small embellishments onto the surface to add some sparkle and texture. Just make sure to press them firmly so that they adhere well.
Absolutely! This clay is very versatile and can be molded into any shape or size you desire. Let your imagination run wild and create ornaments that reflect your unique style and personality.
Definitely! This clay can be used for various other crafts, such as making jewelry, figurines, or decorative objects. Its versatility makes it a great choice for all your creative endeavors.
Yes, you can add a few drops of food coloring to the clay to create different colors. Knead the clay well after adding the coloring to ensure an even distribution. Experiment with different shades and combinations for endless possibilities.
To keep the clay fresh and pliable, store it in an airtight container or wrap it tightly in plastic wrap. This will prevent it from drying out and becoming brittle.
Absolutely! You can make the clay ahead of time and store it for future use. Just make sure to wrap it tightly and store it in a cool, dry place. When you're ready to use it, simply knead it to restore its pliability and you're good to go.
AprilCook, recipe developer and the heart of Chefwiz. More about April