Apple Crostata
Rate this recipeBe the first to rate
 By AprilPublished
 Imagine biting into a warm, flaky pastry filled with sweet and tangy apples.
 By AprilPublished
 Imagine biting into a warm, flaky pastry filled with sweet and tangy apples.
To prepare the pastry, begin by placing the flour, sugar, and salt in a food processor fitted with a steel blade. Pulse a few times to combine the ingredients. Next, add the butter and pulse 12 to 15 times, until the butter is the size of peas. With the motor running, pour in the ice water through the feed tube. Continue pulsing to combine, stopping just before the dough becomes a solid mass. Transfer the dough onto a floured board and shape it into a disk. Wrap it with plastic wrap and refrigerate for at least 1 hour.
Preheat the oven to 450 degrees F.
Dust a rolling pin with flour and roll out the pastry into an 11-inch circle on a lightly floured surface. Transfer it onto a baking sheet.
For the filling, peel, core, and cut the apples into eighths. Then, cut each wedge into 3 chunks. Toss the apple chunks with the orange zest. Spread the apple chunks evenly on the tart dough, leaving a 1 1/2-inch border.
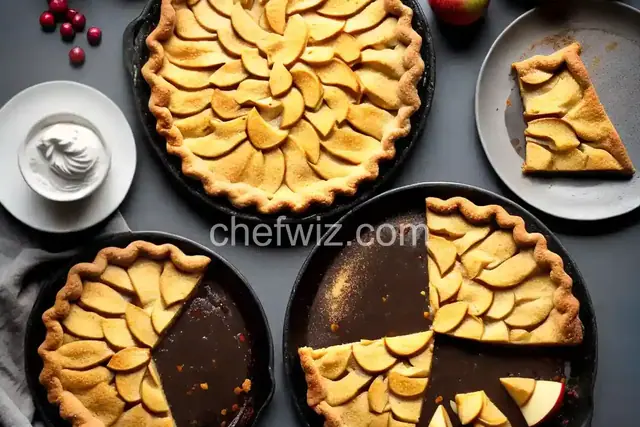
In a food processor fitted with a steel blade, combine the flour, sugar, salt, cinnamon, and allspice. Add the butter and pulse until the mixture resembles crumbs. Transfer it to a bowl and rub it with your fingers until it starts to hold together. Sprinkle this mixture evenly over the apples. Carefully fold the border of the dough over the apples, pleating it to form a circle
Imagine biting into a warm, flaky pastry filled with sweet and tangy apples. The buttery aroma wafts through the air, and your taste buds tingle with anticipation. This is the magic of an apple crostata, a rustic Italian dessert that is both comforting and sophisticated. In this article, we will explore the art of making an apple crostata, step by step. So grab your apron and let's get baking!
Just like the foundation of a house, the crust is the base of any good crostata. It cradles the juicy filling and provides the perfect balance between crispness and tenderness. Making the crust from scratch may seem daunting, but fear not! With a few simple ingredients and a little patience, you can create a crust that is worthy of praise.
The key to a great crust lies in the flour you use. Opt for all-purpose flour, as it strikes the ideal balance between protein and gluten content. This will ensure a tender crust that is easy to work with. Remember, a happy crust makes for a happy crostata!
When it comes to making the crust, technique is everything. Start by combining the flour, sugar, and a pinch of salt in a large bowl. Then, cut cold butter into small cubes and incorporate it into the flour mixture using a pastry cutter or your fingertips. The goal is to create pea-sized crumbs. Finally, add ice water gradually, mixing until the dough comes together. Wrap it in plastic wrap and let it rest in the refrigerator for at least 30 minutes. This resting period allows the gluten to relax, resulting in a more tender crust.
Now that we have our perfect crust, it's time to turn our attention to the star of the show – the apple filling. The filling is where the magic happens, as it adds sweetness, tartness, and a burst of flavor to every bite.
Not all apples are created equal when it comes to baking. Look for apples that are firm and slightly tart, such as Granny Smith or Honeycrisp. These varieties hold their shape well during baking and provide a pleasant contrast to the sweetness of the crust.
To take your apple filling to the next level, add a touch of warmth and complexity with spices like cinnamon, nutmeg, and a hint of lemon zest. These aromatic additions will transform your crostata into a symphony of flavors that will leave your taste buds dancing with delight.
With our crust and filling ready, it's time to bring them together and let the oven work its magic.
On a lightly floured surface, roll out the chilled dough into a circle. Don't worry about achieving a perfect shape – the beauty of a crostata lies in its rustic appearance. Once the dough is rolled out, transfer it to a parchment-lined baking sheet.
Now it's time to bring in the star of the show – the apple filling. Arrange the apple slices in the center of the dough, leaving a border around the edges. Gently fold the edges of the dough over the filling, creating pleats as you go. This not only adds to its rustic charm but also helps to encase the filling.
Preheat your oven to 375°F (190°C) and bake the crostata for about 35-40 minutes, or until the crust is golden brown and the apples are tender. The aroma that fills your kitchen will be irresistible, and the sight of the golden crust will make your mouth water in anticipation.
In conclusion, the apple crostata is a dessert that combines simplicity with elegance. From the flaky crust to the luscious apple filling, every bite is a journey of flavors and textures. So why not try your hand at making this delightful treat? With a little practice and a lot of love, you can create a masterpiece that will impress your friends and family. So go ahead, embrace your inner baker and enjoy the sweet rewards of an apple crostata.
While pre-made pie crust can be convenient, making the crust from scratch is worth the effort. The homemade crust adds a level of freshness and flavor that elevates the crostata.
Absolutely! Crostata can be made with a variety of fruits like peaches, berries, or even pears. Feel free to experiment and create your own unique flavor combinations.
Yes, you can prepare the crostata in advance and refrigerate it until ready to bake. This can be a great time-saving option when entertaining guests or planning ahead for a special occasion.
Yes, you can freeze the crostata before baking. Wrap it tightly in plastic wrap and aluminum foil, and it will keep well for up to 3 months. When ready to bake, simply thaw it in the refrigerator overnight and proceed with the baking instructions.
Absolutely! The warm crostata pairs beautifully with a scoop of vanilla ice cream or a dollop of freshly whipped cream. The creamy, cool accompaniment complements the warm, buttery crust perfectly.
Yes, you can make individual-sized crostatas by dividing the dough and filling into smaller portions. This can be a fun option for parties or when serving a crowd.
Yes, you can reheat the crostata in a preheated oven at 350°F (175°C) for about 10 minutes, or until warmed through. This will help revive the flakiness of the crust and
AprilCook, recipe developer and the heart of Chefwiz. More about April