Guide
Sourdough Starter: Storage and Care
Learn how to store sourdough starter with my simple, user-friendly guide. Keep your starter fresh and ready for your next baking adventure.
 By April16 min read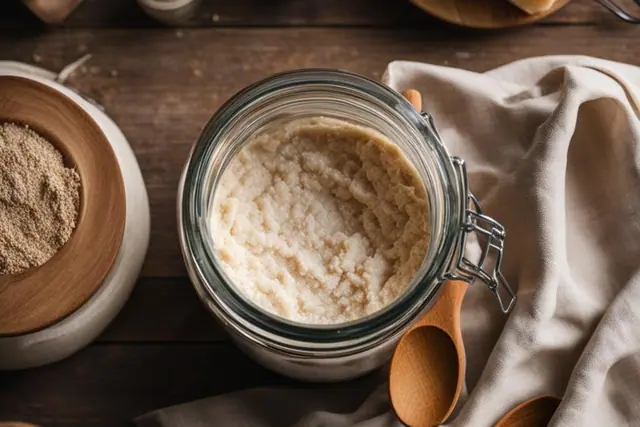
In this guide
- Understanding Sourdough Starter
- Creating a Sourdough Starter
- Storing Sourdough Starter in the Fridge
- Storing Sourdough Starter on the Counter
- Freezing Sourdough Starter
- Tips for Storing Sourdough Starter
- Increasing the Volume of Sourdough Starter
- Reviving and Using Stored Sourdough Starter
- Troubleshooting Sourdough Starter Storage Issues
- Benefits of Storing Sourdough Starter
- Conclusion
- Source Links
- FAQ
Welcome to the world of sourdough baking! As an avid baker, I know how important it is to properly store and care for your sourdough starter. Whether you're a seasoned baker or just starting out, understanding the ins and outs of sourdough starter storage will help you maintain its freshness and quality. In this article, I'll guide you through the best practices for storing and caring for your sourdough starter, ensuring that it stays healthy and ready for all your culinary adventures.
Understanding Sourdough Starter
A sourdough starter is a fascinating and essential component in the world of baking. It is a natural leavening agent that introduces a unique flavor and texture to bread. At its core, a sourdough starter is a simple mixture of flour and water that undergoes fermentation, thanks to the presence of wild yeast and bacteria.
The wild yeast present in the flour initiates the fermentation process, breaking down the carbohydrates and releasing carbon dioxide gas. This gas, in turn, causes the dough to rise and develop a light and airy texture. The bacteria, on the other hand, play a crucial role in developing the characteristic sourness and flavor of sourdough bread.
As the starter matures, the wild yeast and bacteria become more active and abundant, resulting in a stronger and more complex flavor profile. Each time the starter is fed with fresh flour and water, it gets rejuvenated, ensuring a continuous supply of yeast and bacteria for bread-making.
| Sourdough Starter | Commercial Yeast | |
|---|---|---|
| Leavening Agent | Natural leavening agent | Commercially produced yeast |
| Flavor | Complex and slightly sour | Neutral |
| Texture | Light and airy | Dense and uniform |
| Fermentation Time | Longer fermentation process | Shorter fermentation process |
The rich flavor and unique characteristics of sourdough bread can be attributed to the intricate relationship between the natural leavening agents, wild yeast, and bacteria. Understanding the role they play in the fermentation process is key to mastering the art of sourdough baking and creating delightful bread with a distinct flavor.
Creating a Sourdough Starter
Creating a sourdough starter is a simple and rewarding process that involves just a few ingredients: flour and water. To make your own sourdough starter, follow these steps:
- Mix equal parts flour and water: In a clean container, combine equal weights of flour and water. For example, use 100 grams of flour and 100 grams of water.
- Stir well: Mix the flour and water until there are no dry clumps and you have a smooth, thick batter-like consistency.
- Cover and let it sit: Cover the container loosely with a cloth or plastic wrap and let it sit at room temperature, around 70°F (21°C).
- Feed and discard: After 24 hours, discard half of the starter and then "feed" it by adding equal parts flour and water again. Stir well to incorporate the new ingredients.
- Repeat the feeding process: Continue feeding the starter every 24 hours, discarding half and adding fresh flour and water, until the starter becomes active and bubbly. This usually takes 5-7 days.
Throughout the feeding process, you'll notice that the starter will rise and fall as the fermentation activity increases. It will develop a sour smell and become more acidic over time. Once your sourdough starter is active and doubles in size within a few hours after feeding, it is ready to be used in sourdough bread recipes.
Remember to always feed your sourdough starter regularly to keep it strong and active. The feeding schedule may vary depending on your baking needs, but a common practice is to feed it once a day or every 12 hours if stored at room temperature. Adjust the feeding schedule based on the temperature and the level of activity of your starter. With proper care and attention, your homemade sourdough starter will be the key ingredient for delicious, tangy sourdough bread.
Table: Comparison of Different Types of Flour for Sourdough Starter
When creating a sourdough starter, the type of flour you use can have an impact on the fermentation process and the flavor of the final bread. Here's a comparison of different types of flour commonly used for making sourdough starter:
| Flour Type | Characteristics | Recommended Usage |
|---|---|---|
| Bread Flour | High protein content, good gluten development | Ideal for a strong and sturdy sourdough starter |
| All-Purpose Flour | Medium protein content, versatile | Works well for most sourdough recipes |
| Whole Wheat Flour | More nutrients and natural yeast | Contributes to a nutty and earthy flavor profile |
| Rye Flour | Low gluten content, intense flavor | Used in small amounts to enhance flavor and activity |
"Creating a sourdough starter is like nurturing a living organism. It requires patience and care, but the end result is worth it."
Storing Sourdough Starter in the Fridge
When it comes to storing your sourdough starter, refrigeration can be a convenient method, especially if you don't bake frequently. By placing your starter in the fridge, you can extend its shelf life and reduce the frequency of feedings. The lower temperature slows down the fermentation process, allowing you to feed it only once a week instead of daily.
To store your sourdough starter in the fridge, transfer it to a clean, airtight container. Make sure to leave enough room for the starter to expand as it releases gas during fermentation. Place the container in the fridge, ideally in the back where the temperature is the most consistent.
When you're ready to revive your refrigerated starter, take it out of the fridge and allow it to come to room temperature. This can take a few hours or overnight, depending on the temperature of your kitchen. Once it has warmed up, discard a portion of the starter and feed it with fresh flour and water. Follow your regular feeding schedule for a few days until the starter becomes active and bubbly again.
https://www.youtube.com/watch?v=ppc7OxmS3ZY
Storing Sourdough Starter on the Counter
If you bake with sourdough frequently, storing your starter on the counter at room temperature is a suitable option. This method requires daily feedings to keep the starter active and maintain its freshness. By leaving the starter out, you can easily access and use it for baking without the need for additional preparations. Keeping the sourdough starter at room temperature allows it to develop a milder flavor compared to a refrigerated starter. Daily feedings ensure that the starter remains healthy and ready for bread-making.
To store your sourdough starter on the counter, you'll need a clean and airtight container. Choose a container made of plastic or glass that can seal tightly to protect the starter from moisture and contaminants. It's important to avoid metal containers as the fermentation process can corrode them. Make sure to feed the starter daily, typically in equal parts of flour and water, to nourish the yeast and bacteria and sustain their activity.
By storing your sourdough starter on the counter, you'll enjoy the convenience of having it readily available for your baking needs. No need to wait for the starter to warm up or go through additional steps – it's just a scoop away from creating delicious homemade bread. The daily feedings ensure that the starter remains active and vibrant, resulting in the best flavor and texture for your sourdough creations. So, if you're a dedicated sourdough baker, storing your starter on the counter is a convenient and effective choice.
Table: Differences between Storing Sourdough Starter in the Fridge and on the Counter
| Storage Method | Temperature | Feeding | Flavor | Convenience |
|---|---|---|---|---|
| Fridge | Cold | Once a week | Rich and tangy | Less convenient, requires warming up |
| Counter | Room temperature | Daily | Milder | Highly convenient, ready to use |
Freezing Sourdough Starter
Freezing sourdough starter is a convenient method for long-term storage. It allows you to preserve the freshness and quality of your starter for extended periods. To freeze your sourdough starter, transfer it to an airtight container or freezer bag. It's important to ensure the container is sealed tightly to prevent any air from entering. The starter should be in a very thick paste consistency before freezing, as this helps maintain its quality during the freezing process.
When it's time to use the frozen sourdough starter, you will need to defrost and revive it. Start by taking the container out of the freezer and allowing it to thaw at room temperature. This process may take a few hours. Once the starter is completely thawed, gradually warm it up by adding small amounts of room temperature water and flour. This helps reinvigorate the yeast and bacteria in the starter.
After the starter has thawed and warmed up, it's time to begin reviving it by following your regular feeding schedule. Feed the starter with equal parts flour and water, stirring well to incorporate the new additions. Repeat this feeding process for a few days until the starter shows signs of activity, such as bubbling and rising. This indicates that the starter is ready to be used for baking.
In summary, freezing sourdough starter is a viable method for long-term storage when you won't be using it for an extended period. Properly stored and revived, your frozen starter will regain its strength and vitality, allowing you to continue your sourdough baking adventures with ease.
Tips for Storing Sourdough Starter
When it comes to storing your sourdough starter, there are a few key tips to keep in mind to ensure its longevity and quality. One important consideration is the container you use. Opt for a plastic or glass container that can seal tightly and is not made of metal. The fermentation process can corrode metal containers, so it's best to avoid them. An airtight container will help prevent your starter from drying out and protect it from exposure to air, which can affect its quality.
Moisture control is another crucial factor in storing sourdough starter. Make sure the container you use is sealed tightly to prevent any moisture from entering and affecting the consistency and activity of your starter. Additionally, it's important to protect your starter from light. Exposure to light can impact the quality of the starter, so store it in a dark location or use an opaque container to shield it from light.
Having a regular feeding schedule is also key to maintaining the vitality of your sourdough starter. Feed your starter at consistent intervals to keep it active and healthy. You can adjust the feeding frequency based on whether you store your starter in the fridge or on the counter. Remember to discard a portion of your starter before each feeding to prevent it from overgrowing and becoming too acidic. By following these tips for storing your sourdough starter, you can ensure its freshness and readiness for your baking adventures.
| Tip | Description |
|---|---|
| Use the right container | Opt for a plastic or glass container that is airtight and not made of metal to protect your starter from corrosion and air exposure. |
| Control moisture | Seal the container tightly to prevent moisture from entering and affecting the consistency and activity of your sourdough starter. |
| Protect from light | Store your starter in a dark location or use an opaque container to shield it from light, as exposure to light can impact its quality. |
| Follow a feeding schedule | Maintain a regular feeding schedule to keep your starter active and healthy. Adjust the frequency based on whether it's stored in the fridge or on the counter. |
By implementing these tips, you can ensure that your sourdough starter remains in optimal condition, ready to be used in your delightful homemade bread.
Increasing the Volume of Sourdough Starter
If you want to increase the volume of your sourdough starter, you can do so by feeding it without discarding any of the existing starter. Simply add equal quantities of flour and water to the starter until you reach the desired quantity. This method allows you to scale up your sourdough starter without needing to start from scratch.
Increasing the volume of your sourdough starter can be especially useful if you plan on sharing it with others or if you need a larger amount for baking multiple loaves of bread. By having a larger quantity of starter, you have more flexibility and can easily adapt to your baking needs.
When increasing the volume of your sourdough starter, it’s important to maintain the same feeding consistency. This means using equal quantities of flour and water every time you feed the starter. Consistency is key to keeping your starter healthy and active, which in turn ensures successful and flavorful bread baking.
Reviving and Using Stored Sourdough Starter
When it's time to revive your stored sourdough starter, follow these simple steps to get it back to its active and ready-to-use state. Start by taking the starter out of storage and allowing it to warm up at room temperature. This usually takes about 1-2 hours. Once it has reached room temperature, give the mixture a good stir to incorporate any separated layers.
After stirring, it's time to start feeding the starter to reinvigorate the yeast and bacteria. Begin by discarding about half of the starter to make room for fresh food. Then, feed the remaining starter with equal parts flour and water. For example, if you have 100 grams of starter, discard 50 grams and add 50 grams of flour and 50 grams of water. Mix well to combine everything.
Continue with regular feedings every 12 hours, discarding half of the starter and replacing it with fresh flour and water. After a few feedings, you'll notice the starter becoming more active and showing signs of readiness. It will have a pleasant yeasty aroma and will start to rise within a few hours of feeding. At this point, your revived sourdough starter is ready to use in your favorite bread recipes!
"Reviving stored sourdough starter is like waking it up from a long nap. With a little bit of time, patience, and regular feeding, it will come back to life and be ready to leaven your bread once again."
Using the Revived Sourdough Starter
Once your sourdough starter has been successfully revived, it's time to start using it in your baking. The revived starter can be used as a direct substitute for commercial yeast in bread recipes. Keep in mind that sourdough bread requires a longer fermentation time and may have a more complex flavor compared to bread made with commercial yeast.
To use the revived starter in a bread recipe, simply replace the amount of commercial yeast called for with an equal amount of sourdough starter. For example, if a recipe calls for 7 grams of instant yeast, you can use 100 grams of revived sourdough starter instead. Adjust the hydration of the dough as needed, as sourdough starter contains both flour and water.
Remember to always keep a small amount of the revived starter as a "seed" to maintain and continue growing your sourdough starter. Regular feedings and proper storage will keep your sourdough starter healthy and ready to use for future baking endeavors.
Troubleshooting Sourdough Starter Storage Issues
When it comes to storing sourdough starter, you may encounter certain issues that can affect its revival and maintaining activity. However, with the right troubleshooting techniques, you can overcome these challenges and ensure your starter remains healthy and ready for use.
Common Issues
One common issue is the slow or no activity in the starter after revival. This could be due to factors such as low temperature, incorrect hydration, or inconsistent feeding. If your starter is not showing any signs of activity, try adjusting the temperature or providing a warmer environment to encourage fermentation. Additionally, make sure you are feeding your starter regularly and maintaining a consistent feeding schedule to keep the yeast and bacteria active.
Another issue that may arise is a change in smell or appearance of the starter. A foul or off-putting odor could indicate contamination or spoilage. In such cases, it is best to discard the starter and start fresh. If your starter develops a gray or pinkish hue, it could be a sign of harmful bacteria. It is important to maintain good hygiene practices and ensure your utensils and containers are clean.
Troubleshooting Tips
Here are some troubleshooting tips to help you address common sourdough starter storage issues:
- Check the temperature: Ensure that the temperature of your storage area is suitable for fermentation. If it's too cold, try moving the starter to a warmer spot.
- Adjust hydration: If your starter seems too dry or thick, adjust the hydration by adding a little more water or flour to achieve the desired consistency.
- Maintain a consistent feeding schedule: Feeding your starter regularly and at consistent intervals helps maintain its activity and vitality. Stick to a feeding schedule that works best for your baking routine.
- Monitor for contamination: Keep an eye out for any signs of contamination, such as a change in smell or appearance. If you suspect contamination, discard the starter and start anew.
By troubleshooting and addressing storage issues promptly, you can ensure the optimal revival and maintenance of your sourdough starter. With a little patience and practice, you'll be able to enjoy the delightful flavors of homemade sourdough bread.
Benefits of Storing Sourdough Starter
When it comes to storing your sourdough starter, there are several benefits that you can enjoy. Let's take a look at some of the advantages that come with proper storage:
- Convenience: Storing your sourdough starter allows you to have it readily available whenever you want to bake. No need to go through the process of creating a new starter each time.
- Freshness: By storing your sourdough starter, you can maintain its freshness for a longer period. This ensures that you always have a lively and active starter on hand.
- Nutritional Value: Sourdough bread made from a stored starter offers unique nutritional benefits. The fermentation process enhances the digestibility of the bread and increases the availability of certain nutrients.
- Versatility: A stored sourdough starter allows you to explore a wide range of recipes and techniques. From classic loaves to pizza dough and even pancakes, the possibilities are endless.
- Homemade Goodness: Storing your own sourdough starter gives you the satisfaction of creating something delicious and homemade. It adds a personal touch to your baking endeavors.
By keeping your sourdough starter properly stored, you can enjoy the convenience, freshness, and versatility that it brings to your culinary adventures. Whether you're baking for yourself or sharing your creations with others, a well-maintained starter is the key to success.
Conclusion
Proper storage and care are essential for maintaining the freshness and vitality of your sourdough starter. By following the right storage techniques and adhering to a feeding schedule, you can ensure that your starter remains healthy and ready for your baking adventures. Whether you choose to store it in the fridge or on the counter, the key is to maintain the right moisture and temperature levels to preserve its freshness.
Remember to select a suitable container that is airtight and protects your starter from light. This will help prolong its shelf life and maintain its quality. And don't forget to regularly feed your starter to keep it active and thriving.
With the right storage methods and maintenance, your sourdough starter will be your faithful companion in creating delicious homemade bread. So go ahead, embark on your baking adventures, armed with the freshness and flavor of your very own sourdough starter.
Source Links
- https://www.theperfectloaf.com/store-sourdough-starter/
- https://bakeclub.com.au/blogs/bakeclub-blog/how-to-feed-maintain-store-and-use-your-sourdough-starter
- https://www.southernliving.com/food/bread/how-to-store-sourdough-starter
Frequently asked questions
- How do I store my sourdough starter?
You can store your sourdough starter in the fridge, on the counter at room temperature, or freeze it for long-term storage.
- How long can I store my sourdough starter in the fridge?
When stored properly in the fridge, a sourdough starter can maintain its quality and vitality for extended periods, up to a week.
- How often should I feed my sourdough starter stored in the fridge?
If you store your sourdough starter in the fridge, you can reduce the frequency of feedings to once a week.
- How often should I feed my sourdough starter stored on the counter?
If you store your sourdough starter on the counter at room temperature, daily feedings are necessary to keep the starter active and fresh.
- Can I freeze my sourdough starter?
Yes, you can freeze your sourdough starter for long-term storage. Properly stored, it can maintain its flavor for up to three months in the freezer.
- How do I revive my frozen sourdough starter?
To revive your frozen sourdough starter, thaw it at room temperature, gradually warm it up, and feed it to regain its strength before baking.
- What kind of container should I use to store my sourdough starter?
It's best to use plastic or glass containers that can seal tightly and are not made of metal, as the fermentation process can corrode metal containers.
- How can I increase the volume of my sourdough starter?
You can increase the volume of your sourdough starter by adding equal quantities of flour and water to the existing starter until you reach the desired quantity.
- How do I revive my stored sourdough starter?
To revive your stored sourdough starter, take it out of storage, allow it to warm up at room temperature, stir the mixture, and proceed with regular feedings.
- What should I do if I encounter problems with my stored sourdough starter?
If you encounter problems, refer to troubleshooting tips and guidelines to address common issues, such as temperature, hydration, and feeding consistency.
- What are the benefits of storing sourdough starter?
Storing sourdough starter offers benefits in terms of convenience, freshness, and versatility, allowing you to easily incorporate sourdough into your baking routine.
- How important is proper storage and care for sourdough starter?
Proper storage and care are essential for maintaining the freshness and vitality of sourdough starter, ensuring the best results in your baking endeavors.
AprilCook, recipe developer and the heart of Chefwiz. More about April