Witch's Finger Bread Sticks With Maple Mustard Dip
Rate this recipeBe the first to rate
 By AprilPublished
 Have you ever wanted to add a spooky twist to your breadsticks?
 By AprilPublished
 Have you ever wanted to add a spooky twist to your breadsticks?
Combine water, sugar, and yeast in the bowl of an electric mixer with a paddle attachment. Stir until sugar is dissolved. Let it sit for about 5 minutes until yeast bubbles.
On low speed, beat in 1 cup of flour until well combined.
Remove the paddle attachment, clean it, and attach the dough hook. Add 1 1/2 teaspoons of salt and 2 1/2 cups of flour to the mixture. Beat until the dough pulls away from the sides of the bowl, about 3 minutes. If the dough is too sticky, add enough of the remaining 1/2 cup of flour, 1 tablespoon at a time, until the dough is no longer sticky.
Oil a large bowl and transfer the dough to the bowl. Turn the dough over to coat it with oil. Cover the bowl with a dry towel and let the dough rise in a draft-free place at warm room temperature until it doubles in size, about 1 hour.
While the dough is rising, place green food coloring in a small bowl. Using a paintbrush, paint one side of the almond slices or the rounded side of the peanut halves.
Preheat the oven to 450°F with the rack in the middle. Line 2 large baking sheets with parchment paper.
Divide the dough into quarters. Work with one piece at a time and keep the remaining dough covered.
Roll one quarter into a
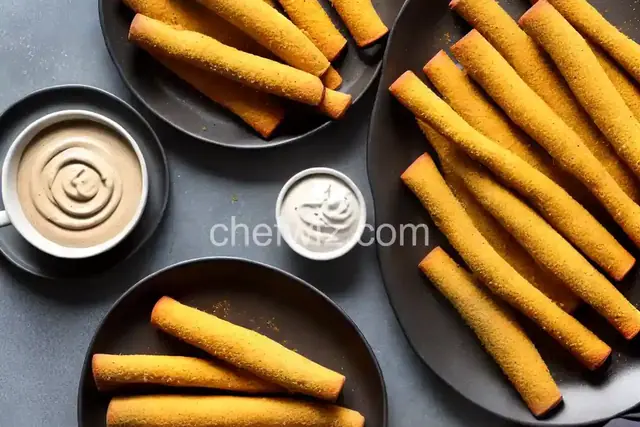
Have you ever wanted to add a spooky twist to your breadsticks? Look no further than these Witch's Finger Bread Sticks! Perfect for Halloween parties or just a fun snack, these eerie breadsticks will delight both kids and adults alike. And to add a touch of sweetness and tang, we have a delicious Maple Mustard Dip that pairs perfectly with these creepy treats. Let's dive in and learn how to create these witchy delights!
Creating these Witch's Finger Bread Sticks is easier than you might think. We start by preparing a simple bread dough, which will be the base for our spooky fingers. Once the dough is ready, we shape them into finger-like sticks and add almond slices as nails to give them that eerie appearance. After baking them to perfection, these breadsticks are ready to be enjoyed!
To shape the bread dough into finger-like sticks, simply roll out small portions of the dough into thin ropes. Then, use your fingers to create knuckles by pressing down and forming small indentations. Remember, the more irregular and bumpy the shape, the scarier the fingers will look!
Now comes the fun part - adding the almond slices as nails to our witchy fingers! Simply press an almond slice onto the top end of each finger, making sure it sticks firmly. The contrast between the breadstick and the almond slice creates a chilling effect that will impress your guests!
No breadstick is complete without a delicious dip to accompany it. Our Maple Mustard Dip adds the perfect balance of sweetness and tanginess to complement the Witch's Finger Bread Sticks. The combination of maple syrup and mustard creates a unique flavor profile that will leave your taste buds wanting more!
To make the Maple Mustard Dip, simply combine maple syrup, mustard, mayonnaise, and a pinch of salt in a bowl. Stir everything together until well combined and smooth. The creamy texture and the hint of sweetness from the maple syrup make this dip absolutely irresistible!
For the best flavor, we recommend chilling the Maple Mustard Dip in the refrigerator for at least 30 minutes before serving. This will allow the flavors to meld together and enhance the overall taste. Plus, a cool dip is the perfect contrast to the warm and freshly baked Witch's Finger Bread Sticks!
Get ready to impress your friends and family with these spooky yet delicious Witch's Finger Bread Sticks! With their eerie appearance and delightful taste, they are sure to be the star of any Halloween gathering. And don't forget to pair them with our mouthwatering Maple Mustard Dip for the ultimate flavor experience. Happy baking and enjoy the festivities!
Absolutely! While the Maple Mustard Dip is a wonderful accompaniment, feel free to get creative and use any dip of your choice. Ranch, marinara, or even a spicy cheese dip would be great alternatives!
Yes, you can substitute regular flour with a gluten-free alternative. Just make sure to follow the instructions provided by the specific brand of gluten-free flour you are using.
These breadsticks are best enjoyed fresh out of the oven. However, you can store them in an airtight container for up to 2 days. To reheat, simply pop them in the oven for a few minutes until warmed through.
Yes, you can prepare the bread dough a day in advance. Once the dough has risen, cover it tightly with plastic wrap and refrigerate. When you're ready to shape and bake the breadsticks, simply remove the dough from the refrigerator and let it come to room temperature before proceeding.
Absolutely! If you want to add a touch of color to your Witch's Finger Bread Sticks, feel free to incorporate food coloring into the dough before shaping. Just be mindful that the color may darken slightly during baking.
Yes, you can prepare the Maple Mustard Dip up to 24 hours in advance. Simply store it in an airtight container in the refrigerator until ready to serve. Give it a good stir before serving to ensure the ingredients are well combined.
Yes, you can freeze the baked Witch's Finger Bread Sticks. Allow them to cool completely, then place them in a freezer-safe container or bag. When you're ready to enjoy them, simply thaw them in the refrigerator and reheat in the oven until warmed through.
Absolutely! If you prefer bite-sized treats, you can divide the dough into smaller portions and shape them into mini witch finger breadsticks. Just remember to adjust the baking time accordingly, as they will cook faster than the regular-sized ones.
AprilCook, recipe developer and the heart of Chefwiz. More about April