Witch Finger Breadsticks
Rate this recipeBe the first to rate
 By AprilPublished
 Have you ever wanted to make a spooky and delicious treat for Halloween?
 By AprilPublished
 Have you ever wanted to make a spooky and delicious treat for Halloween?
Preheat the oven to 400 degrees F.
Line 2 baking sheets with parchment.
In a small bowl, whisk together the oil, Italian seasoning, 1/2 teaspoon salt, and a few grinds of pepper.
Lightly flour a work surface.
Divide the dough into 10 equal portions using a bench scraper or chef's knife.
Roll each portion into a 10-inch rope.
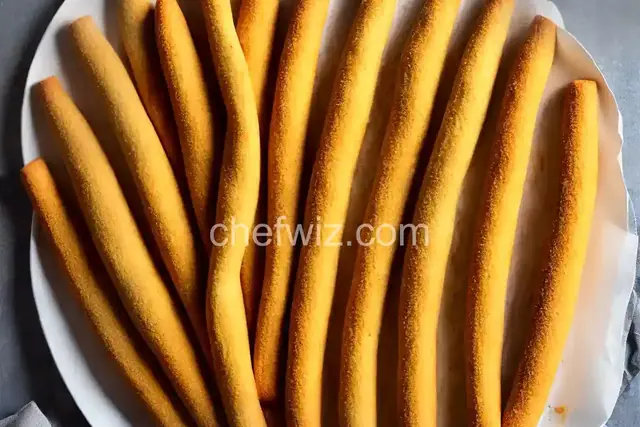
Twist each rope in the middle and arrange them on the prepared baking sheets. Each twist should resemble a gnarly witch knuckle.
Brush the breadsticks with the seasoned oil.
Sprinkle sesame seeds over the breadsticks.
Firmly press an olive half onto the end of each breadstick, ensuring it sticks to the dough.
Bake the breadsticks until they turn golden brown, approximately 15 to 20 minutes.
Serve the breadsticks with warm marinara sauce.
Have you ever wanted to make a spooky and delicious treat for Halloween? Well, look no further than witch finger breadsticks! These eerie and tasty treats will be the hit of any Halloween party. They are not only fun to make but also fun to eat. So, let's dive into the magical world of witch finger breadsticks and learn how to make them!
To begin our witch finger breadstick adventure, we need a few basic ingredients. But before we jump into that, let me ask you: have you ever felt the excitement of creating something unique and creepy? Well, making witch finger breadsticks is like being a mad scientist in the kitchen, mixing together ingredients to create a bewitching treat.
Before we start crafting our witch finger breadsticks, let's gather all the necessary ingredients. But hey, before you start, have you ever wondered what makes a good breadstick? The answer lies in the perfect balance of softness and crunch. It's like finding the right balance between chaos and order, just like a witch casting a spell.
First, we need to mix our dough. Picture this: you're a witch brewing a potion, carefully mixing together various ingredients. In this case, our ingredients include flour, yeast, sugar, salt, and water. It's like creating magic in your kitchen, transforming simple ingredients into a spellbinding treat.
Now that our dough is ready, it's time to shape our witch finger breadsticks. Imagine yourself molding clay, shaping it into long, slender fingers. That's exactly what we're going to do with our dough. We'll roll it out, cut it into finger-like shapes, and add a few spooky details. It's like sculpting a masterpiece, turning dough into eerie fingers.
After shaping our breadsticks, it's time to bake them in the oven. As they bake, the kitchen will fill with the delightful aroma of fresh bread, like a witch's spell filling the air. Once they're golden brown and crisp, we can unleash our creativity and add spooky details like almond nails and red food coloring for a bloody effect. It's like painting a masterpiece, adding the final touches to our witch finger breadsticks.
And there you have it – witch finger breadsticks! These eerie treats are not only visually stunning but also delicious to eat. Making them is like stepping into a magical world, where you get to be the sorcerer of your own spooky creations. So gather your ingredients, unleash your creativity, and let the magic happen in your kitchen this Halloween!
Absolutely! You can use gluten-free flour as a substitute for regular flour in this recipe. Just make sure to follow the instructions on the gluten-free flour package for the best results.
Yes, you can make the breadsticks in advance. Once baked and cooled, store them in an airtight container at room temperature. They should stay fresh for a couple of days.
Yes, you can freeze the breadsticks. Make sure to cool them completely before placing them in a freezer-safe container or bag. When you're ready to enjoy them, simply thaw them at room temperature and reheat in the oven for a few minutes to regain their crispness.
Absolutely! You can experiment with different flavors by adding herbs, spices, or even cheese to the dough. Just make sure to adjust the measurements accordingly and let your creativity run wild.
Yes, you can adjust the size of the breadsticks to your liking. For smaller breadsticks, simply cut the dough into smaller finger-like shapes. If you prefer larger breadsticks, shape the dough accordingly. Just keep in mind that baking time may vary depending on the size.
While yeast is traditionally used in bread recipes to achieve a light and fluffy texture, you can make breadsticks without yeast. There are yeast-free bread recipes available that use baking powder or baking soda as leavening agents. Just make sure to follow a yeast-free breadstick recipe for the best results.
Yes, you can make vegan witch finger breadsticks by using plant-based ingredients. Substitute dairy milk with a non-dairy milk alternative, such as almond milk or soy milk, and use a vegan butter substitute instead of regular butter. Make sure to check the ingredient labels to ensure all the components are vegan-friendly.
Absolutely! Making witch finger breadsticks is a fun and creative activity for kids. They can help mix the dough, shape the breadsticks, and even add spooky details. Just make sure to supervise younger children while working with the oven or any sharp tools.
AprilCook, recipe developer and the heart of Chefwiz. More about April