Victoria Sponge Cake
Rate this recipeBe the first to rate
 By AprilPublished
 Are you a fan of light and fluffy cakes? Do you enjoy a classic British dessert that is simple yet delicious?
 By AprilPublished
 Are you a fan of light and fluffy cakes? Do you enjoy a classic British dessert that is simple yet delicious?
Preheat the oven to 400 degrees F (200 degrees C).
Grease an 8-inch springform pan.
In a medium bowl, sift together the flour and baking powder. Set aside.
Using an electric mixer, beat the butter and sugar until light and fluffy, approximately 3 minutes. The mixture should be noticeably lighter in color.
Add the eggs one at a time, allowing each egg to blend into the butter mixture before adding the next.
Beat in the vanilla.
Gradually add the flour mixture to the butter mixture in batches, alternating with milk. Mix the batter briefly after each addition just to combine.
Pour the batter into the prepared pan.
Bake in the preheated oven for about 20 minutes, or until a toothpick inserted in the center comes out clean.
Let the cake cool in the pan for 10 minutes, then transfer it onto a wire rack to cool completely.
Once the cake is cooled, cut it in half horizontally.
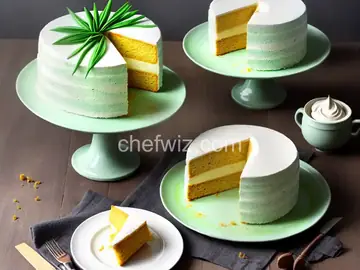
Spread strawberry or raspberry jam and sweetened whipped cream between the layers to create an elegant layer cake.
Are you a fan of light and fluffy cakes? Do you enjoy a classic British dessert that is simple yet delicious? If so, you're in for a treat with Victoria Sponge Cake. This delightful cake is a perfect balance of light sponge, sweet jam, and a touch of cream. In this article, we will explore the history, ingredients, and tips to make the perfect Victoria Sponge Cake.
The Victoria Sponge Cake has a rich history that dates back to the 19th century. It is said to have been a favorite of Queen Victoria herself, hence the name. This cake became popular during the Victorian era, where afternoon tea was a popular social event. The simplicity and elegance of the Victoria Sponge Cake made it a staple at these tea parties.
To create a delicious Victoria Sponge Cake, you'll need a few simple ingredients. Start with butter, sugar, eggs, self-raising flour, and a pinch of salt. These basic ingredients come together to create a light and fluffy sponge. For added flavor, you can also include vanilla extract or lemon zest. To assemble the cake, you'll need strawberry jam and whipped cream.
Now that you have the ingredients, it's time to bake the perfect Victoria Sponge Cake. Here are some tips to ensure your cake turns out beautifully:
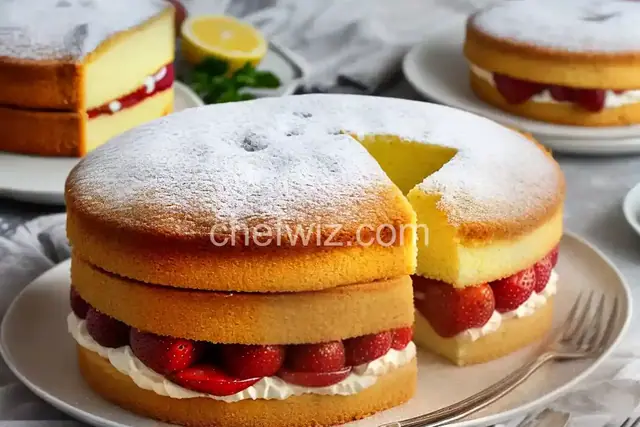
Once your cakes have cooled, it's time to assemble the Victoria Sponge Cake. Start by spreading a generous layer of strawberry jam on one cake layer. Next, add a dollop of whipped cream and spread it evenly. Place the second cake layer on top and dust with powdered sugar for a finishing touch. Now you have a delightful Victoria Sponge Cake ready to be enjoyed!
1. Can I use other flavors of jam?
Yes, you can experiment with different flavors of jam to personalize your Victoria Sponge Cake. Raspberry and blackberry jam are popular alternatives.
2. Can I use frosting instead of whipped cream?
While traditional Victoria Sponge Cake uses whipped cream, you can certainly use frosting if you prefer a richer taste. Buttercream or cream cheese frosting would work well.
3. Can I make the cake in advance?
Absolutely! You can bake the cakes a day in advance and store them in an airtight container. Assemble the cake with the jam and cream on the day you plan to serve it for optimal freshness.
4. Can I freeze the cake?
Yes, you can freeze the unfrosted cake layers for up to a month. Wrap them tightly in plastic wrap and place them in a freezer bag. Thaw them at room temperature before assembling.
5. Can I add fresh fruit to the cake?
Absolutely! Fresh berries, such as strawberries or raspberries, can be added between the layers or on top for an extra burst of flavor and visual appeal.
6. Can I make a gluten-free version of the Victoria Sponge Cake?
Yes, you can substitute the self-raising flour with a gluten-free flour blend to make a gluten-free Victoria Sponge Cake. Ensure the other ingredients are also gluten-free.
7. Can I use a different type of cake pan?
Yes, you can use different sizes or shapes of cake pans. Just keep in mind that the baking time may vary depending on the thickness of the cake layers.
8. Can I decorate the cake?
Absolutely! You can decorate the Victoria Sponge Cake with fresh flowers, sprinkles, or a dusting of cocoa powder. Let your creativity shine!
Victoria Sponge Cake is a classic British dessert that has stood the test of time. Its light and fluffy texture, combined with sweet jam and cream, make it a delightful treat for any occasion. Whether you're hosting an afternoon tea party or simply craving a slice of cake, the Victoria Sponge Cake is sure to satisfy. So why not give it a try and indulge in a taste of tradition?
AprilCook, recipe developer and the heart of Chefwiz. More about April