The Best Cherry Pie (With Fresh or Frozen Fruit) Recipe
Rate this recipeBe the first to rate
 By AprilPublished
 Who doesn't love a freshly baked cherry pie? The combination of tart cherries, sweet filling, and flaky crust is simply irresistible.
 By AprilPublished
 Who doesn't love a freshly baked cherry pie? The combination of tart cherries, sweet filling, and flaky crust is simply irresistible.
In a large bowl, combine pitted cherries, lemon juice, sugar, salt, and tapioca starch. Use a flexible spatula to fold the ingredients together until well combined.
Scrape the mixture into a prepared pie shell.
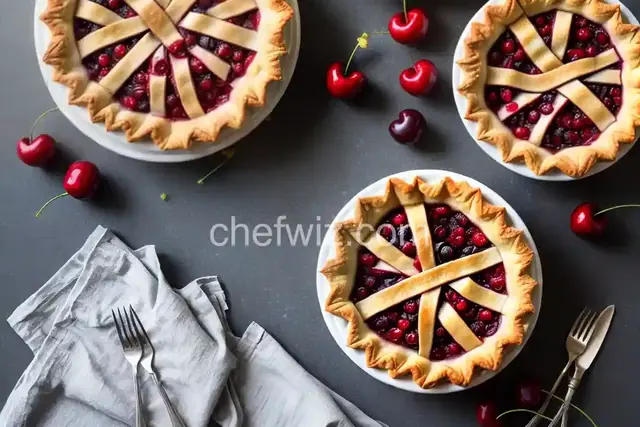
Place the remaining dough on top of the filling. You can use a solid sheet, cutouts, or create a lattice-top design.
Trim away any excess dough and refrigerate the pie for about 30 minutes to ensure the top crust is completely chilled.
While the pie is chilling, adjust the oven rack to the lower-middle position and preheat the oven to 400°F (200°C).
In a small bowl, whisk together the egg, egg yolk, cream, and salt.
Brush the chilled top crust of the pie with the egg mixture in a thin and even layer. This will give the crust a glossy, golden sheen, but it is optional.
Place the chilled pie on a rimmed baking sheet lined with parchment paper.
Bake the pie for about 1 hour, or until the crust is golden.
Loosely cover the pie with tented foil, or place an empty baking sheet on the topmost rack of the oven to shield it.
Continue baking for approximately 15 minutes, or until the filling is bubbling even in the center of the pie.
If the crust completely covers the filling, bake the pie until
Who doesn't love a freshly baked cherry pie? The combination of tart cherries, sweet filling, and flaky crust is simply irresistible. Whether you're using fresh or frozen fruit, making the best cherry pie is easier than you might think. In this article, we'll explore the ins and outs of creating a mouthwatering cherry pie that will leave your taste buds singing with joy.
When it comes to cherry pies, the type of cherries you use can make all the difference. Sour cherries are the traditional choice for pies, as their tartness balances out the sweetness of the filling. However, if sour cherries are not readily available, you can also use sweet cherries, which will result in a slightly sweeter pie.
While fresh cherries have a certain charm, frozen cherries can be just as delicious in a pie. The advantage of using frozen cherries is that they are available year-round, ensuring you can enjoy a cherry pie any time you desire. Plus, frozen cherries are often pitted, saving you the hassle of removing the pits yourself.
No cherry pie is complete without a buttery, flaky crust that melts in your mouth. Making your own pie crust might seem daunting, but it's well worth the effort. With a few simple ingredients and a bit of practice, you can create a crust that rivals even the best bakery.
Now that you have your cherries and crust ready, it's time to focus on the filling. A great cherry pie filling strikes the right balance between sweet and tart, allowing the natural flavors of the cherries to shine through. Adding a touch of lemon zest or almond extract can elevate the taste and take your pie to the next level.
When it comes to baking a cherry pie, a few key tips can make all the difference:
There's something inherently nostalgic about a warm slice of cherry pie. Whether you enjoy it on a lazy Sunday afternoon or serve it as the grand finale to a holiday meal, cherry pie has a way of bringing people together and creating cherished memories.
A1: While fresh or frozen cherries are recommended for the best flavor, you can use canned cherries in a pinch. Just be sure to drain them well and adjust the sugar accordingly.
A2: To prevent shrinkage, make sure to chill your pie crust before baking and avoid stretching it when placing it in the pie dish.
A3: Absolutely! A lattice crust adds a beautiful touch to your pie and allows the vibrant cherry filling to peek through. Simply weave strips of dough over the pie, alternating between horizontal and vertical layers.
A4: Yes, you can freeze a baked cherry pie. Wrap it tightly in plastic wrap and aluminum foil before placing it in the freezer. When ready to enjoy, thaw it in the refrigerator overnight and reheat it in the oven for a few minutes.
A5: It depends on your personal preference. Sour cherries offer a more traditional tart flavor, while sweet cherries provide a sweeter taste. You can also mix the two for a balanced flavor profile.
A6: Absolutely! Feel free to experiment with other fruits like blueberries or raspberries to create a unique and delightful twist on the classic cherry pie.
A7: On average, a cherry pie takes about 45-50 minutes to bake. However, every oven is different, so keep a close eye on your pie and adjust the baking time if needed.
A8: Yes, you can make a gluten-free cherry pie by using a gluten-free pie crust recipe and ensuring that all the ingredients, including the cherries, are gluten-free.
In conclusion, a homemade cherry pie is a delightful treat that brings joy to any occasion. Whether you choose to use fresh or frozen cherries, the key to a perfect pie lies in the balance of flavors and a flaky, buttery crust. So roll up your sleeves, gather your ingredients, and embark on a sweet adventure in the world of cherry pie baking!
AprilCook, recipe developer and the heart of Chefwiz. More about April