Taro Rolls
Rate this recipeBe the first to rate
 By AprilPublished
 Are you tired of the same old dinner rolls? Looking to add a unique and flavorful touch to your next meal?
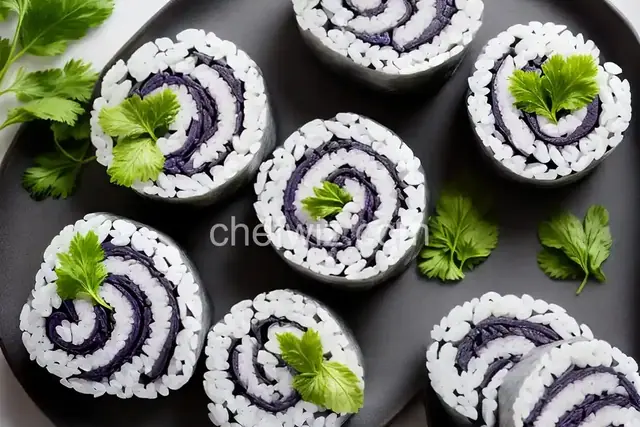 By AprilPublished
 Are you tired of the same old dinner rolls? Looking to add a unique and flavorful touch to your next meal?
In the bowl of a stand mixer fitted with the dough hook, combine water, poi, butter, egg, yeast, and purple food coloring. Allow the mixture to stand for approximately 5 minutes, or until the yeast softens and forms a creamy foam.
Add sugar and salt to the mixture.
Mix the ingredients on low speed, gradually adding flour until the dough comes together and the texture is smooth.
Transfer the dough onto a floured work surface.
Divide the dough into 18 pieces and shape each piece into rolls.
Preheat the oven to 325 degrees F (165 degrees C) and line a baking sheet with aluminum foil.
Place the rolls on the prepared baking sheet.
Cover the rolls and allow them to rise until doubled in size, approximately 20 minutes.
Bake in the preheated oven for about 20 minutes, or until the bottoms of the rolls start to brown.
Are you tired of the same old dinner rolls? Looking to add a unique and flavorful touch to your next meal? Look no further than taro rolls! These delightful rolls take a classic recipe and give it a delicious twist. In this article, we will explore the wonders of taro rolls, from their rich history to their mouthwatering taste. Get ready to elevate your baking game with this simple yet impressive recipe.
Have you ever wondered where taro rolls originated? Taro, a starchy root vegetable, has been a staple in many cultures for centuries. It is commonly used in Asian and Pacific Island cuisine, known for its unique flavor and creamy texture. Taro rolls, with their vibrant purple color and delicate taste, have become a popular variation of traditional dinner rolls.
Now that you know a bit about taro and its cultural significance, let's dive into the process of making taro rolls. Just like any other dinner roll recipe, the key to success lies in the dough. Mixing the ingredients thoroughly and allowing the dough to rise properly are crucial steps to achieve soft and fluffy rolls. Imagine sinking your teeth into a warm, freshly baked taro roll - it's like biting into a cloud!
Before you begin, make sure you have all the necessary ingredients on hand. This includes taro, flour, yeast, sugar, salt, and butter. The taro will give the rolls their distinct flavor and beautiful purple hue, while the other ingredients work together to create a perfect balance of taste and texture.
Once you have your ingredients ready, it's time to mix the dough. Combine the flour, yeast, sugar, and salt in a large bowl. Gradually add in the taro, mashed to a smooth consistency. Mix everything well until a soft and elastic dough forms. Knead the dough for a few minutes, allowing the gluten to develop and create that desired airy texture.
Now that your dough is ready, it's time to shape and bake the rolls. Shape the dough into small balls and place them on a baking sheet. Let them rise for a while until they double in size. Preheat your oven to the recommended temperature and bake the rolls until they turn golden brown. The aroma filling your kitchen will be simply irresistible!
Taro rolls are a fantastic way to add excitement to your meals. They combine the comfort of traditional dinner rolls with the unique taste of taro, creating a delightful experience for your taste buds. So, why not give taro rolls a try? You'll be pleasantly surprised by how this simple twist can make a big difference in your culinary adventures.
A1: Unfortunately, taro rolls are not gluten-free. The main ingredient, flour, contains gluten. However, you can explore gluten-free alternatives and experiment with different flours to create a similar texture and flavor.
A2: Yes, you can! After baking the rolls, allow them to cool completely. Then, place them in an airtight container or freezer bag and store them in the freezer. When you're ready to enjoy them, simply thaw and reheat in the oven for a few minutes.
A3: Absolutely! Taro powder is a convenient alternative to fresh taro. Just make sure to follow the instructions on the packaging and adjust the measurements accordingly to achieve the desired flavor and color.
A4: Taro rolls are incredibly versatile and can be enjoyed with a variety of dishes. They pair well with soups, stews, curries, or simply as a side to your favorite main course. Let your creativity guide you!
A5: Taro leaves are typically used in other dishes, such as taro leaf wraps, and are not commonly incorporated into taro rolls. Stick to using taro root for this particular recipe.
A6: Taro rolls are best enjoyed fresh on the day they are baked. However, you can store them in an airtight container for 1-2 days at room temperature. To maintain their softness, consider reheating them briefly in the oven before serving.
A7: Absolutely! Feel free to get creative and add other ingredients to enhance the flavor of your taro rolls. You can experiment with herbs, spices, or even cheese to make them even more delicious.
A8: Yes, you can substitute purple sweet potato for taro if you prefer. The rolls may have a slightly different taste and texture, but they will still be delicious and visually appealing.
AprilCook, recipe developer and the heart of Chefwiz. More about April