Stovetop Bread
Rate this recipeBe the first to rate
 By AprilPublished
 Have you ever craved the delicious aroma and taste of fresh bread, but didn't want to heat up your entire kitchen with the oven?
 By AprilPublished
 Have you ever craved the delicious aroma and taste of fresh bread, but didn't want to heat up your entire kitchen with the oven?
Grease a 9-inch Dutch oven and set it aside.
In a stand mixer fitted with the dough hook attachment, combine the butter, yeast, sugar, salt, and 1 cup of warm water.
Mix on low speed and gradually add 1/2 cup of flour at a time, ensuring that each addition is fully incorporated before adding more.
Once all of the flour is added, knead the mixture on medium speed for 8 minutes.
Transfer the dough to the prepared Dutch oven, cover it, and allow it to rise until it doubles in size, which should take approximately 1 hour.
Place the Dutch oven on medium-low heat and cook until the internal temperature of the bread reaches 200 degrees F, which should take around 20 to 25 minutes.
Allow the bread to cool in the pot for 5 minutes, then remove it from the pot and place it on a rack to cool completely.
Have you ever craved the delicious aroma and taste of fresh bread, but didn't want to heat up your entire kitchen with the oven? Look no further than stovetop bread! This simple and versatile method allows you to bake bread on your stovetop, giving you the perfect solution for those hot summer days or for when you simply want a quick and easy homemade loaf without the fuss. Let's dive in and discover the secrets to making mouthwatering stovetop bread.
Baking bread on a stovetop is like conducting a symphony. You have to orchestrate the right ingredients, temperature, and timing to create a masterpiece. Just as a conductor guides the musicians to play harmoniously, you'll guide the dough to rise and bake into a delectable loaf. With a little practice, you'll become a maestro of stovetop bread.
When it comes to stovetop bread, not all recipes are created equal. You'll want to look for recipes specifically designed for stovetop baking. These recipes typically use less yeast and require a shorter baking time. They may also suggest using a Dutch oven or a cast-iron skillet to create the perfect stovetop environment for your bread to rise and bake.
Now that you have your recipe, it's time to prepare the dough. Just like a sculptor molds clay, you'll shape and knead the dough until it becomes smooth and elastic. This process develops the gluten, giving your bread structure and a pleasing texture. Don't be afraid to get your hands dirty and feel the transformation happening beneath your fingertips.
Once your dough is ready, it's time for it to rise. This is where the magic happens. The yeast in the dough will feast on the sugars, releasing carbon dioxide and causing the dough to expand. It's like watching a balloon inflate, filling the room with anticipation. Allow the dough to rise in a warm spot for the recommended time, usually until it has doubled in size.
Now comes the exciting part – baking your bread on the stovetop. Preheat your Dutch oven or cast-iron skillet on low heat for a few minutes. This will create the perfect environment for your bread. Carefully place your risen dough into the hot vessel, cover with a lid, and let the magic unfold. The gentle heat from the stovetop will work its wonders, turning your dough into a beautiful, golden loaf.
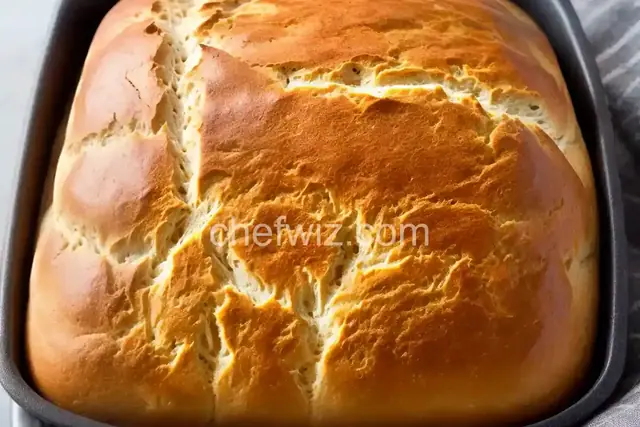
Once your stovetop bread has finished baking, it's time to savor the fruits of your labor. Break open the crusty exterior and inhale the intoxicating aroma. Spread a generous amount of butter on a warm slice and let it melt into the crevices. Close your eyes and take a bite – the soft, fluffy interior and the burst of flavors will transport you to bread heaven.
Stovetop bread offers a convenient and delicious way to enjoy homemade bread without the need for an oven. With the right recipe, preparation, and baking technique, you can create bread that rivals any bakery. So, next time you're craving fresh bread, why not give stovetop bread a try? Your taste buds will thank you.
No, not all bread recipes are suitable for stovetop baking. Look for recipes specifically designed for stovetop bread, as they are formulated to work best with this method.
While not absolutely necessary, using a Dutch oven or cast-iron skillet creates a more controlled environment for baking stovetop bread, resulting in better texture and crust.
The baking time for stovetop bread is generally shorter than traditional oven-baked bread. It can take anywhere from 30 to 45 minutes, depending on the recipe and the size of the loaf.
Absolutely! Stovetop bread can be customized with various flavors and ingredients. Feel free to experiment with herbs, spices, cheeses, or even dried fruits and nuts to create unique and delicious bread.
Yes, stovetop bread can be frozen. Allow the bread to cool completely, then wrap it tightly in plastic wrap or place it in a freezer bag. It can be stored in the freezer for up to three months.
If your stovetop bread doesn't rise properly, it could be due to various factors such as expired yeast, incorrect measurements, or inadequate proofing time. Double-check your ingredients and follow the recipe instructions closely for the best results.
Yes, there are gluten-free stovetop bread recipes available. Look for recipes that use alternative flours such as rice flour, almond flour, or tapioca flour to create a gluten-free version of stovetop bread.
Stovetop bread can be a healthier option than oven-baked bread, as it usually requires less oil or fat for baking. However, the overall healthiness of the bread depends on the ingredients and recipe used.
AprilCook, recipe developer and the heart of Chefwiz. More about April