Shark Week Shark-cuterie Board
Rate this recipeBe the first to rate
 By AprilPublished
 Are you ready to dive into the world of sharks? Shark Week is an exciting time for shark enthusiasts and ocean lovers alike.
 By AprilPublished
 Are you ready to dive into the world of sharks? Shark Week is an exciting time for shark enthusiasts and ocean lovers alike.
In a large bowl, mix together cream cheese, cheddar, green onions, everything seasoning, and cayenne using a hand mixer until well combined.
Transfer the mixture onto a large piece of plastic wrap and shape it into a triangle with a flat bottom and slightly rounded sides, resembling a shark's head. Use the plastic wrap to help shape it. Refrigerate for about 1 hour until firm.
Unwrap the shark head cheese ball and place it on a serving platter or large cutting board.
Cut a smaller piece of paper into the same shape as the shark's head and place it in the center of the bottom of the cheese ball. Sprinkle poppy seeds onto the exposed surface of the cheese ball, pressing them gently. Remove the paper and clean any excess seeds around the cheese ball.
Arrange halves of sopressata in the bottom center of the cheese ball to create the open mouth of the shark. Cut teeth shapes from a slice of cheese and place them on top of the sopressata.
Take small pieces of leftover cheese and place them on each side of the shark's head. Put a peppercorn on top of each piece of cheese. If the peppercorns are not staying in place, you can lightly press them with cream cheese or hummus.
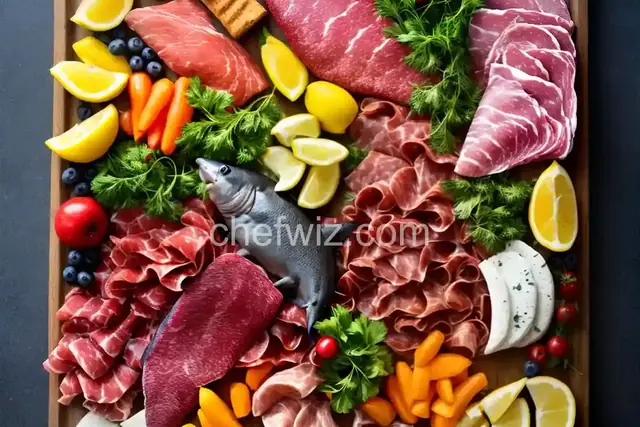
Are you ready to dive into the world of sharks? Shark Week is an exciting time for shark enthusiasts and ocean lovers alike. To celebrate this annual event, why not create a shark-themed charcuterie board? This unique and visually stunning appetizer display will not only impress your guests but also add a touch of adventure to your gathering. Let's explore how you can create a jaw-dropping Shark-cuterie board!
Just like a shark carefully selects its prey, you need to choose the right ingredients for your Shark-cuterie board. Think of your ingredients as the different elements of the ocean ecosystem. You'll want to include a variety of flavors, textures, and colors to create a visually appealing and delicious spread.
Start by selecting a variety of cheeses to represent the Great White shark. Opt for a mix of hard, soft, and semi-soft cheeses to add diversity to your board. Arrange them in different shapes and sizes to mimic the powerful presence of the Great White.
Include some seaweed and kelp to represent the underwater vegetation in the ocean. These can be in the form of crispy seaweed snacks or even a seaweed salad. Not only will they add a pop of green to your board, but they also bring a unique texture and flavor.
Now that you have your ingredients ready, it's time to assemble your Shark-cuterie board. Think of this process as creating a marine landscape, complete with hidden treasures and surprises.
Start by placing a large piece of cured meat or smoked salmon in the shape of a shark's fin. This will be the centerpiece of your board and will create an instant wow factor. Surround it with sliced cured meats like salami, prosciutto, and pepperoni to represent the shark's body.
Add an assortment of crackers and bread to mimic the ocean floor. Choose different shapes and sizes to create depth and dimension. You can also use breadsticks to represent coral reefs or rock formations.
No Shark-cuterie board is complete without some additional elements to enhance the overall experience. These finishing touches will take your board from ordinary to extraordinary.
Add some garnishes and accents to bring your Shark-cuterie board to life. Consider using blueberries or blackberries to represent ocean bubbles. Sprinkle some edible flowers to mimic colorful coral reefs. The possibilities are endless!
Creating a Shark-cuterie board is a creative and fun way to celebrate Shark Week. By carefully selecting the right ingredients and arranging them in a visually appealing manner, you can create a show-stopping centerpiece that will have your guests amazed. So, dive in and let your imagination run wild as you embark on this culinary adventure!
Absolutely! Feel free to get creative and choose ingredients that you and your guests will enjoy. The key is to have a variety of flavors, textures, and colors.
If you're serving the Shark-cuterie board to children, you can make it more kid-friendly by including their favorite snacks like cheese cubes, crackers, and fruit. You can also use cookie cutters to shape the cheese into fun shark or ocean-themed shapes.
Absolutely! You can substitute cured meats with vegetarian options like marinated tofu, grilled vegetables, or vegetarian deli slices.
You can prepare some elements of your Shark-cuterie board a few hours in advance, such as slicing the cheeses and arranging the cured meats. However, it's best to assemble the board closer to the serving time to ensure the ingredients stay fresh.
Yes, you can definitely add dips or sauces to complement the flavors of the ingredients on your Shark-cuterie board. Consider including options like spicy mayo, honey mustard, or a tangy salsa.
If you have leftovers from your Shark-cuterie board, you can store them in airtight containers in the refrigerator. Make sure to separate the different components to maintain their freshness.
Absolutely! You can take the Shark-cuterie board concept to the next level by incorporating a birthday theme. Use shark-shaped cookie cutters to shape the cheese, and add birthday-themed decorations to the board.
Of course! You can scale down the ingredients and the size of the board to accommodate a smaller gathering. The key is to maintain the visual appeal and the variety of flavors.
AprilCook, recipe developer and the heart of Chefwiz. More about April