Salt Rising Bread
Rate this recipeBe the first to rate
 By AprilPublished
 Have you ever tried a bread that rises without the help of yeast?
 By AprilPublished
 Have you ever tried a bread that rises without the help of yeast?
Heat the milk and add 1 tablespoon of sugar, cornmeal, and 1 teaspoon of salt.
Transfer the mixture to a jar and place it in an electric skillet or crock pot filled with hot water.
Maintain the temperature between 105 to 115 degrees F (40 to 47 degrees C) for 7-12 hours until fermentation occurs. You can tell it has fermented when you hear gas escaping and see bubble foam forming over the starter. This process can take up to 24 hours.
Wait for the unusual salt-rising smell to appear before proceeding with bread-making.
To make the sponge:
Transfer the bubbly starter mixture to a medium-sized bowl.
Stir in 2 cups of warm water, 2 tablespoons of sugar, shortening, and 2 cups of all-purpose flour.
Thoroughly beat the sponge and place the bowl back in the water to maintain the temperature.
Cover the bowl and let the sponge rise until it becomes light and full of bubbles, which should take approximately 2 1/2 to 3 hours.
To incorporate baking soda and flour:
Dissolve baking soda in 1 tablespoon of warm water and add it to the sponge.
Stir in 5 1/4 cups of flour, adding more if needed, until the dough is kneadable.
Knead the dough for 10 minutes or
Have you ever tried a bread that rises without the help of yeast? A bread that has a distinct aroma and flavor? Salt rising bread is a one-of-a-kind delight that will surely captivate your taste buds. In this article, we will explore the intriguing history, the special process, and the mouthwatering taste of salt rising bread. So, let's dive in and discover this hidden gem!
Imagine a time when yeast was not readily available, and bakers had to rely on their creativity to make bread rise. Salt rising bread originated in the Appalachian region of the United States during the 19th century. It was a staple for pioneers and settlers who didn't have access to commercial yeast. The unique fermentation process of salt rising bread allowed them to enjoy freshly baked loaves without relying on traditional yeast.
So, how does salt rising bread rise without yeast? The answer lies in the power of bacteria. Yes, bacteria! The process begins by creating a starter, also known as the "mother sponge," which is a mixture of cornmeal, warm water, and a pinch of salt. This mixture is left to ferment overnight, creating the perfect environment for bacteria to thrive.
As the starter ferments, bacteria produce carbon dioxide, which causes the bread to rise. The distinctive aroma of salt rising bread comes from the by-products of the bacteria's fermentation process. It is this unique combination of flavors and smells that gives salt rising bread its characteristic taste.
Creating salt rising bread is no easy task. It requires patience, precision, and a bit of intuition. Bakers must carefully monitor the temperature and conditions to ensure the bacteria thrive and the bread rises properly. It's a delicate balance of science and art, resulting in a bread that is both visually appealing and incredibly delicious.
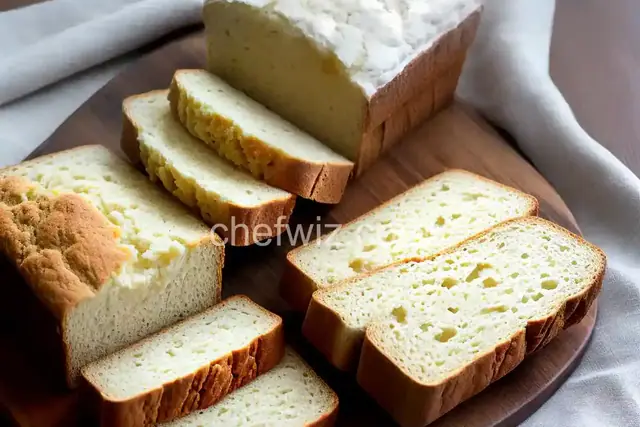
Now that you know the fascinating history and process behind salt rising bread, it's time to savor its unique flavor. The bread has a dense yet tender texture, with a slightly tangy taste. The crust is golden and crispy, while the inside is soft and moist. It pairs perfectly with soups, stews, or simply slathered with butter.
Each bite of salt rising bread is like a journey through time, a taste that connects us to our ancestors and their resourcefulness. It's a bread that tells a story and brings us closer to the roots of traditional baking.
Salt rising bread is a true culinary treasure, with its rich history, unique fermentation process, and unforgettable flavor. It's a bread that takes us back in time and connects us to the ingenuity of our ancestors. Whether you try making it at home or seek it out in specialty bakeries, salt rising bread is a must-try for any bread lover. So, embrace the art of bread making, savor the tangy taste, and let salt rising bread transport you to a world of flavor and tradition.
Absolutely! While it may require some practice to perfect the process, making salt rising bread at home is a rewarding experience. Just be prepared to be patient and embrace the art of bread making.
Despite its name, salt rising bread does not taste overly salty. The salt is used in the starter to create the right environment for bacteria to grow, but it does not overpower the flavor of the bread.
While salt rising bread is delicious on its own, it may not be the best choice for sandwiches. Its dense texture and unique flavor are better suited for enjoying with spreads or as a side to a meal.
The process of making salt rising bread can take anywhere from 12 to 24 hours, depending on the temperature and conditions. It requires overnight fermentation and careful monitoring of the starter.
Yes, you can freeze salt rising bread. However, it is best enjoyed fresh. If you do freeze it, make sure to wrap it tightly to prevent freezer burn and let it thaw at room temperature before consuming.
No, salt rising bread is not gluten-free. It is traditionally made with wheat flour, which contains gluten. If you have gluten intolerance or celiac disease, salt rising bread may not be suitable for you.
While the traditional recipe calls for wheat flour, you can experiment with alternative flours like spelt or rye. However, keep in mind that the texture and flavor may differ from the original salt rising bread.
Salt rising bread is not as widely available as other types of bread. However, you may be able to find it in specialty bakeries or farmers markets, especially in the Appalachian region. Alternatively, you can try making it at home and experience the joy of creating this unique bread yourself.
AprilCook, recipe developer and the heart of Chefwiz. More about April