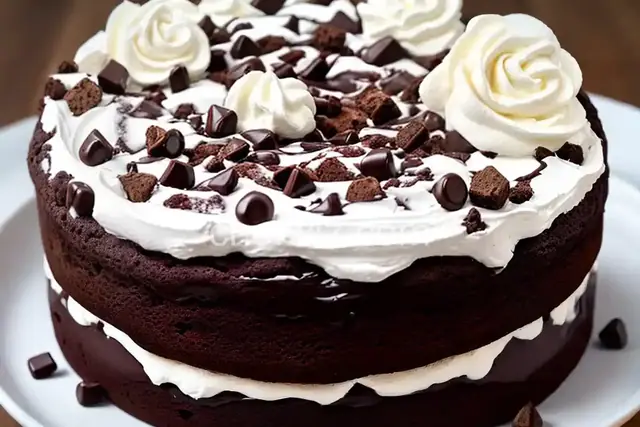
Rocky Road Ice Cream Cake
Rate this recipeBe the first to rate
 By AprilPublished
 Are you a fan of ice cream and cake? If so, you're in for a treat!
 By AprilPublished
 Are you a fan of ice cream and cake? If so, you're in for a treat!
Preheat the oven to 350 degrees F.
Grease a 9-inch springform pan and line the bottom with parchment paper.
In a medium bowl, combine the melted butter and wafer cookies, mixing well.
Press the mixture into the bottom and slightly up the sides of the prepared pan.
Bake for 10 minutes, then allow it to cool completely.
Spread marshmallow creme onto the cookie crust and sprinkle with walnuts.
Scoop ice cream onto the walnut layer, packing it tightly.
Use an offset spatula to smooth the top.
Cover with plastic wrap and freeze until firm, approximately 2 to 2 1/2 hours.
Remove the cake from the pan by running a knife around the edge, then remove the springform and bottom of the pan.
Invert the cake onto a sheet of plastic wrap, removing the parchment paper.
Place a plate on the bottom and invert once more.
Heat the heavy cream in a small pot until simmering.
Pour the cream over the chocolate in a heatproof bowl and stir until smooth.
Allow the mixture to cool for 10 minutes.
Frost the top and sides of the cake with the ganache.
Sprinkle with mini marshmallows.
If the cake starts to soften, return it to the freezer for a few minutes.
Freeze for
Are you a fan of ice cream and cake? If so, you're in for a treat! In this article, we'll dive into the delicious world of Rocky Road Ice Cream Cake. Get ready to satisfy your sweet tooth and indulge in a dessert that combines the best of both worlds.
Imagine a luscious, creamy ice cream cake that's packed with rich chocolate, fluffy marshmallows, and crunchy nuts. The combination of these flavors and textures creates a heavenly dessert experience that will leave you wanting more. It's like a party in your mouth!
Rocky Road Ice Cream Cake strikes the perfect balance between the sweetness of chocolate, the gooeyness of marshmallows, and the nutty crunch of nuts. Each bite is a delightful explosion of flavors that will make your taste buds dance with joy.
Whether you're celebrating a birthday, hosting a summer barbecue, or simply treating yourself, Rocky Road Ice Cream Cake is the ultimate dessert to impress your guests or satisfy your cravings. It's versatile and can be customized to suit any occasion.
Creating this masterpiece is easier than you might think. With a few simple steps, you can whip up a homemade Rocky Road Ice Cream Cake that will rival any store-bought version. Let's get started!
Before you begin, make sure you have the following ingredients on hand:
Follow the instructions on the chocolate cake mix box to bake the cake. Once it's cooled, cut it into two equal layers. These layers will form the base and top of your ice cream cake.
Place one layer of the chocolate cake at the bottom of a springform pan. Spread a layer of ice cream on top of the cake, followed by a sprinkle of marshmallows and nuts. Repeat this process with the second layer.
Once you've assembled the layers, cover the pan with plastic wrap and place it in the freezer for at least four hours or overnight. When you're ready to serve, remove the cake from the pan and drizzle it with chocolate sauce. Add a dollop of whipped cream and a few extra marshmallows and nuts for an extra indulgent touch.
Now that your Rocky Road Ice Cream Cake is ready, it's time to dig in and enjoy every bite. Share it with your loved ones or savor it all for yourself - the choice is yours. Just be prepared for a dessert experience that will have you coming back for seconds!
Rocky Road Ice Cream Cake is a dessert that brings together the best of both worlds - ice cream and cake. With its irresistible combination of flavors and textures, it's no wonder this treat is loved by many. Whether you're celebrating a special occasion or simply indulging in a sweet craving, this cake is sure to satisfy. So go ahead, gather your ingredients, follow the steps, and create your own heavenly delight!
Absolutely! While chocolate or vanilla ice cream works best, feel free to get creative and use your favorite flavor.
Of course! If you're not a fan of nuts or have allergies, you can omit them from the recipe. The cake will still be delicious.
Freezing the cake for at least four hours allows it to set properly and ensures the layers hold together when serving. However, if you're short on time, you can freeze it for a minimum of two hours.
Absolutely! Get creative and add your favorite toppings like chocolate chips, caramel sauce, or even fresh fruit.
Yes! This cake is a great make-ahead dessert. Simply store it in the freezer until you're ready to serve.
Yes, you can experiment with different cake flavors. However, keep in mind that chocolate cake pairs exceptionally well with the other ingredients in Rocky Road Ice Cream Cake.
When stored properly in an airtight container, Rocky Road Ice Cream Cake can last up to two weeks in the freezer.
Absolutely! If you're short on time or prefer convenience, store-bought cake and ice cream can be used instead of homemade.
AprilCook, recipe developer and the heart of Chefwiz. More about April