Rich Red Plum Jam Recipe
Rate this recipeBe the first to rate
 By AprilPublished
 Are you ready to dive into the world of delicious homemade jams?
 By AprilPublished
 Are you ready to dive into the world of delicious homemade jams?
Divide the plum halves into two equal portions.
In a non-reactive mixing bowl, combine the first group of plum halves with 1 pound 4 ounces of sugar.
Cut the remaining plum halves in half to make quarters.
In a separate bowl, mix the plum quarters with the remaining 12 ounces of sugar.
Cover both bowls tightly and let them stand at room temperature overnight.
In a large pot, cook the plum halves, along with any sugar and syrup, over medium heat. Stir occasionally to prevent scorching. Cook until softened, approximately 15 minutes.
Pass the plum halves through a food mill fitted with the smallest-hole plate. Scrape any remaining plum left on the mill into the plum puree.
Mix the plum puree into the quartered plums and stir in the lemon juice.
Thoroughly wash 12 half-pint canning jars and their lids. If you plan to process the jam for shelf-stable storage, prepare a water bath and sterilize the jars as described in the instructions.
Set several metal spoons on a plate in the freezer.
Scrape the plum mixture into a wide jamming pot.
Heat the plum mixture over medium-high heat, stirring as needed to prevent scorching. Cook until the jam starts to foam, approximately 15 minutes.
Continue to cook, stirring minimally and lowering the heat if necessary
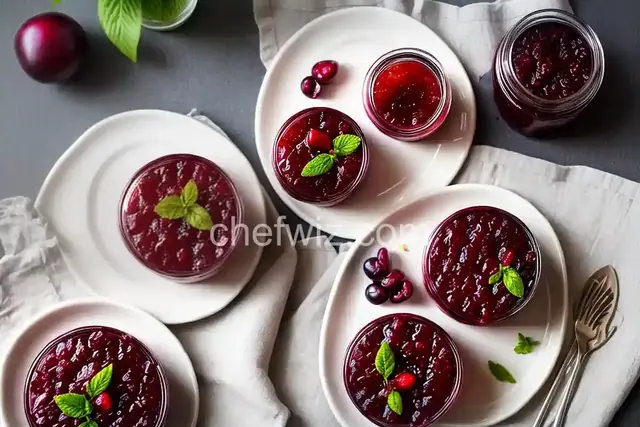
Are you ready to dive into the world of delicious homemade jams? Look no further than this rich red plum jam recipe! It's the perfect balance of sweet and tangy, and it's sure to become a family favorite. Let's get started!
There's something truly special about making your own jam. It's a labor of love that allows you to control the ingredients and flavors. Plus, the satisfaction of spreading your homemade jam on a slice of warm toast is unparalleled. Say goodbye to store-bought jams filled with preservatives and hello to a fresh, homemade batch!
Before we begin, let's talk about the star of the show – plums! When selecting plums for your jam, look for ones that are ripe but still firm. You want them to be slightly soft to the touch, with a deep, rich color. The juicier the plum, the better your jam will turn out!
Once you have your plums, it's time to prepare them for jam-making. Start by washing the plums thoroughly to remove any dirt or residue. Then, slice the plums in half and remove the pits. Don't worry about peeling the skin – it adds a lovely texture to the jam!
Now that your plums are prepped, it's time to dive into the jam-making process. Here's a step-by-step guide to help you along:
In a large saucepan, combine the plums, sugar, and a splash of lemon juice. Cook over medium heat until the sugar has dissolved and the plums have softened. You'll start to notice the incredible aroma filling your kitchen – it's a true delight for the senses!
Once the plums have softened, use a potato masher or a fork to gently mash them. This will release their natural juices and help create a thicker consistency. Continue to simmer the mixture over low heat, stirring occasionally, until it reaches a jam-like consistency.
While your jam is simmering, it's important to sterilize your jars. This ensures that your jam stays fresh for longer. Simply place your jars and lids in a large pot of boiling water for a few minutes. Once sterilized, carefully remove them and let them air dry.
Using a ladle or a funnel, carefully fill the sterilized jars with your homemade plum jam. Leave about half an inch of headspace at the top to allow for expansion. Seal the jars tightly and let them cool completely before storing them in the refrigerator.
Now that your plum jam is ready, it's time to savor the fruits of your labor – quite literally! Spread it on warm toast, drizzle it over pancakes, or use it as a filling for pastries. The possibilities are endless, and each bite will transport you to a world of sweet, tangy deliciousness.
There you have it – a delicious, homemade rich red plum jam that's bursting with flavor. Making your own jam is a rewarding experience that allows you to savor the taste of summer all year round. So why wait? Grab some plums, roll up your sleeves, and let the jam-making adventure begin!
A1: When stored properly in sterilized jars, homemade plum jam can last up to a year in the refrigerator.
A2: Absolutely! Frozen plums work just as well as fresh ones for making jam. Just make sure to thaw them before using.
A3: Yes, you can adjust the amount of sugar to your taste. However, keep in mind that sugar acts as a natural preservative and helps the jam set properly.
A4: Of course! Feel free to get creative and add other fruits like raspberries or strawberries to enhance the flavor of your plum jam.
A5: While this recipe is specifically for plum jam, you can adapt it for other fruits by adjusting the sugar and cooking times accordingly.
A6: Yes, you can use this recipe for canning. Simply follow the proper canning procedures to ensure the safety and longevity of your jam.
A7: The jam will start to thicken as it cools, but it may take up to 24 hours for it to fully set and reach its desired consistency.
A8: Absolutely! If you want to make a larger batch of plum jam, simply double or triple the ingredients accordingly. Just make sure you have a large enough pot!
AprilCook, recipe developer and the heart of Chefwiz. More about April