Red Velvet Swirl Brownies
Rate this recipeBe the first to rate
 By AprilPublished
 Are you a fan of the classic red velvet cake? Do you love the rich and velvety texture combined with the hint of chocolate?
 By AprilPublished
 Are you a fan of the classic red velvet cake? Do you love the rich and velvety texture combined with the hint of chocolate?
Preheat the oven to 350 degrees F.
Grease an 8 by 8-inch baking pan and set it aside.
For the brownie layer: Melt the butter in a saucepan over medium heat. Transfer the melted butter to a large bowl and add the sugar, vanilla, cocoa powder, salt, food coloring, and vinegar in the given order, making sure to mix between each addition.
In a small bowl, whisk the eggs and then stir them into the cocoa mixture.
Gently fold in the flour until it is lightly combined.
Stir in the walnuts and pour the batter into the prepared baking pan, reserving 1/4 cup of the batter for the top.
For the cream cheese layer: In a medium bowl, blend together the cream cheese, sugar, egg, and vanilla.
Spread the cream cheese layer gently over the brownie batter in the pan.
Dollop the reserved brownie batter over the cream cheese layer.
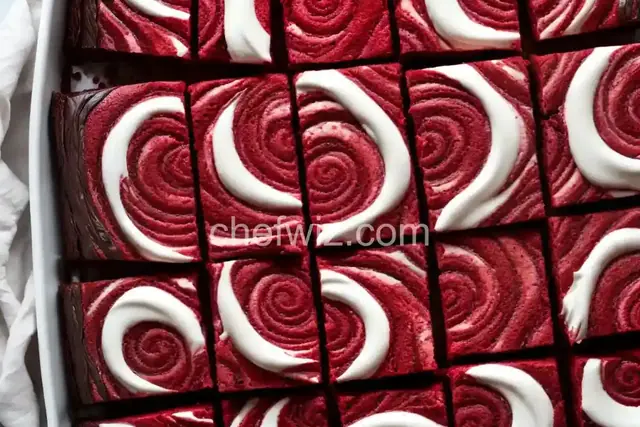
Using a skewer or the tip of a knife, create a swirl pattern by dragging it through the cream cheese mixture.
Bake the brownies for 30 minutes.
Remove the pan from the oven and place it on a cooling rack. Allow the brownies to cool completely before cutting into them.
Are you a fan of the classic red velvet cake? Do you love the rich and velvety texture combined with the hint of chocolate? If so, then you're going to fall head over heels for red velvet swirl brownies! These decadent treats bring together the best of both worlds, combining the flavors of red velvet cake and brownies into one delightful dessert. Let's dive in and discover how to make these mouthwatering delights!
So, why should you choose red velvet swirl brownies over other desserts? Well, imagine sinking your teeth into a fudgy and moist brownie with a beautiful red velvet swirl running through it. It's like a burst of flavor and indulgence all in one bite!
Red velvet swirl brownies are perfect for any occasion. Whether you're craving a sweet treat for a birthday party, a potluck, or just a cozy night in, these brownies will undoubtedly impress your guests and leave them wanting more. Plus, they are visually stunning with their vibrant red and chocolatey swirls, making them a beautiful addition to any dessert table.
Now that you're eager to try these delectable brownies, let's dive into the process of making them. Although they may look fancy and complicated, they are actually quite straightforward to prepare. Don't worry, you don't have to be a master baker to whip up these beauties!
Before you begin, gather all the necessary ingredients. You'll need the usual suspects like flour, cocoa powder, sugar, and eggs. But the star of the show is the red velvet batter, which you can make from scratch or use a store-bought mix for convenience.
Start by preparing the brownie batter. Mix together the dry ingredients, then add in the wet ingredients like eggs and melted butter. Stir until everything is well combined and you have a smooth and thick brownie batter.
Next, it's time to create that beautiful red velvet swirl. Take a portion of the brownie batter and mix it with the red velvet batter. You can either pour the batters alternately into the baking pan and swirl them together with a knife or create layers of the two batters for a more defined swirl.
Once you have your red velvet swirl brownie batter ready, pour it into a greased baking pan and smooth the top. Pop it into the oven and bake until a toothpick inserted into the center comes out with a few crumbs. Allow the brownies to cool completely before cutting into squares and serving. Now, it's time to indulge in the irresistible combination of red velvet and brownie goodness!
Red velvet swirl brownies are the ultimate treat for any dessert lover. The combination of red velvet cake and fudgy brownies creates a flavor explosion that is hard to resist. Whether you choose to make them from scratch or use a boxed mix, these brownies are sure to impress your friends and family.
So why wait? Go ahead and give these red velvet swirl brownies a try. Your taste buds will thank you!
Absolutely! Using a boxed brownie mix can save you time and still result in delicious red velvet swirl brownies.
To achieve a more pronounced swirl, try adding dollops of the red velvet batter on top of the brownie batter in the baking pan. Then, take a toothpick or a skewer and gently swirl the two batters together.
Of course! You can get creative with your toppings. Consider adding cream cheese frosting, chocolate ganache, or even a dusting of powdered sugar for an extra touch of sweetness.
You can store your red velvet swirl brownies in an airtight container at room temperature for up to three days. If you want to extend their shelf life, you can also refrigerate them for up to a week.
Absolutely! If you want to make these brownies ahead of time or have leftovers, you can freeze them for up to three months. Just make sure to wrap them tightly in plastic wrap or place them in an airtight container before freezing.
Yes, you can! Simply substitute the all-purpose flour with a gluten-free flour blend. Just make sure to check that all your other ingredients are also gluten-free if you have dietary restrictions.
Absolutely! If you're a fan of nuts, feel free to add chopped walnuts, pecans, or almonds to your brownie batter for some added crunch and flavor.
While the vibrant red color is a characteristic of red velvet, you can certainly make these brownies without food coloring. The flavor will still be delicious!
So there you have it - a simple and delightful recipe for red velvet swirl brownies. These treats are the perfect combination of two beloved desserts and are sure to impress anyone who tries them. Whether you're baking them for a special occasion or simply because you're craving something sweet, these brownies will not disappoint. So go ahead, get baking, and enjoy the irresistible goodness of red velvet and brownie swirls!
AprilCook, recipe developer and the heart of Chefwiz. More about April