Red Velvet Layer Cake
Rate this recipeBe the first to rate
 By AprilPublished
 Are you ready to indulge in a dessert that combines rich flavors, velvety texture, and a touch of elegance?
 By AprilPublished
 Are you ready to indulge in a dessert that combines rich flavors, velvety texture, and a touch of elegance?
Preheat the oven to 350 degrees F.
Grease two 9-inch-round cake pans and line the bottoms with parchment paper; grease the parchment.
In a bowl, combine the flour, cocoa powder, baking soda, and salt.
In a stand mixer fitted with the paddle attachment, beat the granulated sugar, 12 tablespoons of butter, and vegetable oil on medium-high speed until fluffy, approximately 4 minutes.
Add the eggs one at a time, beating well after each addition.
Mix in the food coloring, vinegar, and vanilla.
Reduce the mixer speed to low and add the flour mixture in 3 batches, alternating with the buttermilk, beginning and ending with the flour, until just combined.
Divide the batter evenly between the prepared pans.
Bake for 35 to 40 minutes, or until a toothpick inserted into the center comes out clean.
Let the cakes cool for 10 minutes on racks, then remove them from the pans and allow them to cool completely.
Using a long serrated knife, carefully slice each cake horizontally to create 2 even layers.
In the stand mixer with the paddle attachment, beat the cream cheese and butter on medium-high speed until fluffy.
Add the confectioners' sugar, lemon juice, vanilla, and salt; beat until smooth.
Place one cake layer on a platter and spread 1
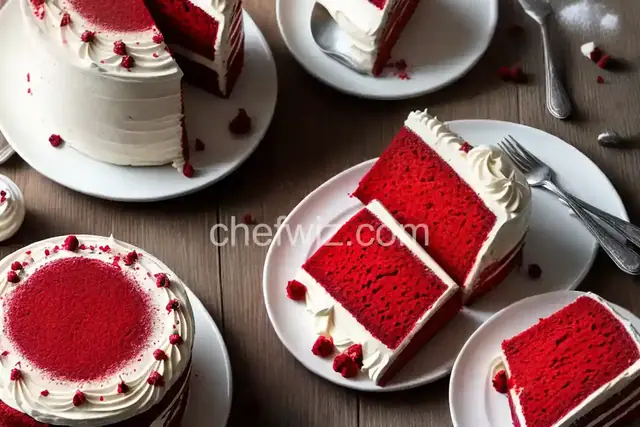
Are you ready to indulge in a dessert that combines rich flavors, velvety texture, and a touch of elegance? Look no further than the heavenly creation known as Red Velvet Layer Cake. This classic confection is a favorite at birthday parties, weddings, and any special occasion where a little indulgence is in order. In this article, we'll explore the history of Red Velvet Layer Cake, its iconic deep red color, and why it has become a beloved treat worldwide.
Like many culinary delights, the origins of Red Velvet Layer Cake are shrouded in mystery and legend. Some say it was first introduced in the Victorian era, while others claim it originated in the American South. Regardless of its precise beginnings, one thing is certain: Red Velvet Layer Cake has stood the test of time and continues to captivate dessert lovers around the globe.
What sets Red Velvet Layer Cake apart from other cakes is its vibrant, deep red color. But what gives it this distinct hue? The secret lies in the reaction between cocoa powder and vinegar, which enhances the natural red pigments found in cocoa. This chemical reaction not only creates the eye-catching color but also contributes to the cake's unique flavor profile.
Red Velvet Layer Cake tantalizes the taste buds with its harmonious blend of flavors. The cocoa lends a subtle hint of chocolate, while the addition of buttermilk provides a tangy and creamy element. A touch of vanilla extract rounds out the flavor profile, resulting in a cake that is both rich and delicate. And let's not forget about the cream cheese frosting, the perfect complement to the cake's velvety texture.
Red Velvet Layer Cake is not just a dessert; it's an experience. The moment you take a bite, you're transported to a world of pure indulgence. The velvety texture melts in your mouth, while the flavors dance on your taste buds. Each layer of cake is a work of art, meticulously stacked and frosted to perfection. Whether you're celebrating a birthday, anniversary, or simply treating yourself, Red Velvet Layer Cake adds a touch of sophistication to any occasion.
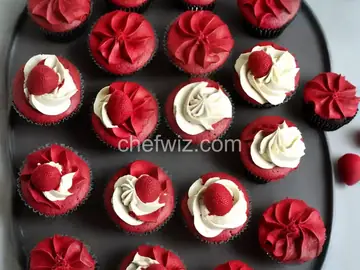
Red Velvet Layer Cake is not limited to traditional celebrations. Its versatility allows it to be enjoyed in various forms. From cupcakes and cake pops to truffles and ice cream, this iconic flavor can be adapted to suit any dessert lover's fancy. So whether you're serving a crowd or indulging in a personal treat, Red Velvet Layer Cake has you covered.
While Red Velvet Layer Cake may seem like a daunting task to tackle in your own kitchen, fear not! We've got some tips and tricks to ensure your baking endeavor is a success. One key tip is to sift the dry ingredients to create a light and fluffy batter. Another is to use gel-based food coloring for a more vibrant red hue. And remember, patience is key when assembling and frosting the layers. Take your time, and the end result will be a masterpiece that rivals any bakery creation.
Red Velvet Layer Cake is more than just a dessert; it's a celebration of flavors, textures, and indulgence. Whether you're a seasoned baker or a novice in the kitchen, this classic confection is sure to impress. So go ahead, gather your ingredients, and embark on a baking adventure that will delight your taste buds and create memories to last a lifetime. Happy baking!
Absolutely! If you don't have buttermilk on hand, you can make a DIY version by adding a tablespoon of vinegar or lemon juice to a cup of milk. Let it sit for a few minutes, and voila! You've got a buttermilk substitute.
Yes, you can freeze Red Velvet Layer Cake. Make sure to wrap it tightly in plastic wrap and store it in an airtight container. When you're ready to enjoy it, let it thaw in the refrigerator overnight and bring it to room temperature before serving.
When properly stored in the refrigerator, Red Velvet Layer Cake can stay fresh for up to five days. Just make sure to cover it with plastic wrap or place it in an airtight container to prevent it from drying out.
While cream cheese frosting is the traditional choice for Red Velvet Layer Cake, you can certainly experiment with other frostings. Whipped cream, chocolate ganache, or even a buttercream frosting can be delightful alternatives.
Absolutely! Red Velvet Layer Cake can be a canvas for your creativity. Consider adding a touch of espresso powder for a subtle coffee flavor or a sprinkle of cinnamon for a warm and comforting twist.
Red Velvet Layer Cake can be adapted to accommodate various dietary restrictions. There are numerous recipes available for gluten-free, vegan, and dairy-free versions of this beloved dessert.
Yes, Red Velvet Layer Cake is a great make-ahead dessert. You can bake the layers in advance, wrap them tightly, and store them in the freezer. When you're ready to assemble and frost the cake, simply thaw the layers and proceed with the recipe.
Absolutely! Red Velvet Layer Cake provides the perfect canvas for your creativity. From edible flowers and sprinkles to intricate piping and fondant decorations, the options are endless. Let your imagination run wild!
AprilCook, recipe developer and the heart of Chefwiz. More about April