Raspberry Yogurt Popsicles Recipe
Rate this recipeBe the first to rate
 By AprilPublished
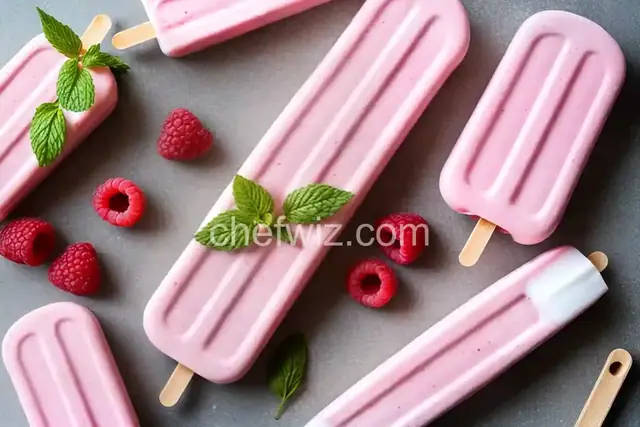
 Summer is here, and what better way to beat the heat than with a delicious and refreshing Raspberry Yogurt Popsicle?
 By AprilPublished
 Summer is here, and what better way to beat the heat than with a delicious and refreshing Raspberry Yogurt Popsicle?
Combine raspberries, water, sugar, orange juice, and salt in a 2-quart stainless steel saucepan.
Bring the mixture to a boil over medium-high heat.
Reduce the heat and simmer gently while stirring occasionally with a heat-resistant spatula for about 10 minutes or until the raspberries have broken down and the mixture has slightly thickened.
Take the saucepan off the heat and let the mixture cool for 30 minutes.
Transfer the mixture to a blender and blend until smooth for about 15 seconds.
Use a fine-mesh strainer set over a small bowl to strain the raspberry purée and remove the seeds. You should end up with 1 cup of strained purée.
In a medium bowl, whisk together yogurt, sugar, cream, orange juice, and salt until well combined.
Add the raspberry purée to the yogurt base and whisk until thoroughly combined.
Divide the popsicle base evenly between six 3-fluid-ounce popsicle molds.
Freeze the molds until the popsicles are solid, which usually takes around 4 hours.
To make filling the molds easier, you can transfer the popsicle mixture to a measuring cup or another container with a spout.
Follow the instructions provided with your popsicle mold to unmold the popsicles.
Summer is here, and what better way to beat the heat than with a delicious and refreshing Raspberry Yogurt Popsicle? These frozen treats are not only mouthwatering but also packed with the goodness of fresh raspberries and creamy yogurt. Whether you're enjoying them by the poolside or as a guilt-free dessert after a BBQ, these popsicles are a delightful addition to your summer menu.
When it comes to summer treats, Raspberry Yogurt Popsicles are a winner. The tangy sweetness of raspberries combined with the creamy texture of yogurt creates a harmonious blend of flavors. Not only do they taste amazing, but they are also a healthier alternative to store-bought popsicles that are often loaded with artificial colors and sugars.
Now, you might be wondering, why raspberries? Well, raspberries are not only bursting with flavor but are also a nutritional powerhouse. They are packed with antioxidants, vitamins, and fiber, making them a great addition to your diet. Plus, they add a beautiful natural pink color to the popsicles, making them even more appealing.
Creating the perfect Raspberry Yogurt Popsicle is easier than you think. All you need are a few simple ingredients and some popsicle molds. First, start by blending fresh raspberries until smooth. Then, mix in some creamy yogurt and a touch of honey or your preferred sweetener. Pour the mixture into the popsicle molds, add some popsicle sticks, and freeze them until solid. Voila! You have your homemade Raspberry Yogurt Popsicles ready to enjoy.
Here are a few tips to ensure your Raspberry Yogurt Popsicles turn out perfectly every time:
Choose ripe, juicy raspberries for the best flavor and natural sweetness. If fresh raspberries are not available, you can also use frozen ones.
Try using Greek yogurt for a creamier texture or opt for a dairy-free alternative like coconut or almond yogurt for a vegan-friendly version.
Squeeze in a bit of lemon or lime juice to enhance the tanginess of the raspberries and add a refreshing twist.
Adjust the sweetness of your popsicles by adding honey, maple syrup, or any other sweetener of your choice. Remember, raspberries are naturally sweet, so you may not need much additional sweetness.
Raspberry Yogurt Popsicles are a delightful and refreshing summer treat that you can enjoy guilt-free. With their vibrant color and burst of flavors, they are perfect for cooling down on a hot day. So next time you're craving a frozen dessert, whip up a batch of these homemade popsicles and savor the taste of summer!
Absolutely! Frozen raspberries work just as well for making Raspberry Yogurt Popsicles. Simply thaw them before blending.
It usually takes about 4-6 hours for the popsicles to freeze completely. However, it's best to leave them overnight for the perfect texture.
Yes, you can! Using flavored yogurt will add an extra layer of flavor to your popsicles. Just keep in mind that the sweetness may vary, so adjust the amount of added sweetener accordingly.
Absolutely! Kids love the fruity and creamy combination of Raspberry Yogurt Popsicles. They make for a healthy and refreshing summer treat for the whole family.
Of course! Feel free to experiment with other fruits like strawberries, blueberries, or even a mix of different berries. The possibilities are endless!
Raspberry Yogurt Popsicles can be stored in the freezer for up to 2-3 months. Just make sure to cover them properly to prevent freezer burn.
Absolutely! You can make these popsicles vegan by using dairy-free yogurt and a plant-based sweetener like maple syrup or agave nectar.
Yes, indeed! Raspberry Yogurt Popsicles are a healthier alternative to sugary store-bought popsicles. They are low in calories, high in fiber, and packed with vitamins and antioxidants.
AprilCook, recipe developer and the heart of Chefwiz. More about April