Raspberry Squares for Junior Chefs
Rate this recipeBe the first to rate
 By AprilPublished
 Are you ready to embark on a delicious adventure in the kitchen?
 By AprilPublished
 Are you ready to embark on a delicious adventure in the kitchen?
Preheat the oven to 350 degrees F (175 degrees C).
Line an 8x8 inch baking dish with foil and lightly grease the foil.
In a mixing bowl, combine the flour, oats, and sugar.
Add the butter to the mixture and use your hands to mix until it resembles coarse crumbs.
Stir in the almond extract.
Take out 2 cups of the flour mixture and set aside in a separate bowl.
Pour the remaining flour mixture into the prepared pan and press it evenly across the bottom.
Spread raspberry jelly over the flour layer.
Gently press the reserved 2 cups of flour mixture over the jelly.
Sprinkle the top with almonds.
Bake in the preheated oven for approximately 30 minutes or until the top is golden brown.
Allow to cool in the baking dish.
Lift out the foil to place the square on a cutting board.
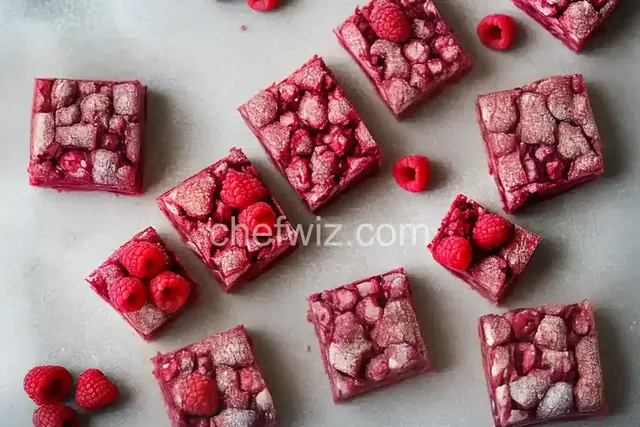
Using a sharp knife, cut into 9 squares.
Are you ready to embark on a delicious adventure in the kitchen? Today, we're going to dive into the world of raspberry squares! These delightful treats are perfect for junior chefs who are just starting to explore the joy of baking. So put on your apron and let's get started!
When it comes to baking, raspberry squares are a fantastic choice for young chefs. Not only are they simple to make, but they also provide a wonderful opportunity to experiment with different flavors and textures. Plus, who can resist the sweet and tangy taste of raspberries?
Think of raspberry squares as a blank canvas waiting to be filled with your creative touch. You can customize them by adding other fruits, like blueberries or strawberries, or even sprinkle some chocolate chips on top for an extra indulgence. The possibilities are endless!
Before we dive into the recipe, let's gather all our ingredients and tools. You'll need a mixing bowl, a baking dish, measuring cups and spoons, a whisk or spoon for stirring, and, of course, fresh raspberries. It's always a good idea to have an adult nearby to help with any tricky steps.
The base of our raspberry squares is a buttery and crumbly crust that serves as the foundation for all the deliciousness that follows. It's like the solid ground beneath our feet before we embark on a great adventure. And trust me, this adventure is going to be epic!
To make the base, we'll start by combining flour, sugar, and a pinch of salt in a bowl. Think of this mixture as the building blocks of our creation. Next, we'll cut in some cold butter, which adds richness and helps create those irresistible crumbs.
Now that our base is ready, it's time to add the star of the show: the raspberries! These juicy little gems burst with flavor and add a vibrant touch to our squares. It's like adding colorful brushstrokes to a canvas.
Gently spread the raspberries over the base, ensuring that every bite is filled with their fruity goodness. As they bake, the raspberries will release their juices, creating a delightful filling that's both sweet and tangy.
Once our raspberry squares are assembled, it's time to pop them into the oven. As they bake, the kitchen will fill with the irresistible aroma of raspberries and buttery goodness. It's like a symphony of flavors and scents coming together to create a masterpiece.
While the squares are baking, you can use this time to clean up your workspace and lick the spoon (don't worry, we won't tell anyone!). Before you know it, the timer will go off, and your raspberry squares will be ready to be devoured.
As you take your first bite of a warm raspberry square, you'll be rewarded with a burst of flavors and textures. The buttery crust crumbles in your mouth, while the sweet and tangy raspberries dance on your taste buds. It's like a party in your mouth!
So, junior chefs, don't be afraid to dive into the world of raspberry squares. This simple and delicious treat is the perfect way to unleash your creativity in the kitchen. Whether you're baking for yourself or sharing with friends and family, these raspberry squares are sure to bring smiles to everyone's faces.
Yes, you can use frozen raspberries if fresh ones are not available. Just make sure to thaw and drain them before using.
Absolutely! Feel free to experiment with different fruits like blueberries, strawberries, or even a combination of different berries.
Yes, you can make the squares ahead of time and store them in an airtight container. They should stay fresh for a few days.
Definitely! Adding a glaze or frosting can take your raspberry squares to the next level. Drizzle some icing or spread a layer of cream cheese frosting for an extra touch of sweetness.
Yes, you can substitute the all-purpose flour with a gluten-free flour blend. Just make sure to check the packaging for any additional instructions or measurements.
Absolutely! Feel free to get creative and use different baking molds or cut the squares into fun shapes once they are baked and cooled.
Of course! Feel free to add your favorite nuts or chocolate chips to the base for some extra crunch or indulgence.
Oh, absolutely! Serving these warm raspberry squares with a scoop of vanilla ice cream is pure bliss. The combination of warm and cold, sweet and tangy is simply divine.
In conclusion, raspberry squares are the perfect baking adventure for junior chefs. They provide a canvas for creativity, are easy to make, and offer a reward of delicious flavors. So put on your apron, gather your ingredients, and let your imagination run wild in the kitchen. The sweet and tangy world of raspberry squares awaits!
AprilCook, recipe developer and the heart of Chefwiz. More about April