Popovers
Rate this recipeBe the first to rate
 By AprilPublished
 Who doesn't love a tasty snack that is both delicious and versatile?
 By AprilPublished
 Who doesn't love a tasty snack that is both delicious and versatile?
Preheat your oven to 450 degrees F (230 degrees C) and prepare six 6-ounce custard cups by greasing and flouring them.
In a medium bowl, lightly beat the eggs. Then, gently mix in the flour, milk, and salt until the batter is just smooth, being careful not to overmix.
Fill each custard cup halfway with the batter.
Place the cups in the preheated oven and bake for 20 minutes.
After 20 minutes, decrease the oven temperature to 350 degrees F (175 degrees C) and continue baking for another 20 minutes.
Once done, immediately remove the custard cups from the oven and serve the contents while still hot.
Who doesn't love a tasty snack that is both delicious and versatile? Popovers are the perfect treat that can be enjoyed on any occasion. Whether you're hosting a party, having a family gathering, or simply craving a quick and easy bite, popovers are sure to please. In this article, we will delve into the world of popovers, exploring their origins, different variations, and how to make them. So, grab a cup of tea and let's dive into the satisfying world of popovers!
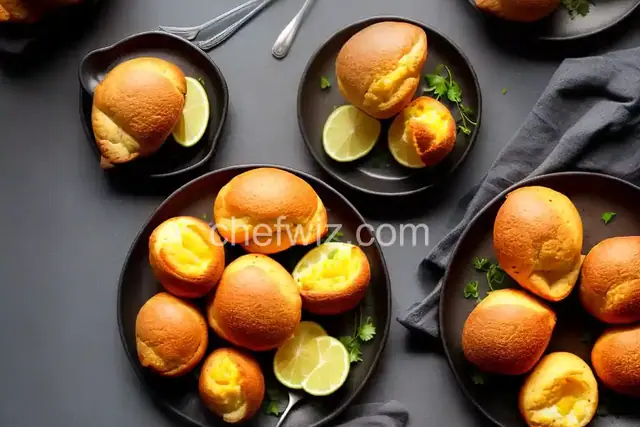
Have you ever wondered where popovers got their name? Well, these delightful snacks are said to have originated in the United States in the 19th century. The name "popover" comes from the way the batter "pops over" the sides of the pan while baking, creating a light and airy pastry. It's like magic in the oven!
Popovers can be enjoyed in various flavors and styles to suit different tastes. Whether you prefer sweet or savory, there's a popover recipe out there for you. For those with a sweet tooth, try adding a touch of cinnamon and sugar to the batter or filling the popover with a creamy custard. If you're more into savory snacks, consider stuffing your popovers with cheese, herbs, or even bacon. The possibilities are endless when it comes to creating your own unique popover masterpiece!
Now that we've explored the history and variations of popovers, let's dive into the process of making these delightful treats. Making popovers is surprisingly simple and requires just a few basic ingredients. All you need is flour, eggs, milk, salt, and some melted butter. Mix the ingredients together, pour the batter into a preheated popover pan, and bake until golden brown and puffed up. The result? A crispy and airy popover that will leave you craving for more!
While making popovers is fairly straightforward, there are a few tips and tricks that can help you achieve popovers that are crispy on the outside and fluffy on the inside. One important tip is to preheat your popover pan before pouring in the batter. This helps create that signature "pop" effect. Another key tip is to resist the temptation to open the oven door while the popovers are baking. This can cause them to deflate. So be patient and let the magic happen behind closed doors!
Popovers are a delightful snack that can be enjoyed on any occasion. Whether you choose to make them sweet or savory, they are sure to please your taste buds. So why not give popovers a try? With their light and airy texture, they are the perfect treat to enjoy on a cozy evening or share with friends and family. Get creative with your flavors and toppings, and let the popover magic begin!
While a popover pan is recommended for the best results, you can still make popovers using a muffin tin. Just make sure to grease the tin generously and fill each cup about halfway with the batter.
Absolutely! There are many gluten-free flour options available that can be used as a substitute for regular flour. Experiment with different types to find the one that suits your taste and dietary needs.
The key to preventing deflation is to not open the oven door while the popovers are baking. The sudden change in temperature can cause them to collapse. Also, make sure to bake them until they are golden brown and fully cooked.
Yes, popovers can be frozen for later enjoyment. Once cooled, place them in an airtight container or freezer bag and store them in the freezer. When ready to eat, simply reheat them in the oven until warmed through.
Absolutely! Mini popovers are a fun twist on the traditional size. Simply use a mini popover pan or a mini muffin tin to create bite-sized popovers that are perfect for parties or snacking.
Yes, adding fillings to your popovers can take them to the next level. Whether it's a sweet filling like jam or a savory filling like cheese and herbs, fillings can add an extra burst of flavor to your popovers.
Popovers are best enjoyed fresh out of the oven when they are still warm and crispy. However, they can be stored in an airtight container at room temperature for up to 2 days. To reheat, simply place them in a preheated oven for a few minutes.
Popovers are best enjoyed fresh, but you can prepare the batter in advance and refrigerate it for up to 24 hours. When ready to bake, give the batter a good stir and pour it into the preheated popover pan. This way, you can still enjoy freshly baked popovers without the hassle of preparing the batter from scratch.
AprilCook, recipe developer and the heart of Chefwiz. More about April