Poke Cake II
Rate this recipeBe the first to rate
 By AprilPublished
 Are you a dessert lover? Do you enjoy indulging in a slice of cake that's moist, flavorful, and bursting with deliciousness?
 By AprilPublished
 Are you a dessert lover? Do you enjoy indulging in a slice of cake that's moist, flavorful, and bursting with deliciousness?
Prepare two 8 or 9 inch round cake pans by placing the cake layers, top side up, in each pan.
Use a utility fork to prick each cake at 1/2 inch intervals.
In a separate bowl, dissolve gelatin in boiling water.
Carefully spoon the dissolved gelatin over the cake layers.
Chill the cakes in the refrigerator for 3 to 4 hours.
Take one cake pan and dip it in warm water for 10 seconds.
Unmold the cake onto a serving plate.
Spread about 1 cup of whipped topping on top of the first cake layer.
Dip the other cake pan in warm water for 10 seconds.
Unmold the second cake layer and carefully place it on top of the first cake layer.
Frost the top and sides of the cakes with the remaining whipped topping.
Chill the cakes before serving.
Are you a dessert lover? Do you enjoy indulging in a slice of cake that's moist, flavorful, and bursting with deliciousness? If so, then you're in for a treat! In this article, we'll dive into the world of Poke Cake II, a dessert that will satisfy your sweet tooth and leave you craving for more. So, let's get started and discover why Poke Cake II is the ultimate dessert for all occasions.
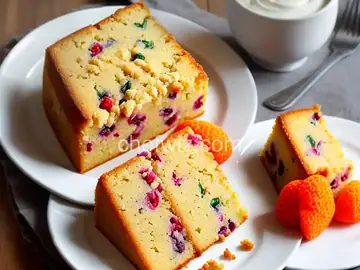
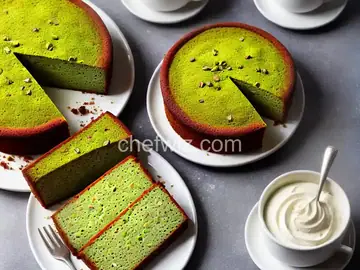
Imagine a traditional cake that has been transformed into a masterpiece of flavor infusion. Poke Cake II is exactly that - a delightful dessert that takes ordinary cake to extraordinary levels. The process involves baking a cake and then poking holes all over it. These holes are then filled with a luscious mixture, such as condensed milk, flavored gelatin, or fruit puree. The cake absorbs the mixture, creating a moist and heavenly texture that will make your taste buds dance with joy.
Poke Cake II has gained immense popularity for several reasons. Firstly, it offers endless flavor possibilities. From classic combinations like chocolate and caramel to unique pairings like lemon and raspberry, there's a Poke Cake II flavor for everyone. Secondly, it's incredibly easy to make. Even if you're not an experienced baker, you can whip up a delicious Poke Cake II in no time. Lastly, it's a visually stunning dessert. The vibrant colors of the filling and the moistness of the cake make it a feast for the eyes as well as the taste buds.
Making a Poke Cake II is a breeze. All you need is a simple cake mix, a filling of your choice, and a few basic ingredients. Start by baking the cake according to the instructions on the box. Once the cake is done, let it cool slightly, and then poke holes all over it using the handle of a wooden spoon. Next, pour your chosen filling into the holes, making sure to cover the entire cake. Refrigerate the cake for a few hours to allow the flavors to meld together. Finally, top it off with whipped cream, fresh fruit, or any other garnishes you desire, and voila - your Poke Cake II is ready to be devoured!
Poke Cake II is a versatile dessert that can be enjoyed on any occasion. Its vibrant and eye-catching appearance makes it a perfect centerpiece for birthday parties, potlucks, and family gatherings. Its refreshing flavors also make it an excellent choice for summer picnics or barbecues. Whether you're celebrating a special event or simply craving something sweet, Poke Cake II is the answer.
Absolutely! One of the best things about Poke Cake II is its customizability. You can experiment with different cake flavors, fillings, and toppings to create your own unique masterpiece. Feeling adventurous? Try adding crushed cookies, sprinkles, or even a drizzle of chocolate sauce on top. The possibilities are endless, and you can let your creativity run wild to make a Poke Cake II that suits your taste perfectly.
If you're ready to embark on your Poke Cake II journey, you'll find a plethora of recipes online. From popular cooking websites to food blogs and even social media platforms, the internet is filled with inspiration. You can also check out cookbooks or ask friends and family for their favorite recipes. Remember, the joy of Poke Cake II lies not only in the final result but also in the process of exploring different recipes and flavors.
While Poke Cake II traditionally includes ingredients like cake mix, condensed milk, and gelatin, you can easily modify the recipe to suit your dietary needs. If you're following a vegan diet, you can use plant-based alternatives for the cake mix and dairy-free milk for the filling. For those with gluten sensitivities, there are plenty of gluten-free cake mixes available in stores. With a little creativity and ingredient substitution, you can enjoy a scrumptious Poke Cake II that fits your dietary restrictions.
Poke Cake II is a dessert that brings joy to both the baker and the eater. Its simplicity, versatility, and mouthwatering flavors make it a crowd-pleaser on any occasion. So, why not give it a try? Whip up a Poke Cake II, and let your taste buds experience a slice of heaven. With endless flavor possibilities and a visually stunning appearance, Poke Cake II is sure to become your go-to dessert for all your sweet cravings.
Absolutely! While a cake mix is convenient, you can definitely use a homemade cake for your Poke Cake II. Just make sure the cake is fully cooled before poking the holes and filling them.
Yes, you can make Poke Cake II in advance. In fact, it's even better when chilled for a few hours to allow the flavors to meld together. Simply cover it with plastic wrap and refrigerate until you're ready to serve.
Poke Cake II can be stored in the refrigerator for up to 3-4 days. Just make sure to cover it tightly to prevent drying out.
While it's not recommended to freeze a fully assembled Poke Cake II, you can freeze the unfilled cake layers. Wrap them tightly in plastic wrap and store them in a freezer-safe bag for up to 2 months. Thaw them in the refrigerator before filling and serving.
Absolutely! The beauty of Poke Cake II lies in its versatility. Feel free to experiment with different fillings like pudding, fruit preserves, or even flavored syrups to create your own unique flavor combinations.
Yes, you can make a healthier version of Poke Cake II by using alternatives like sugar-free gelatin, low-fat milk, and reducing the amount
AprilCook, recipe developer and the heart of Chefwiz. More about April