Pierogi Dough
Rate this recipeBe the first to rate
 By AprilPublished
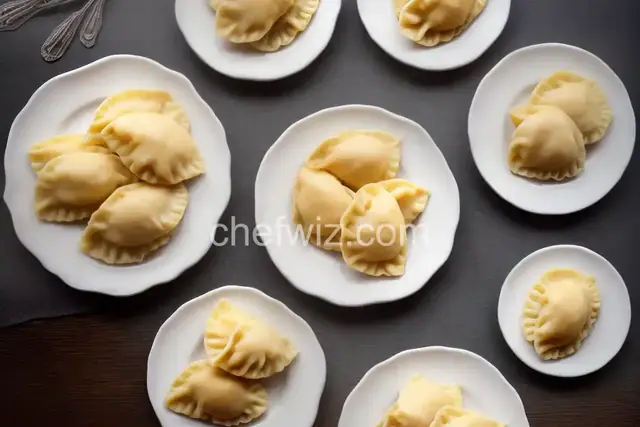
 Who doesn't love a plate of warm, pillowy pierogi? These delightful dumplings are a staple in many Eastern European cuisines, and for good reason.
 By AprilPublished
 Who doesn't love a plate of warm, pillowy pierogi? These delightful dumplings are a staple in many Eastern European cuisines, and for good reason.
Combine the flour, salt, and baking powder in a large bowl. Create a hollow space in the center.
In another bowl, blend the vegetable oil, warm water, and beaten egg. Pour the mixture into the hollow of the dry ingredients.
Knead the dough for 8 to 10 minutes.
Cover the dough and allow it to rest for 2 hours.
Roll out the dough and fill it according to your preference.
Who doesn't love a plate of warm, pillowy pierogi? These delightful dumplings are a staple in many Eastern European cuisines, and for good reason. But have you ever wondered what makes the perfect pierogi? It all starts with the dough.
Just like a strong foundation is crucial for a sturdy building, the dough is the foundation of any great pierogi. It needs to be tender yet resilient, allowing the filling to shine while also holding its shape during cooking.
Think of the dough as a cozy blanket wrapping around a delicious surprise. It should be soft enough to melt in your mouth but strong enough to keep the filling secure. So, how do you achieve this perfect balance? Let's dive in.
Creating pierogi dough is a straightforward process that requires just a few simple ingredients: flour, eggs, water, and a pinch of salt. The key lies in the proportions and the method of mixing.
Imagine you're building a sandcastle on the beach. You need just the right amount of sand and water to create a moldable mixture. Too much water, and everything collapses. Too little, and the sand won't hold its shape. The same principle applies to pierogi dough.
For every cup of flour, you'll need one egg and a quarter cup of water. This ratio ensures that the dough is pliable and easy to work with. If you're making a large batch, remember to keep the proportions consistent.
When it comes to mixing the dough, less is more. You want to gently combine the ingredients until they form a cohesive mass. Overmixing can lead to a tough dough, whereas undermixing may result in a crumbly texture.
Think of it as folding a letter. You want to delicately bring the edges together without tearing the paper. Similarly, you want to bring the dough together without overworking it. Once the ingredients are combined, let the dough rest for at least 30 minutes. This allows the gluten to relax and makes the dough easier to roll out.
Now that your dough has had time to rest, it's time to roll it out. This step requires a sprinkle of patience and a pinch of finesse.
Start by lightly dusting your work surface with flour. Cut the dough into smaller portions to make it more manageable. Roll out each portion into a thin sheet, aiming for an even thickness throughout.
Think of it as stretching pizza dough. You want to apply even pressure, working from the center outwards. This ensures that the dough is of uniform thickness, allowing for even cooking of the pierogi.
For pierogi, aim for a thickness of about 1/8 inch. This allows the dumplings to cook through without becoming too doughy. You can use a rolling pin or a pasta machine to achieve the desired thickness.
With your rolled-out dough ready, it's time to fill the pierogi. Spoon a small amount of filling onto one half of the dough, leaving a border around the edges. Fold the dough in half, creating a half-moon shape.
Now comes the crucial step: sealing the edges. Think of it as closing a book. You want to press the edges together firmly, ensuring that no filling escapes during cooking. You can use your fingertips or the tines of a fork to create a decorative edge.
Once your pierogi are filled and sealed, it's time to cook them to perfection. Bring a large pot of salted water to a boil and carefully drop in the dumplings. Cook them until they float to the surface, which usually takes about 3-5 minutes.
At this point, you have a choice: you can enjoy the pierogi as they are, or you can take them to the next level by sautéing them in butter until they turn golden brown. Both methods result in delicious pierogi that are sure to impress.
The secret to perfect pierogi lies in the dough. By using the right proportions, gently mixing the ingredients, and rolling out the dough to the correct thickness, you can create dumplings that are tender, flavorful, and simply irresistible. So, next time you're craving a taste of Eastern European comfort food, don't forget the importance of good pierogi dough.
Yes, you can substitute eggs with yogurt, sour cream, or even mashed potatoes to create an eggless version of pierogi dough.
Absolutely! Whole wheat flour adds a nutty flavor and a slightly denser texture to the dough. Just keep in mind that the pierogi might have a slightly different taste and texture compared to traditional ones.
Yes, you can freeze pierogi dough for later use. Just wrap it tightly in plastic wrap or place it in an airtight container before freezing. Thaw the dough in the refrigerator overnight before rolling it out.
Pierogi dough can be stored in the refrigerator for up to 2 days. Make sure to wrap it tightly in plastic wrap to prevent it from drying out.
Yes, you can use the same dough recipe to make sweet pierogi. Just fill them with fruit, such as strawberries or blueberries, and serve them with a dusting of powdered sugar.
Yes, a stand mixer can be used to mix the dough. Just be careful not to overmix it, as it can result in a tough texture.
Traditional pierogi fillings include potato and cheese, sauerkraut and mushroom, and cottage cheese. However, you can get creative and fill them with anything you like!
Yes, you can make gluten-free pierogi dough by using a gluten-free flour blend. Just make sure to follow a recipe specifically designed for gluten-free
AprilCook, recipe developer and the heart of Chefwiz. More about April