Philly Cheesesteak Sliders
Rate this recipeBe the first to rate
 By AprilPublished
 Have you ever craved the delicious combination of tender beef, melted cheese, and sautéed onions?
 By AprilPublished
 Have you ever craved the delicious combination of tender beef, melted cheese, and sautéed onions?
Freeze the steak until it becomes firm and very cold, but not frozen completely. This should take about 20 minutes.
Slice the steak very thinly against the grain.
Preheat the oven to 350°F.
In a small bowl, mix together butter, parsley, garlic, a pinch of salt, and a pinch of pepper. Set this mixture aside for later use.
Heat 2 tablespoons of oil in a large skillet over medium-high heat.
Add the onion and bell pepper to the skillet and season with 1/4 teaspoon of salt. Cook until the onion becomes tender and slightly golden, stirring occasionally. This should take about 10 minutes.
Transfer the onion mixture to a plate.
In the same skillet, heat the remaining 1 tablespoon of oil over medium-high heat.
Add the seasoned steak to the skillet and cook, tossing occasionally, until the steak is browned and just cooked through. This should take about 5 minutes.
Return the cooked onion mixture to the skillet and toss to combine with the steak. Warm the mixture through and then remove from heat.
Using a serrated knife, slice the rolls in half horizontally.
Place the bottom halves of the rolls on a small baking sheet.
Spread mayonnaise evenly on the bottom halves of the rolls.
Top the mayonnaise with
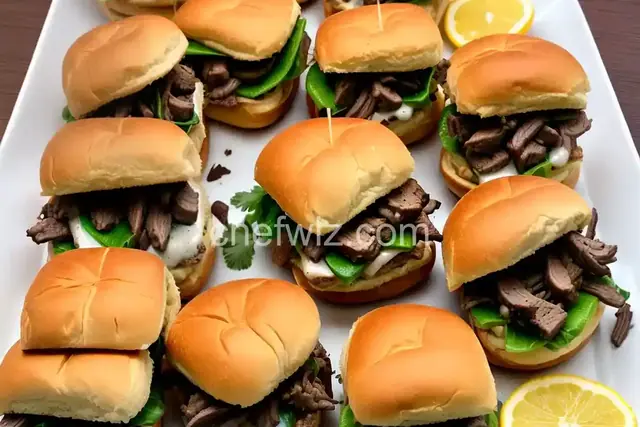
Have you ever craved the delicious combination of tender beef, melted cheese, and sautéed onions? If so, then you're in for a treat with Philly Cheesesteak Sliders! These mini sandwiches pack all the flavors of a classic Philadelphia cheesesteak into a bite-sized package. Whether you're hosting a party, looking for a quick and easy dinner idea, or simply want to indulge in a satisfying snack, Philly Cheesesteak Sliders are the perfect choice.
Making Philly Cheesesteak Sliders is an art that requires attention to detail and a few key ingredients. Just like a painter carefully selects their colors, you'll need to choose the finest ingredients to create a masterpiece in flavor. Think of the slider buns as your canvas, ready to be filled with the savory goodness of thinly sliced beef, gooey cheese, and caramelized onions.
The star of the show, the beef, should be thinly sliced to ensure tenderness and even cooking. Like a sculptor shaping their clay, you'll want to shape the beef into perfectly sized pieces that fit snugly inside the slider buns. Seasoned with a pinch of salt and pepper, the beef becomes the foundation upon which the entire slider is built.
Just as an artist selects their palette, you'll need to choose the perfect cheese to complement the flavors of the beef. Provolone or American cheese are popular choices that melt beautifully and add a creamy richness to each bite. Like a painter adding the final touches to their masterpiece, the melted cheese completes the flavor profile of the Philly Cheesesteak Sliders.
Caramelized onions are the secret ingredient that adds depth and sweetness to the sliders. Like a chef skillfully sautéing onions until they reach the perfect golden brown, you'll want to cook the onions until they are soft, sweet, and fragrant. The onions act as the brush strokes that bring the entire flavor composition together.
Now that you have all the ingredients prepared, it's time to assemble and cook your Philly Cheesesteak Sliders. Like a composer conducting a symphony, you'll carefully layer the beef, cheese, and onions onto the slider buns. Once assembled, the sliders are ready to be baked or grilled until the cheese is melted and the buns are golden brown.
In conclusion, Philly Cheesesteak Sliders are a culinary work of art that combines the flavors of tender beef, melted cheese, and sautéed onions into a perfect bite-sized sandwich. Whether you're a food enthusiast, an aspiring artist, or simply someone who appreciates good food, these sliders are sure to satisfy your cravings.
Absolutely! Feel free to experiment with different types of cheese to find the perfect flavor combination for your sliders.
While Philly Cheesesteak Sliders traditionally use beef, you can certainly substitute it with chicken if you prefer. Just make sure to adjust the cooking time accordingly.
Yes, you can assemble the sliders ahead of time and refrigerate them until ready to bake or grill. This makes them a convenient option for parties or gatherings.
Absolutely! Feel free to add peppers, mushrooms, or any other vegetables you enjoy to enhance the flavor and texture of your sliders.
Yes, you can make vegetarian sliders by substituting the beef with grilled or sautéed mushrooms and using a vegetarian-friendly cheese alternative.
To make the beef more tender, you can marinate it in a mixture of olive oil, Worcestershire sauce, and your choice of seasonings for at least 30 minutes before cooking.
Philly Cheesesteak Sliders pair well with a side of crispy fries, a fresh green salad, or even a creamy coleslaw. They make for a satisfying and delicious meal.
Yes, you can freeze the assembled sliders before baking or grilling them. Just make sure to wrap them tightly in foil or place them in an airtight container to prevent freezer burn. When ready to serve, thaw them in the refrigerator and then bake or grill as usual.
Now that you have all the information you need, it's time to unleash your culinary creativity and enjoy the mouthwatering flavors of Philly Cheesesteak Sliders. Happy cooking!
AprilCook, recipe developer and the heart of Chefwiz. More about April