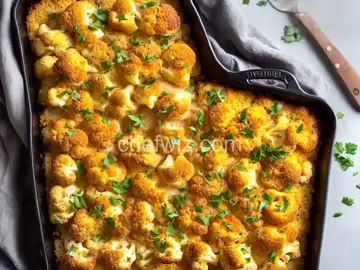
Perfect Omelet
Rate this recipeBe the first to rate
 By AprilPublished
 Who doesn't love a perfectly cooked omelet? It's a versatile dish that can be enjoyed for breakfast, brunch, or even dinner.
 By AprilPublished
 Who doesn't love a perfectly cooked omelet? It's a versatile dish that can be enjoyed for breakfast, brunch, or even dinner.
In a medium-sized bowl, whisk the eggs until the whites are completely mixed in.
Add salt, pepper, and a pinch of red pepper flakes to the beaten eggs, and mix well.
Heat a medium non-stick skillet over medium heat and melt the butter.
Pour the beaten eggs into the skillet and tilt the pan to ensure that the eggs cover the entire surface.
As the eggs start to set, use a rubber spatula to gently push the cooked edges towards the center of the pan.
Tilt the pan to allow any uncooked egg to flow to the edge.
Once the bottom of the omelet is set, but the top is still slightly moist, sprinkle cheese and chives on one half of the omelet.
Fold the other half of the omelet over the cheese and gently slide it onto a plate.
Who doesn't love a perfectly cooked omelet? It's a versatile dish that can be enjoyed for breakfast, brunch, or even dinner. The beauty of an omelet lies in its simplicity. With just a few ingredients, you can create a delicious and satisfying meal that is sure to impress. In this article, we will explore the art of making the perfect omelet, and I'll share some tips and tricks to help you achieve omelet perfection every time.
Making an omelet may seem intimidating, but with a little practice and patience, you'll soon become a pro. The key to a perfect omelet lies in the technique. It's important to use the right heat, the right pan, and the right ingredients.
First, you'll need a non-stick skillet or omelet pan. This will ensure that your omelet doesn't stick to the pan and makes flipping easier. Heat the pan over medium-high heat and add a small pat of butter or a drizzle of olive oil.
Next, crack your eggs into a bowl and whisk them until well beaten. Season with salt and pepper to taste. Pour the beaten eggs into the heated pan, and let them cook undisturbed for a minute or two, until the edges start to set.
Now comes the fun part - choosing your fillings and flavors. The options are endless! You can go for a classic ham and cheese omelet, or get creative with vegetables, herbs, and even leftover meats. Think of an omelet as a blank canvas, waiting to be filled with your favorite ingredients.
Once the edges of your omelet start to set, it's time to add your fillings. Sprinkle your chosen ingredients evenly over one side of the omelet. Don't overstuff it, as this will make folding difficult. Let the omelet cook for another minute or two, until the center is just set and the cheese, if using, is melted.
Now comes the crucial step - folding your omelet. Using a spatula, gently lift one side of the omelet and fold it over the fillings. Press down lightly with the spatula to seal the omelet. Let it cook for another minute or so, until the cheese is fully melted and the omelet is cooked to your desired level of doneness.
Slide the omelet onto a plate, and voila! You have a perfectly cooked omelet. But the journey doesn't end here. To truly elevate your omelet game, you can experiment with different toppings and garnishes. A sprinkle of fresh herbs, a dollop of sour cream, or a drizzle of hot sauce can take your omelet to the next level.
Mastering the art of making the perfect omelet takes practice, but with the right techniques and a touch of creativity, you'll soon be whipping up omelets that are worthy of a chef's hat. Remember to experiment with different fillings and flavors, and don't be afraid to get creative. Whether you prefer a classic omelet or a gourmet creation, the possibilities are endless. So grab your spatula, heat up that pan, and get ready to create omelet perfection!
While a non-stick pan is ideal for making omelets, you can still make a delicious omelet using a regular skillet. Just make sure to use enough butter or oil to prevent sticking.
An omelet is cooked when the center is just set and the edges are slightly golden. The cheese, if using, should be melted. Be careful not to overcook it, as this can result in a dry omelet.
Absolutely! If you're lactose intolerant or following a dairy-free diet, you can still enjoy a delicious omelet. Simply omit the cheese and use plant-based milk or water instead of dairy milk.
Using a non-stick pan and enough oil or butter is key to preventing your omelet from sticking. Make sure the pan is properly heated before adding the eggs.
While it's best to enjoy an omelet fresh off the stove, you can make a large omelet and slice it into portions to be reheated later. Store the slices in an airtight container in the refrigerator and reheat in a skillet or microwave when ready to eat.
Yes, you can use egg whites instead of whole eggs to make a lower calorie omelet. Simply separate the yolks from the whites and whisk the whites until frothy before pouring them into the pan.
To make your omelet fluffy, whisk the eggs vigorously before cooking them. This incorporates air into the eggs, resulting in a lighter texture.
Yes, you can freeze leftover omelets for future meals. Wrap each omelet tightly in plastic wrap or foil and place them in a freezer-safe bag or container. When ready to eat, thaw in the refrigerator overnight and reheat in a skillet or microwave.
AprilCook, recipe developer and the heart of Chefwiz. More about April