Penguin Slice-and-Bake Cookies
Rate this recipeBe the first to rate
 By AprilPublished
 Have you ever wanted to make a cute and delicious treat that will impress your friends and family?
 By AprilPublished
 Have you ever wanted to make a cute and delicious treat that will impress your friends and family?
In a medium bowl, whisk together the flour, baking powder, and salt.
In a large bowl, beat the butter and sugar with an electric mixer on medium-high speed until light and fluffy, for 3 to 5 minutes.
Beat in 1 egg and the vanilla until fully incorporated.
Reduce the mixer speed to low, add the flour mixture, and beat until just combined.
Transfer all but 1/4 cup of the dough onto a floured surface.
Add 3 drops of orange food coloring to the remaining dough in the bowl and mix on low until evenly colored.
Flatten the orange dough into a disk, wrap it in plastic, and refrigerate for about 20 minutes until firm.
Clean the mixing bowl and paddle, then add 3/4 cup of the uncolored dough back into the bowl.
Add 4 drops of black food coloring and mix on low until evenly colored.
Form the black dough into a rectangle, wrap it in plastic, and refrigerate for about 20 minutes until firm.
To make the penguin's body:
Roll the remaining uncolored dough into a cylinder that is 9-10 inches long and about 1 1/2 inches wide.
Wrap the cylinder in plastic and set it aside at room temperature.
Divide the orange dough into 3 equal pieces.
Roll
Have you ever wanted to make a cute and delicious treat that will impress your friends and family? Look no further than Penguin Slice-and-Bake Cookies! These adorable cookies not only taste fantastic but also bring a smile to anyone's face. In this article, we'll explore the process of making these delightful treats and share some tips and tricks to ensure your cookies turn out perfectly every time.
Before we dive into the recipe, let's gather our ingredients and equipment. Picture this: you're in your kitchen, ready to create something amazing. You have your mixing bowl, measuring cups, and spoons at the ready. The excitement builds as you gather flour, sugar, butter, and other essential ingredients. Are you ready to embark on this baking adventure?
When it comes to baking, using quality ingredients is key. Just like a painter needs the best paints, a baker needs the finest ingredients to create a masterpiece. Think of it this way: if you were building a house, you wouldn't use flimsy materials, would you? The same principle applies to baking. So, let's make sure we have the best ingredients on hand.
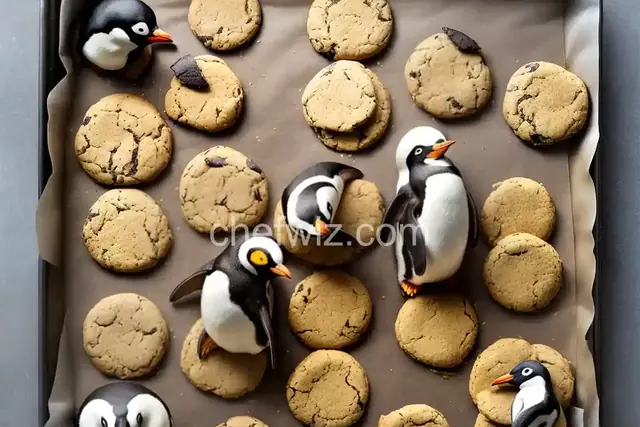
Now that we have everything we need, it's time to dive into the process of making these adorable penguin cookies. Imagine yourself as a sculptor, molding dough into little penguin shapes. The dough is your clay, and you have the power to give life to these cute little creatures. Are you ready to let your creativity shine?
Think of the dough as your canvas, waiting for your artistic touch. You gently roll it into a log, just like a sculptor shaping their masterpiece. With each stroke, the dough becomes more defined, taking the shape of a penguin. Can you picture it? These little penguins are going to be the stars of your cookie jar!
Now that the penguins have taken form, it's time to add their distinctive features. Just like an artist adding the finishing touches to a painting, you carefully shape their beaks, wings, and eyes. It's amazing how a few simple additions can bring your cookies to life. Can you feel the excitement building?
With the penguins fully formed, it's time to pop them in the oven and let the magic happen. As the cookies bake, your kitchen fills with the delightful aroma of freshly baked treats. It's like a symphony of scents, inviting everyone to the table. Can you imagine the smiles on your loved ones' faces as they take their first bite?
Once your penguin cookies have cooled, it's time to share them with your loved ones. Picture this: a room filled with laughter and joy as everyone gathers around to taste your creations. The cookies are a hit, and you beam with pride. Your hard work has paid off, and the happiness in the room is palpable. Can you feel the warmth of this moment?
Creating Penguin Slice-and-Bake Cookies is not just about baking; it's about creating memories and sharing joy with the people you love. These adorable treats are a perfect way to bring a smile to anyone's face. So, why not gather your ingredients, put on your apron, and embark on this delightful baking adventure? The penguins are waiting to come to life in your kitchen!
A1: Absolutely! While penguin cookies are adorable, you can use the same slice-and-bake technique to create different shapes. Let your imagination run wild and have fun experimenting with various designs.
A2: Yes, you can! If you want to prepare the dough in advance, simply wrap it tightly in plastic wrap and freeze it. When you're ready to bake, just thaw it in the refrigerator overnight, slice, and bake as usual.
A3: These cookies can stay fresh for up to a week when stored in an airtight container at room temperature. However, they are so delicious that they often disappear within a day or two!
A4: Absolutely! Feel free to add your favorite flavors to the dough, such as chocolate chips, vanilla extract, or even a hint of citrus zest. Get creative and make the recipe your own!
A5: Definitely! Making Penguin Slice-and-Bake Cookies is a fun activity that the whole family can enjoy. Let the kids help shape the dough and add the penguin details. It's a great way to spend quality time together in the kitchen.
A6: While margarine can be used as a substitute for butter, keep in mind that it may affect the flavor and texture of the cookies. Butter is generally the preferred choice for achieving the best results.
A7: The number of cookies depends on the size of the penguins you create. On average, this recipe yields around 24 to 30 cookies.
A8: Absolutely! Once the cookies have cooled, feel free to get creative and decorate them with icing, sprinkles, or even melted chocolate. Let your imagination run wild and make each penguin unique!
AprilCook, recipe developer and the heart of Chefwiz. More about April