Peanut Butter and Jelly Cake
Rate this recipeBe the first to rate
 By AprilPublished
 Are you a fan of the classic combination of peanut butter and jelly?
 By AprilPublished
 Are you a fan of the classic combination of peanut butter and jelly?
Preheat the oven to 350 degrees F (175 degrees C).
Lightly grease two 8-inch square baking pans with baking spray.
Line the bottom of each pan with a square piece of parchment paper.
Spray parchment with baking spray, then flour each parchment-lined pan, shaking away any excess flour.
In a medium bowl, whisk together cake flour, baking powder, and salt. Set aside.
In a large mixing bowl, combine sugar and butter. Beat with an electric mixer on medium speed until light and fluffy, about 3 to 5 minutes.
Add vanilla extract to the sugar and butter mixture.
With the mixer running on low speed, add the flour mixture alternately with the milk, beginning and ending with the flour.
In a clean mixing bowl, beat egg whites on medium speed until stiff peaks form.
Gently fold the beaten egg whites into the batter.
Divide the batter evenly between the prepared pans.
Bake in the preheated oven for 30 to 35 minutes, or until a toothpick inserted into the center of the cakes comes out clean.
Cool the cakes in the pans on a wire rack for 15 minutes.
Run a knife around the edge of the pans and turn the cakes out onto the wire rack.
Remove the parchment paper and allow the cakes to cool completely, about 1 hour.
Working on
Are you a fan of the classic combination of peanut butter and jelly? If so, you're in for a treat! In this article, we'll explore a delicious dessert that takes this beloved duo to a whole new level - the Peanut Butter and Jelly Cake. Get ready to indulge in a sweet and tangy flavor explosion!
Imagine taking a bite of a cake that instantly transports you back to your childhood. The Peanut Butter and Jelly Cake does just that. It captures the essence of your favorite childhood sandwich but elevates it into a decadent and mouthwatering dessert.
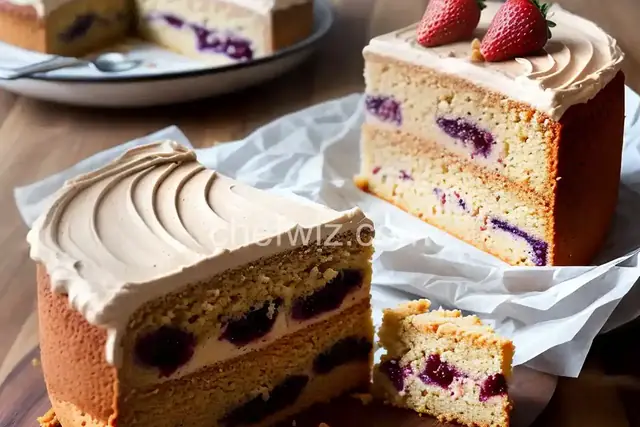
The cake layers are moist and tender, infused with the rich flavor of peanut butter. The sweet and creamy peanut butter frosting adds a velvety texture that perfectly complements the cake. And let's not forget about the jelly! A layer of fruity and vibrant jelly nestled between the cake layers adds a burst of sweet and tangy goodness.
Whether you're hosting a birthday party, a family gathering, or simply craving a delicious treat, the Peanut Butter and Jelly Cake is a surefire crowd-pleaser. Its unique combination of flavors surprises and delights everyone who takes a bite.
As you slice into the cake, revealing the layers of peanut butter cake and jelly, your guests' eyes will light up with anticipation. Each forkful brings a harmonious blend of sweet, nutty, and fruity flavors, leaving everyone wanting more.
Creating your own Peanut Butter and Jelly Cake is easier than you might think. With a few simple steps and a handful of ingredients, you can recreate this nostalgic dessert in your very own kitchen.
Start by preparing the peanut butter cake layers. Mix the dry ingredients together and then beat in the wet ingredients until the batter is smooth. Divide the batter into cake pans and bake until golden brown and fragrant.
Once the cakes have cooled, it's time to assemble the masterpiece. Spread a generous layer of peanut butter frosting on top of one cake layer, then add a generous layer of your favorite jelly. Place the second cake layer on top and repeat the process.
Finally, frost the entire cake with the remaining peanut butter frosting, making sure to create a smooth and even finish. For an extra touch of elegance, you can drizzle some melted jelly on top or garnish with crushed peanuts.
The Peanut Butter and Jelly Cake is a dessert that combines the nostalgia of childhood with the indulgence of a decadent treat. Its layers of peanut butter cake and fruity jelly create a harmonious symphony of flavors that will leave you craving more.
So why not channel your inner child and whip up a Peanut Butter and Jelly Cake for your next special occasion or simply to satisfy your sweet tooth? It's a dessert that will bring smiles to faces and have everyone asking for seconds.
Yes, you can use any type of jelly that you prefer. Whether it's grape, strawberry, raspberry, or even a combination, the choice is yours!
Yes, you can make the cake layers in advance. Simply wrap them tightly in plastic wrap and store them in the refrigerator. When you're ready to assemble the cake, let the layers come to room temperature before frosting.
Absolutely! If you have a preference for almond butter or have dietary restrictions, feel free to substitute it in the recipe. The cake will still have a delicious nutty flavor.
When stored in an airtight container in the refrigerator, the Peanut Butter and Jelly Cake can stay fresh for up to 4-5 days. However, it's so delicious that it's unlikely to last that long!
Yes, you can make this cake gluten-free by using a gluten-free flour blend in place of regular flour. Just make sure to check the labels of all the ingredients to ensure they are gluten-free.
Absolutely! If you prefer the added texture of crunchy peanut butter, go ahead and use it. It will add a delightful crunch to the cake.
Yes, you can freeze the Peanut Butter and Jelly Cake. Wrap it tightly in plastic wrap and place it in an airtight container before freezing. Thaw it in the refrigerator overnight before serving.
Yes, you can use homemade jelly if you have some on hand. It will add a personal touch to the cake and enhance the flavors even further.
AprilCook, recipe developer and the heart of Chefwiz. More about April