Painted Sugar Cookies
Rate this recipeBe the first to rate
 By AprilPublished
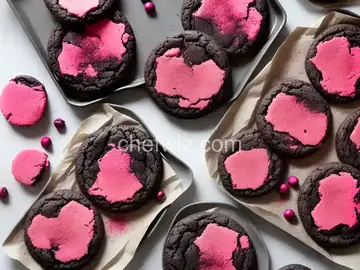
 Have you ever seen those beautifully painted sugar cookies that look almost too good to eat?
 By AprilPublished
 Have you ever seen those beautifully painted sugar cookies that look almost too good to eat?
In a large bowl, use an electric mixer to combine the butter, shortening, and sugar until creamy.
Add the egg and vanilla to the mixture and beat until it becomes light.
In a separate small bowl, mix together the soda, salt, and flour.
Gradually stir the dry ingredients into the creamed mixture until well combined.
Wrap the dough in plastic wrap and refrigerate for at least 30 minutes.
Take out half of the dough and wrap it in plastic wrap, placing it back in the refrigerator.
On a lightly floured surface, roll out the remaining dough to a thickness of 1/8 inch.
Use a cookie cutter of your choice to cut out cookies and place them on ungreased cookie sheets, leaving about 2 inches of space between each cookie.
In four different custard cups, add 1 teaspoon of corn syrup and 1/4 teaspoon of water each. Add food coloring to each cup and stir well.
Use a small paintbrush to paint the unbaked cookies with the colored mixtures. Optionally, you can also press cookie dough through a garlic press to create "hair" for gingerbread figures.
Preheat the oven to 375 degrees F.
Bake the cookies for 9 to 10 minutes, or until they are lightly browned.
Use a spatula to remove the cookies from the cookie sheets and let
Have you ever seen those beautifully painted sugar cookies that look almost too good to eat? They are like little edible pieces of art, with intricate designs and vibrant colors. But how do they make those cookies look so amazing? In this article, we'll dive into the world of painted sugar cookies and explore the techniques and tips to create your own edible masterpieces.
Painted sugar cookies are a delightful twist on traditional sugar cookies. Instead of just using icing to decorate the cookies, they are painted with food-safe colors to achieve a more detailed and artistic look. The process involves using edible food coloring and brushes to create intricate designs and patterns on the cookies.
But before you begin painting your cookies, there are a few key things to keep in mind:
The first step in creating painted sugar cookies is to have the perfect canvas. You'll want to start with a batch of well-baked, flat sugar cookies. The surface should be smooth and even, providing a good base for your artwork. Avoid cookies with too many cracks or uneven edges, as they can make painting more challenging.
Next, you'll need to prepare your edible paint. There are various ways to create edible food coloring, including using gel or powder colors mixed with a few drops of water or alcohol. Experiment with different colors and consistencies to find what works best for your desired designs. Remember, practice makes perfect!
When it comes to painting sugar cookies, having the right tools can make all the difference. Invest in a set of food-safe brushes with different sizes and shapes to allow for more precise details. You may also want to have toothpicks or fine-tipped paintbrushes on hand for smaller, intricate designs.
Now that you have the basics down, let's explore some tips and tricks to elevate your painted sugar cookies to the next level:
Before you begin painting, it's helpful to have a rough idea of what you want your finished cookies to look like. Sketch out your design on paper or create a digital mock-up to guide your painting process. Having a plan in place will help you stay organized and ensure your cookies turn out as envisioned.
To create depth and dimension, consider layering different colors on your cookies. Start with a base color and allow it to dry completely before adding additional colors on top. This will prevent the colors from bleeding into each other and create a more professional-looking result.
Painting sugar cookies is a labor of love that requires patience. Take your time and allow each layer to dry before moving on to the next. Rushing the process can lead to smudging and frustration. Remember, good things come to those who wait!
Painted sugar cookies are a delightful way to showcase your creativity and bring a touch of artistry to your baking. With the right techniques, tools, and a dash of patience, you can create stunning edible masterpieces that are as delicious as they are beautiful. So, grab your brushes and let your imagination run wild!
No, regular paintbrushes may contain chemicals and are not food-safe. It's important to use brushes specifically designed for edible purposes.
Painted sugar cookies can last up to a week when stored in an airtight container at room temperature.
It's not recommended to freeze painted sugar cookies, as the moisture from thawing can cause the colors to bleed and the designs to become distorted.
Yes, you can experiment with natural food coloring options such as beet juice, matcha powder, or turmeric to achieve vibrant colors.
Absolutely! Store-bought sugar cookie dough can be a convenient option, especially if you're short on time. Just make sure to follow the baking instructions on the package.
The possibilities are endless! You can paint flowers, animals, geometric patterns, or even portraits. Let your creativity soar!
Allow each layer of paint to dry completely before adding additional details. You can also apply a thin layer of clear glaze or edible varnish to protect the design.
Painting sugar cookies can be a fun activity for children, but adult supervision is recommended, especially when handling food coloring and brushes.
AprilCook, recipe developer and the heart of Chefwiz. More about April